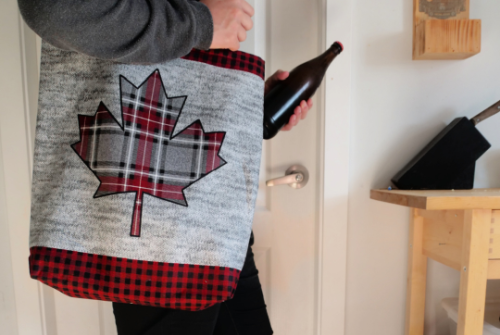
If you’re like me, having an extra tote bag handy, is a good thing. This tote is made from a fabric panel. The fabric is a nice, easy to work with, lightweight canvas and the print has a charming Canadian theme. The printed fabric panel comes with printed instructions, but we have added a fusible interlining to add strength and stability as well as a fun lining. We have also changed some of the sewing technique. We hope you will enjoy our version of this bag and will give it a try for yourself!

Here’s what you’ll need:
1 “My Canada” Canvas Bag Panel (item 26779)
.5yd Cotton Print (we used item 26778)
.5yd Fusible Fleece (item 17023)
1 spool coordinating thread
Sewing pins
Fabric Scissors
Iron and Ironing Board
Sewing machine with straight stitch


Cutting: Cut out each of the pattern pieces from the bag panel (main bag, pocket, straps x 2)


Cutting Lining: Cut the lining fabric to the same width as the main bag piece (18”) as shown in first image above. Now we need to cut the length of the lining. Open out the main bag fabric and measure the length. Deduct 4” from this measurement and cut the lining to this length.

Cutting Fusible Fleece: Cut out the fusible fleece to the same size as the main bag piece as shown above.


Let’s make a pocket! Finish the top edge of the pocket as shown in the second image above. We used a serger but you can use a zig zag stitch, pinking sheers, or seam binding.


Fold the top edge down ½” with right sides together and pin in place as shown in first image above. Using a ½” seam allowance, stitch the top left and right corners as shown in second image above.


The first image above shows the back of the pocket after stitching the corners. We ran the last few stitches right off the edge of the fabric instead of backstitching. Trim the corners as shown in the second image above.


Turn the top edge of the pocket right-side-out as shown in first image above. Make sure your corners are turned all the way. Press back ½” of sides and bottom of pocket as shown in second and third image above.

Hem the top edge in place using approximately 3/8” hem. It is best to do this from the back of the pocket to you can make sure that you are a catching the finished edge in the seam. The image above shows the finished pocket from the front.


Centre the pocket on the lining. The top edge of the pocket should be approximately 4” from the top edge of the lining. Starting at the top right corner of the pocket, edge stitch the pocket to the lining. Continue across the bottom and up to the top left corner. The third image above is a view from the back of the lining that shows how to securely stitch the top corners of the pockets.

Using a “wool” setting on your iron, apply the Fusible Fleece to the back of the main bag piece. Make sure that the glue-side of the Fusible Fleece is facing the back of the fabric. Do not SLIDE your iron over the fleece – LIFT the iron and place it on the fleece for 5 – 10 seconds and then repeat until the whole piece is fused.


Let’s make some straps! Press each strap in half with wrong sides together as shown in the first image above. Then turn one of the raw edges in to meet the fold and press in place as shown in second image above. Turn the strap over and press the other raw edge in to meet the fold and press again. Stitch about 1/8” from each long edge of straps (through all 4 layers).


Let’s baste the straps in place! The top edge of the bag is 18”. Centre the end of one strap over the 6” point. Take the other end of the strap and centre it over the 12” point (first image above). Pin in place (second image above). Using 3/8” seam allowance, baste strap in place (third image above).


Let’s line our bag! Place the top edge of the lining over the top edge of the main bag piece. Pin in place (first image above). Stitch together (stitched edge shown in second image above).

Bring other edge of lining to other top edge of main bag and pin in place. (Don’t forget that the lining is 4” shorter than the main bag piece so the main bag piece will be a little bunched up) Stitch together.


Turn everything right side out. Your bag should look like a big loop. Place this ‘loop’ around your ironing board (first image above). Press the seam allowance toward the lining (second image above). Repeat for second seam.


Bring the wrong sides of the bag and lining together folding the top edge along the marked “fold” marking (first image above). Press along the marked fold (second image above). Repeat for second top edge of bag. Stitch right over the seam where the lining meets the main bag fabric (third image above). This will help reinforce the straps.


Using a 3/8” seam, baste the long unfinished edges of the bag through all three layers (first image above). Finish the long edges of the bag. We used a serger (second image above), but you can use a zig zag stitch or seam binding if you don’t have a serger.

At this point, your bag should look like this. It’s not really a ‘bag’ yet, just a lined rectangle with straps at each end, but we’re very close!

Fold the bag in half with right sides together as shown above.


Take the bottom edge of the bag and bring it in toward the top edge of the bag as shown in the first image above. There are marks on the pattern piece to indicate where the folds should be. Pin through all four layers at the bottom of the bag. Repeat for other side of bag.


Using ½” seam allowances, stitch the side seams. Be sure to stop and start with backstitches to make your bag more secure.


Turn the bag right-side-out. That little bit of folding you did at the bottom edge of the bag has created a very cool mitred effect and your bag is finished! Congratulations! Touch it up with a little bit of pressing and start using it.