
Some of you may remember seeing a short Instagram video where I was looking for a name for a tiny grey octopus that I had crocheted. That was my first attempt at Amigurumi, cute little crocheted toys. I recently picked it up again, and I can’t seem to put it down! If you’re thinking about giving this a try, here is some info about the process…
Patterns
If you’re looking for a pattern for these adorable toys, there are a few books you can purchase (Fabricana carries some in our yarn department). YouTube videos are also a great reference, especially if you’re a beginner and want to see the steps in real time. Ravelry.com is also an amazing resource for free patterns or purchasing them. The little bear that I made was adapted from a free pattern for a bunny on Ravelry. I was running out of yarn, so the long bunny ears became short bear ears.
Yarn
Cotton seems to be the yarn of choice for these toys. I think one of the advantages is that cotton tends to hold its shape quite well when it is crocheted. Another advantage is that cotton washes well, so you can wash the toys easily if they get soiled. Fabricana carries a yarn from Sirdar called Happy Cotton that is 100% cotton and available in a wide range of colours. The balls are very small, so you can buy as little as you need. For my little projects I used Sirdar Stories DK. This blend of 60% cotton and 40% acrylic seems to work nicely.
(All Fabricana yarn is available in-store, not online at this time).
The Magic Ring
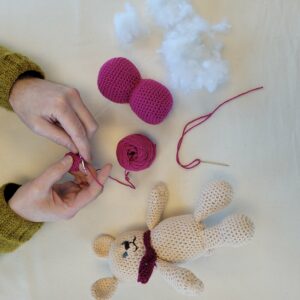
All the little pieces of my little bear (head, legs, arms, ears, and tail) started with a Magic Ring or Magic Circle. This technique allows you to “cast on” six stitches and then pull them together nice and tight, so you don’t have a hole at the beginning of your work. It took me a while to get the hang of this technique, but I watched several YouTube videos and managed to figure it out. Being left-handed is always a little tricky. I basically have to do a mirror image of what they are showing in the video.
Single Crochet
This is the most common stitch when making these toys, so make sure your single crochets are nice and consistent.
Stitch Marker
When you’re crocheting in the round, it’s easy to lose your place. That is, it’s difficult to know where your rows begin and end. Make sure that you are using a removeable stitch marker. When you make the first stitch in a row, apply the marker to that stitch. At the end of the row, remove the marker and then crochet the last stitch.
Increases and Decreases
The shapes of these toys are created by increasing and decreasing the number of stitches in each row. Make sure that you are confident in knowing how to make consistent increases and decreases.
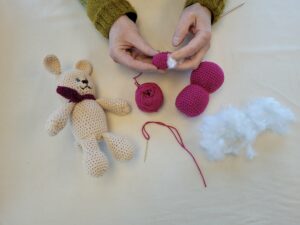
Stuffing
Before I closed up each part of my little bear, I filled them with polyester fibre fill (from a pillow form that I was no longer using). Each of the parts of the bear were stuffed to create a nice plump shape. I did not stuff the ears, because I wanted them to have a nice curved shape. Since I used polyester for the stuffing, I don’t have to worry about the bear getting lumpy when he is washed. If he does, it will be easy to get him back into shape.
Darning Needle
I used a darning needle to sew the parts closed and sew them together. A darning needle has a nice big eye that makes it easy to thread the yarn into. The tip of a darning needle is also duller than a sewing needle, so you don’t pierce the yarn, you can simply sew between the yarns.
That smiling face
Many of these patterns call for safety eyes, but I didn’t have any on hand, so I used embroidery floss and my darning needle to stitch the bear’s face. Keep in mind that the eyes should sit at the centre of the face vertically (don’t be tempted to place them too high). If you want to create the traditional animated face, the eyes are typically little dots in black yarn set quite wide apart. Always keep in mind the age of the person who is receiving this toy. If they’re a toddler, embroidery floss may be the safer route to go.
Accessorizing
To give my bear a little more flair, I crocheted a very simple three row scarf in a contrasting leftover yarn from my stash.
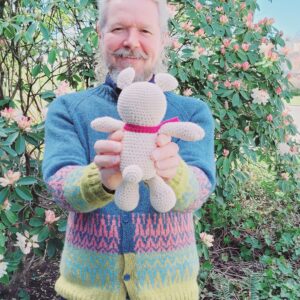
I really enjoyed the whole process and, after practising some of the basic skills I mentioned above, I found crocheting this little guy to be very rewarding! It’s a great medium-level project and I can’t wait to gift this adorable bear to my equally adorable great-nephew.


1 thought on “Can’t stop the Crochet!”
Congratulations! your bear is so cute! Does it have a name?