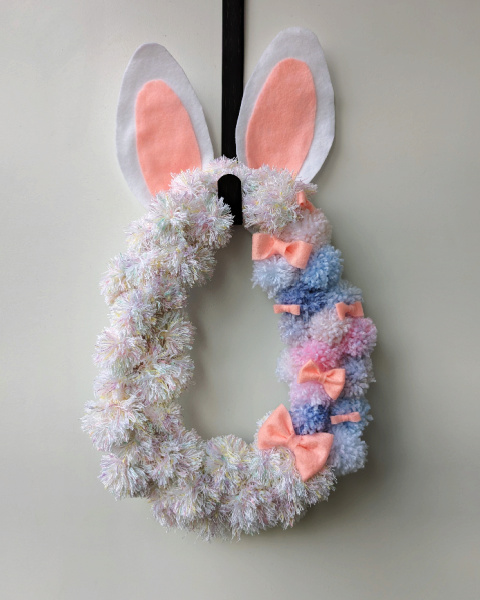
Spring is… springing! And there isn’t a better way to welcome the new buds, April showers, and the Easter season than with bunny decor! We’ve put together this 5 step Easter Wreath perfect for decorating your door this spring. Follow along with our pompom video and learn how to apply this easy to learn skill to this festive project. You don’t even need to sew!
What you’ll need
- 1 bundle of yarn (wool or acrylic wool works best)
- 1/2 yard of white craft felt
- 1/4 yard of pink craft felt
- 1/2 yard (or less) of medium weight interfacing
- A wreath base (metal, wood-paper, or wood)
- Light weight cardboard or craft paper
- Sewing scissors
- Paper scissors/Cardboard scissors
- Hot glue & a hot glue gun or Speed-Sew glue
- Sewing machine (Optional)
- Matching thread white & pink (Optional)
Instructions
Step 1: Follow along with our pompom making video and learn how to easily make a pompom for any project! We made approximately 30 pompoms in varying sizes.
Step 2: Grab your wreath and glue felt to the front and back of the wreath all the way around. We used white felt for this so it would “blend in” with the pompoms. It is easiest to use hot glue for this step, but with patience you can use Speed-Sew glue. (It doesn’t have to look perfect, everything will be covered by the pompoms).
Step 3: Grab your pompoms and lay them out in a way you like. Glue your pompoms down on the front of the wreath.


Step 4: Get your remaining white felt, interfacing, and pink felt. Cut 4 bunny ears out of the white felt, 2 for each side. Cut 2 bunny ears out of the interfacing, 1 for each ear. Glue or sew your ears together so the felt is on the outside, and the interfacing is on the inside. (The edge of the felt can be left exposed, or you can turn the seams to the inside. Felt won’t fray so you don’t have to worry about that).
Step 5: Cut 2 smaller ear shapes out of the pink felt for the inside of the ears. Glue to the centre of the ear, or sew down. Pinch the base of your ears together to create a small dart. Glue or sew the dart into place, and then glue the finished ear to the back of your wreath.

Step 6: [Optional extra details!] We created some simple bows to add to our wreath. To do this, cut a 4″ by 2″ strip of pink felt and fold it so the ends meet in the middle. Secure the ends to the back of the bow with glue or a stitch. Cut a small 1/2″ by 1″ piece of pink felt, and pinch the middle of your bow where the ends meet. Secure this small band of felt around the middle, concealing the join at the back of the bow. Voila! You can make bows of varying sizes as well, play with it!

Your wreath is now done, and ready to be displayed. This style of wreath isn’t even limited to Easter, and you can adapt how to configure your pompoms in order to fit any holiday, or season. Share with us what your wreath looks like!