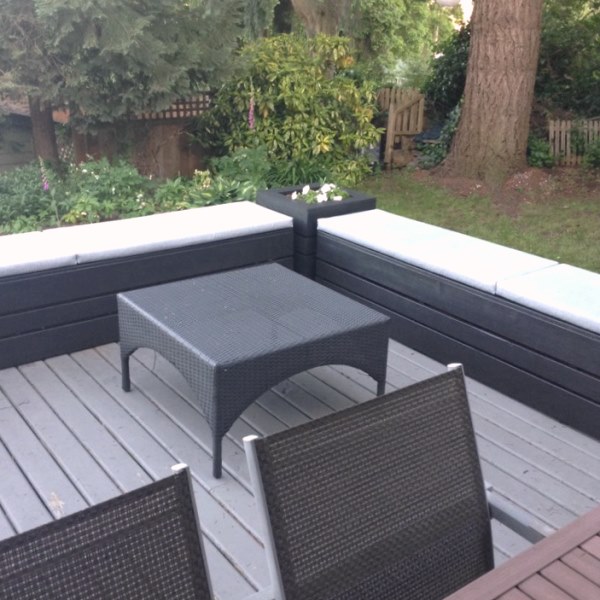
As I’m writing this, it’s June and patio season is in full swing! It’s been over 30 degrees celsius (which is very warm for June in the Vancouver area!) and my well-shaded backyard is calling my name. However, the patio cushions that I’ve enjoyed for the last several seasons have seen better days. There are four 4’ X 18” cushions that rest on two 8’ long benches that create a relaxing conversation area. Fading from the sunlight and sticky stains from our towering conifer have made me realize it’s time for an update. After selecting a nice heathery grey printed outdoor fabric, I’m excited to get started. Thankfully, the foam is in good shape, so off with the old covers and on to sewing the new ones!
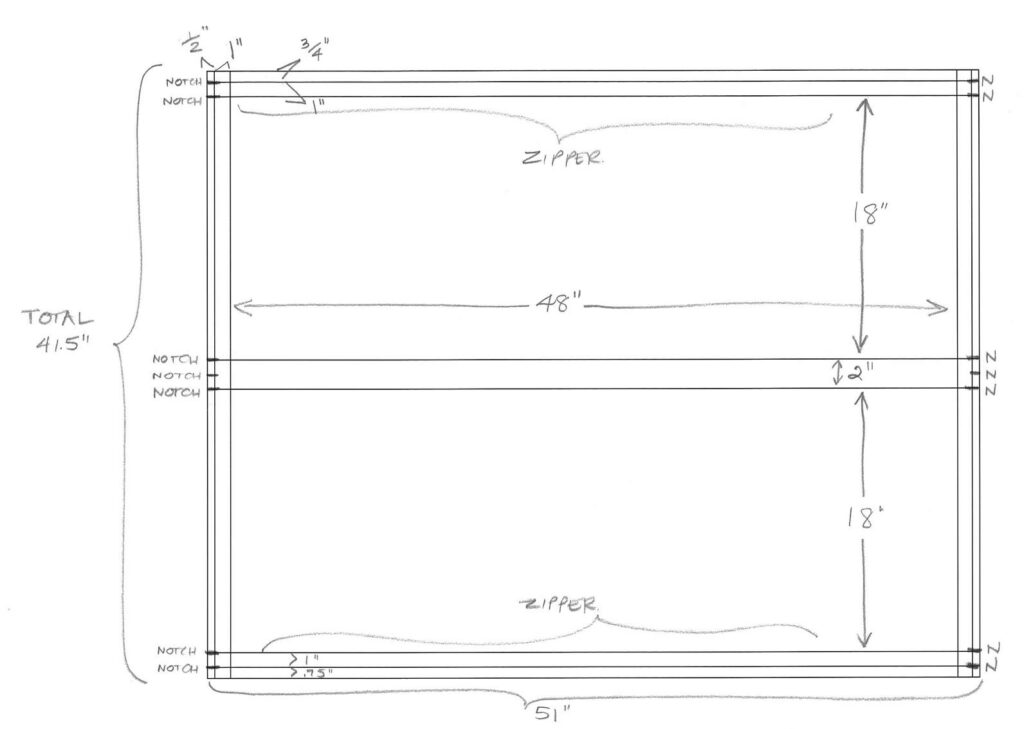
The simplicity of this project is that I start with a rectangle but with a very specific (and easy) method for sewing the ends of the cushions, I end up with a perfectly fitted three dimensional cover. With the dimension of 4’ (length) X 18” (width) X 2” (depth) I calculated my rectangle to be 41.5” X 51”. This allowed for the size of the cushion plus .75” seam allowances where the zipper is going, and .5” seam allowances at the cushion ends. (see diagram below)
I cut out the rectangle and finished every edge. I then folded the rectangle in half along the length and sewed the long edges together and put in a nice long zipper, to make it easy to insert the foam. At this point I essentially had a nice long fabric cylinder that fit around my foam with a big zipper along the length.
Now for the fun “magical” part!
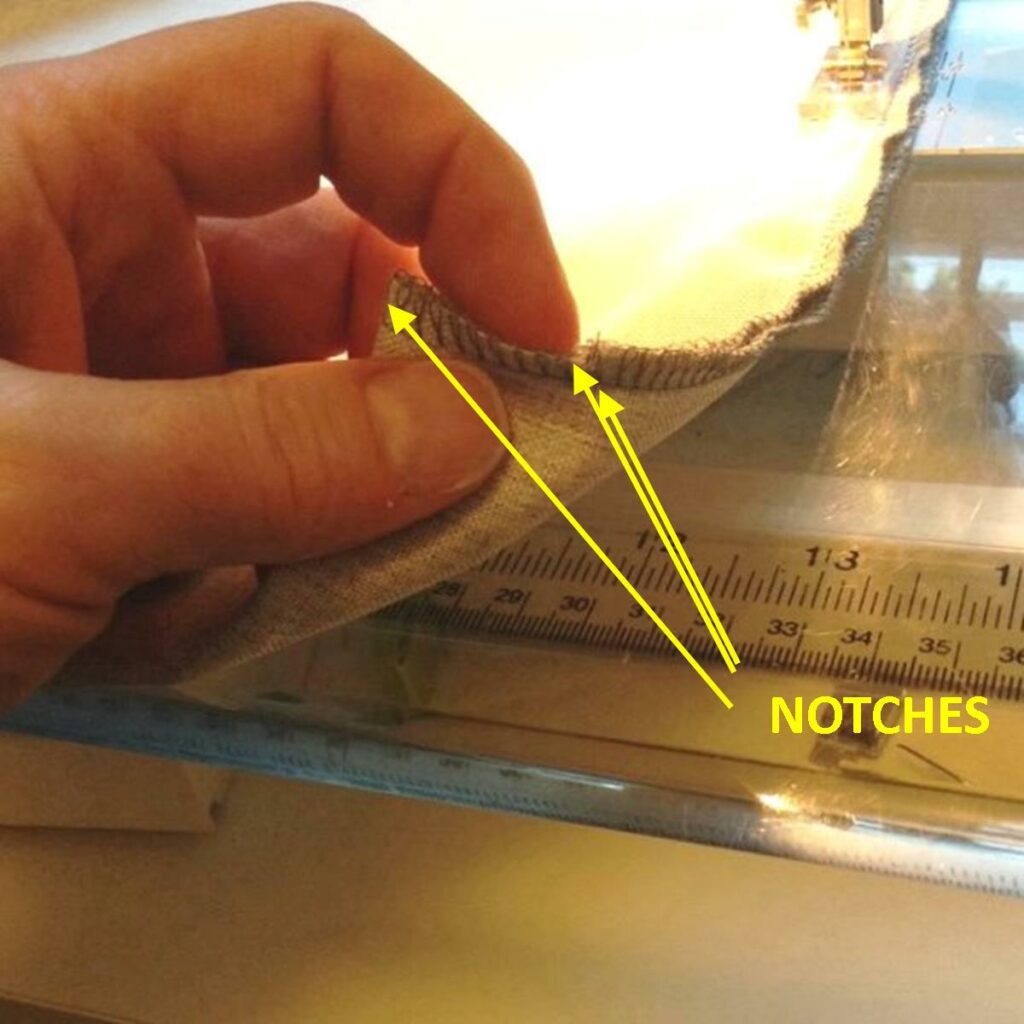
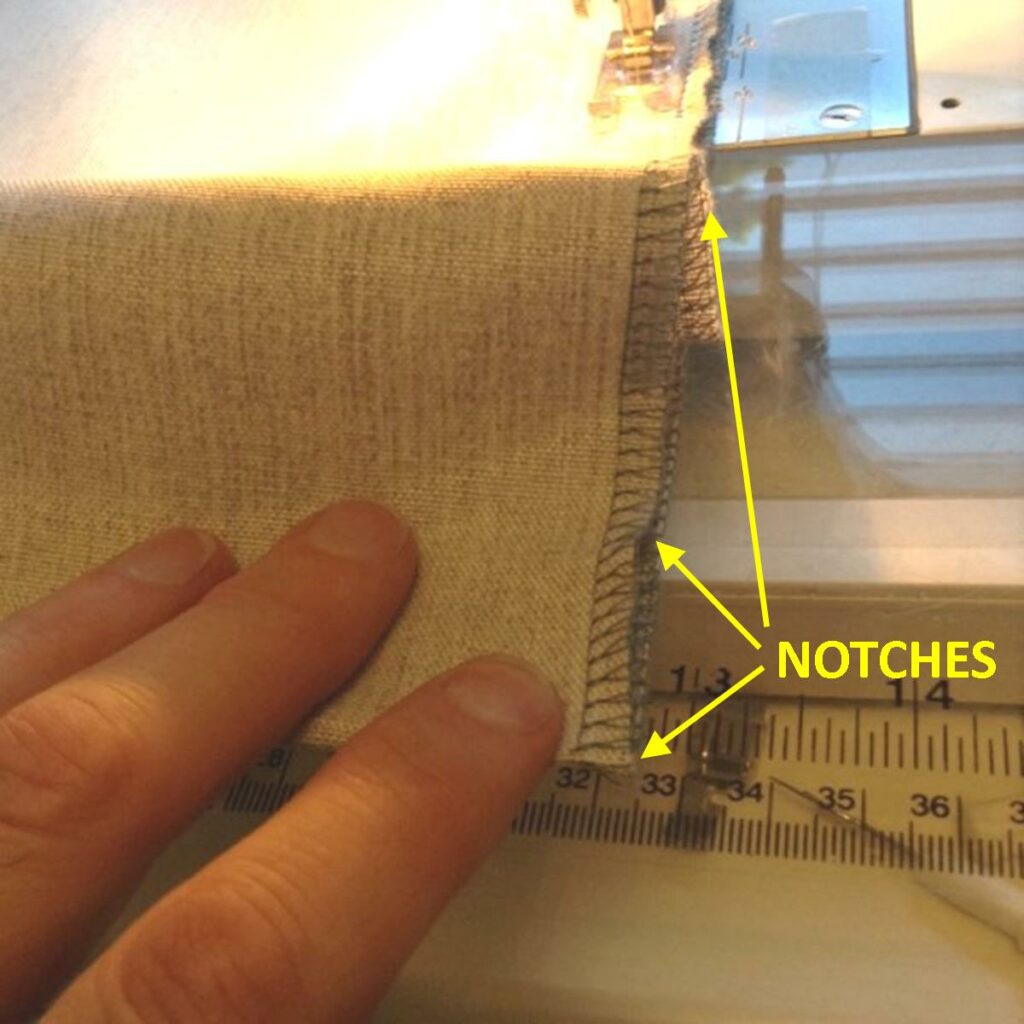
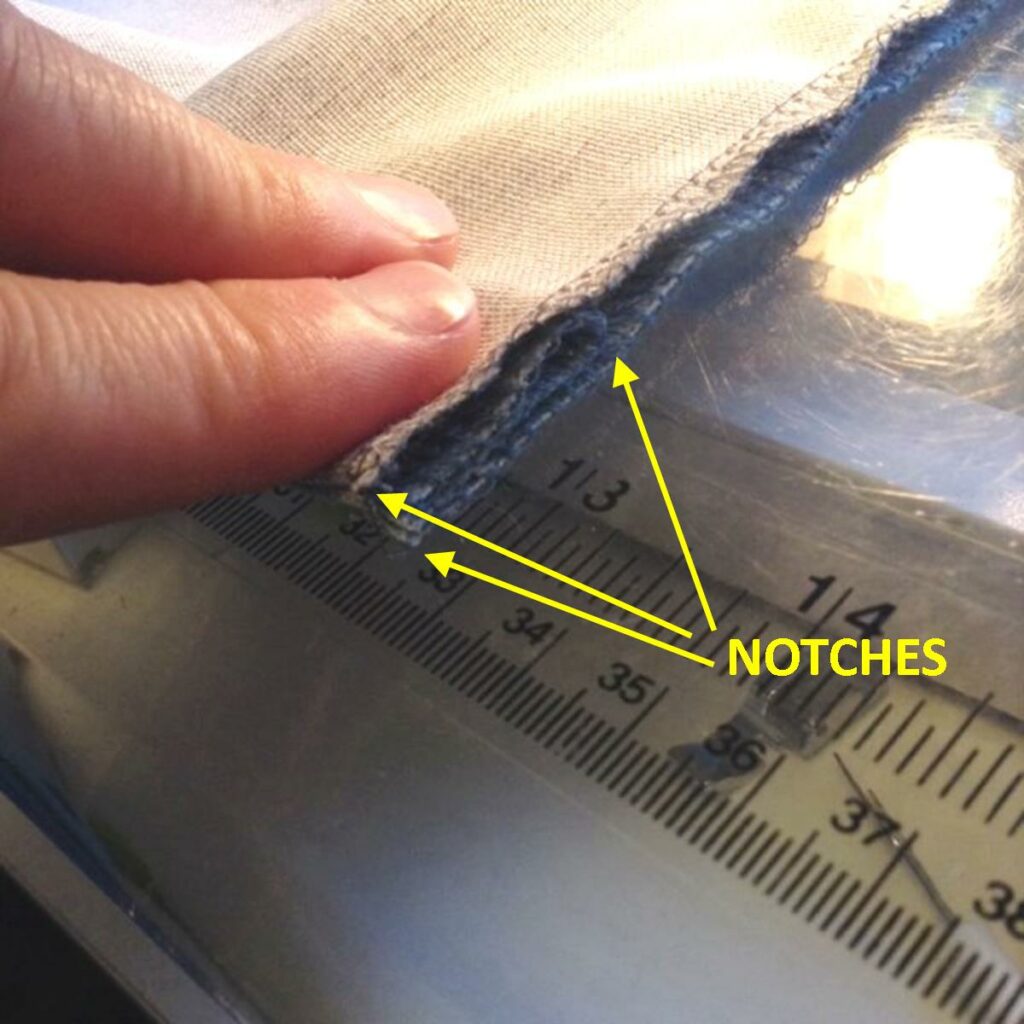
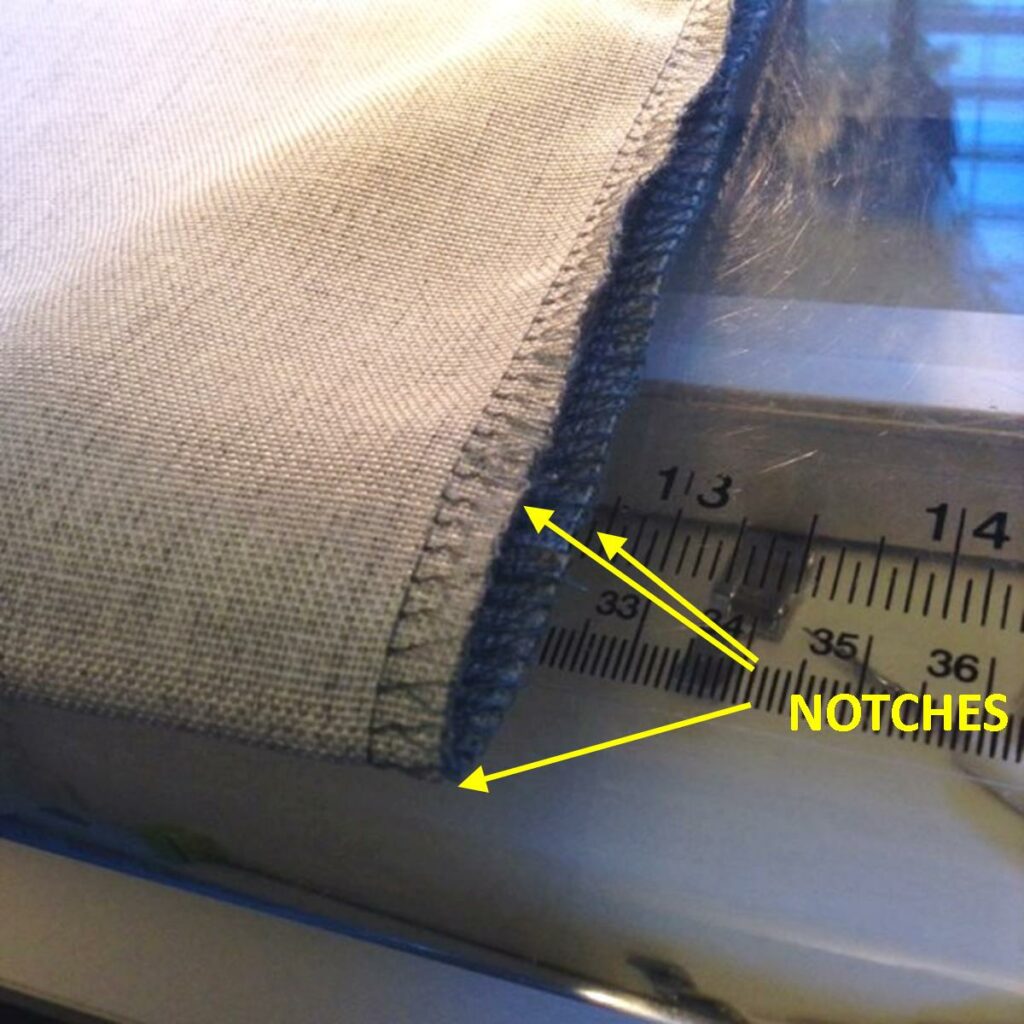
With right sides together (inside out) I laid the “cylinder” flat with the zipper at one edge. At the folded edge opposite the zipper, I made a very small notch at both ends. Then I made two more notches 1” in from the first notch. The 1” measurement is based on the depth of the foam divided by two. I made two more notches 1” away from the seam where the zipper is. (The notches are indicated on the diagram above for a visual reference.)
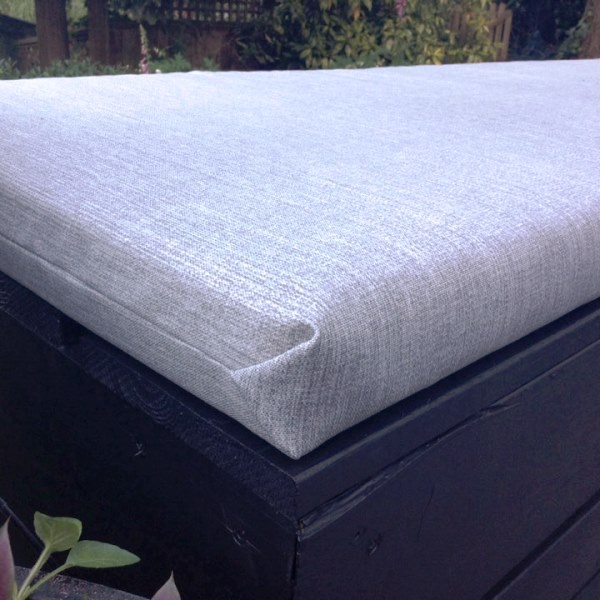
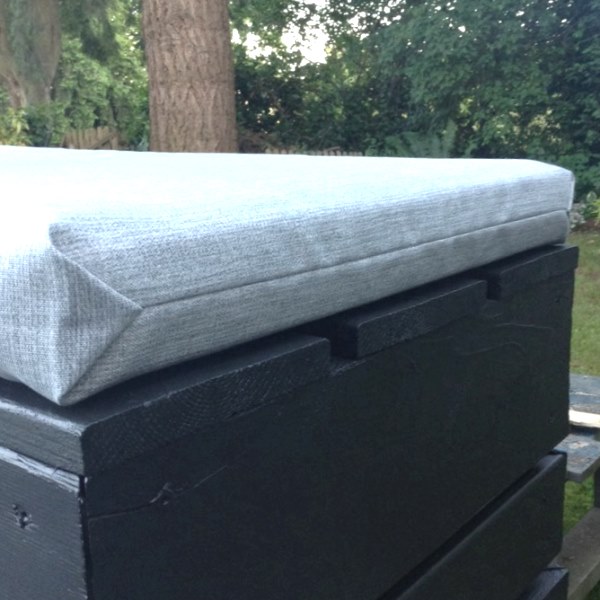
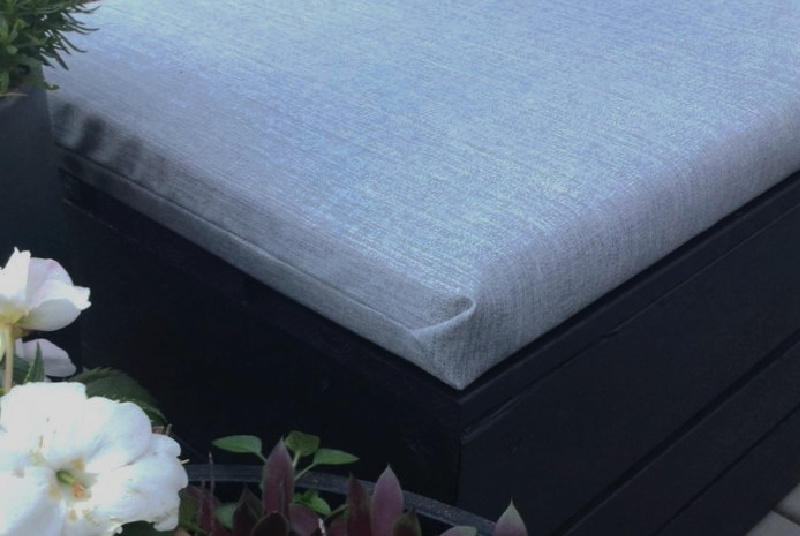
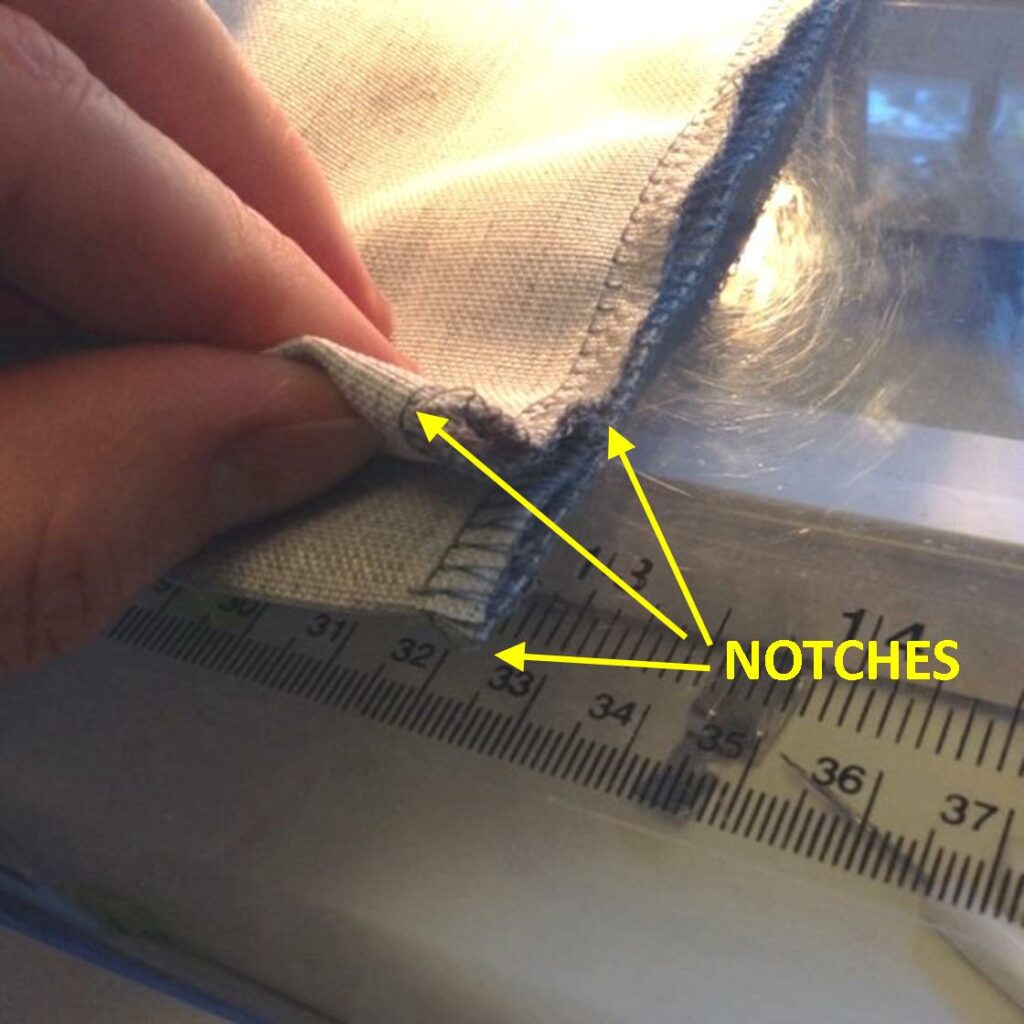
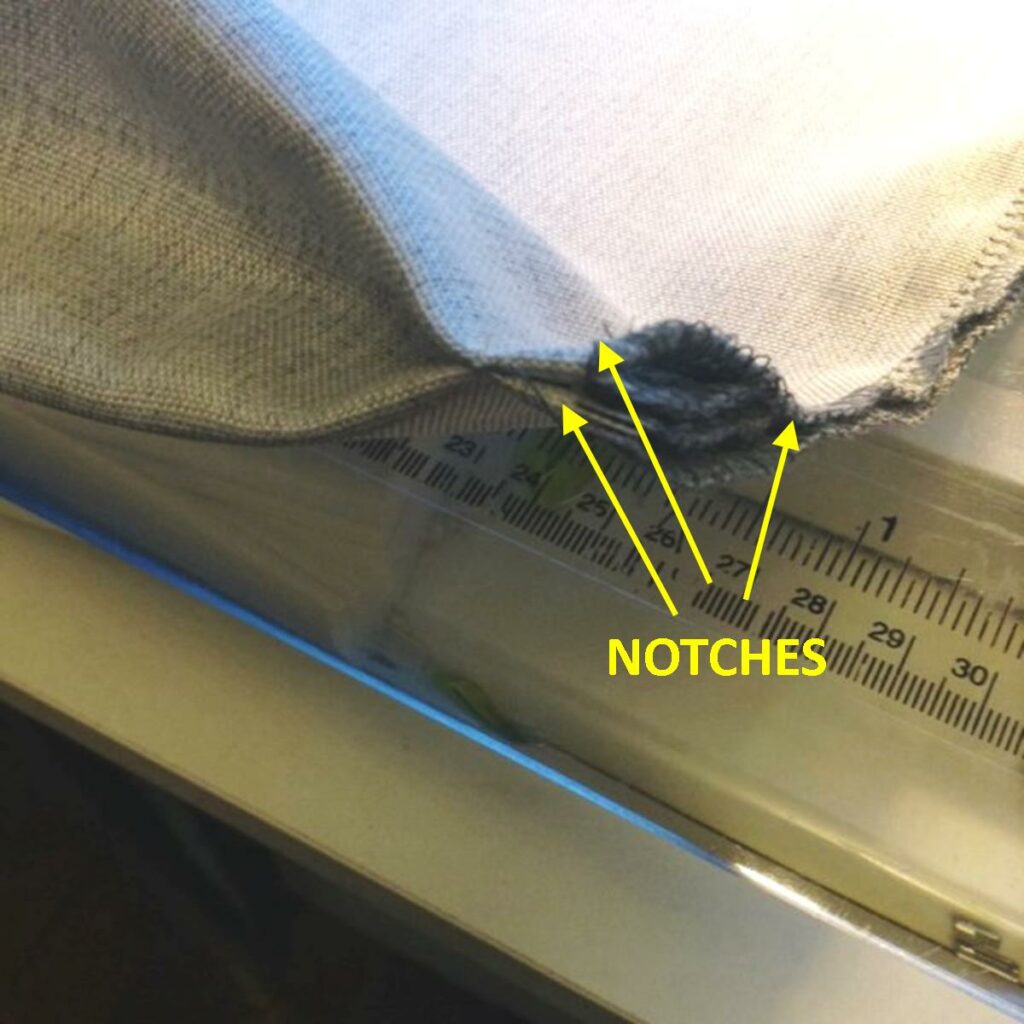
The illustrations below show how the fabric was folded at the notches to create my perfect corner,but please keep in mind that I did the exact same process at the beginning of the seam at the edge where my zipper is. That is, I created the exact same inverted pleat at the beginning of the seam and then started stitching along the edge with a ½” seam allowance. I finished the seam by stitching through the inverted pleat at the end of the seam. I repeated the same process for the other end of the cushion. Magically, when the cushion gets turned right side out, our beautiful little tailored corner is created. It’s a little slice of sewing heaven!

Here are few shots to show the finished cushions. I’ll be adding in some toss cushions for a pop of colour and pattern, but at this point I’m ready to grab a beer and relax! We hope you loved this simple tutorial. If you found it helpful let us know. Comments on our blog, commenting on social media posts, and following us helps us a lot to reach a wider audience! Until next time, don’t forget to follow and tag us on social media.