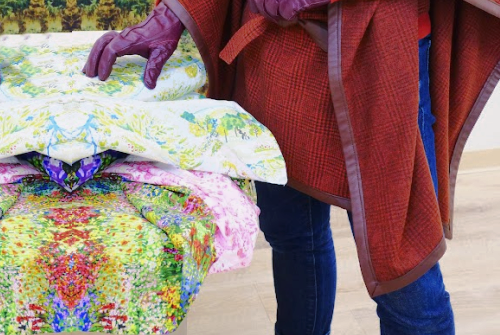
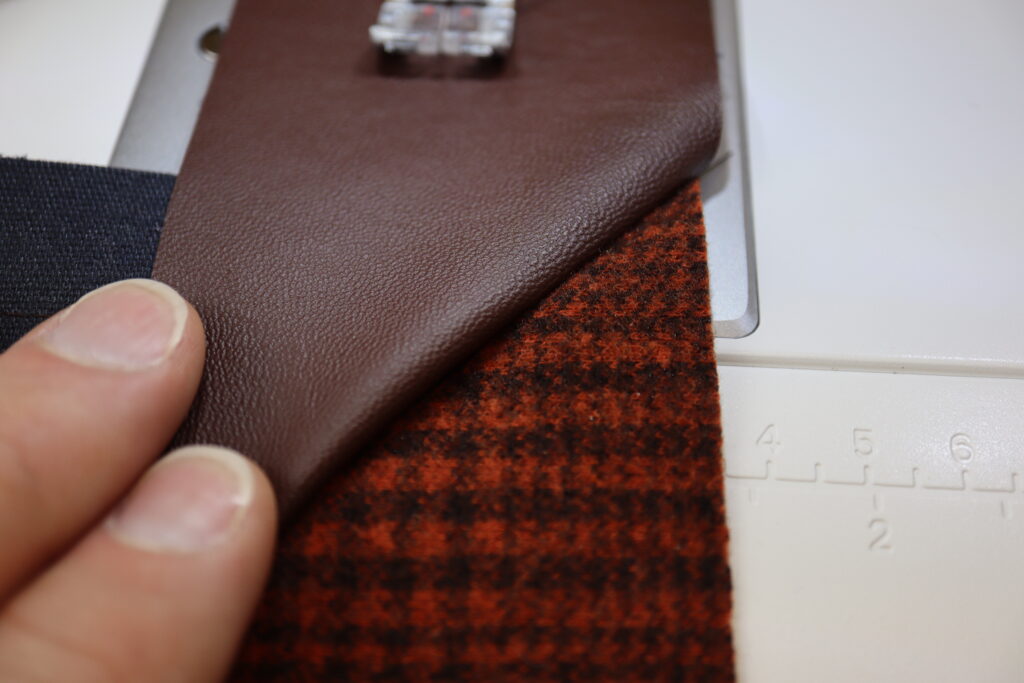
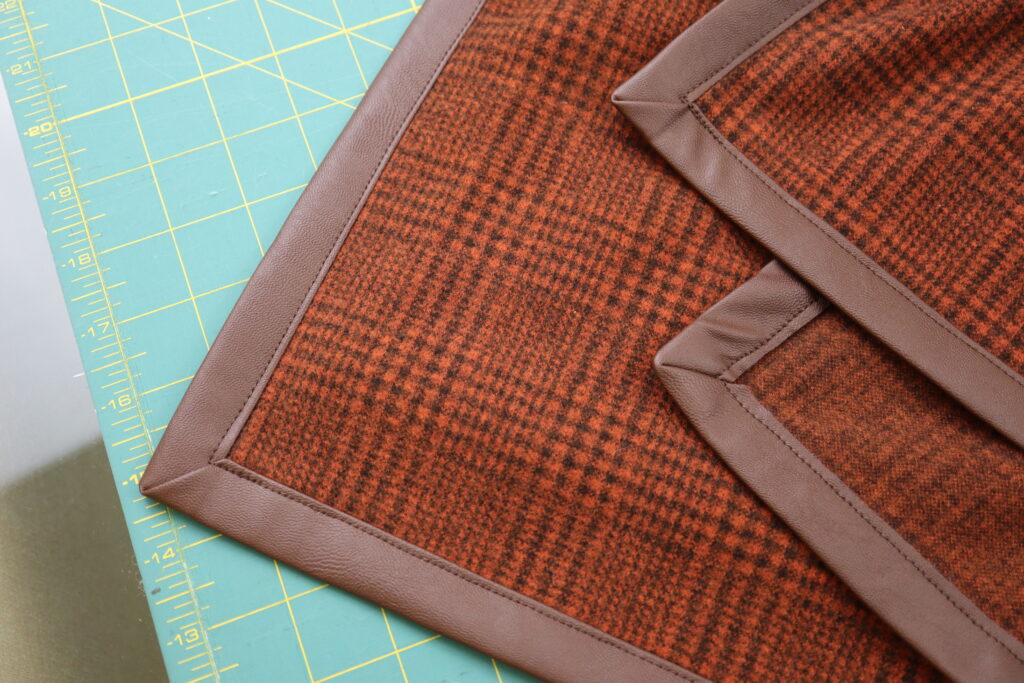
This post is the third post in a series of techniques we used to create a fashionable belted cape with contrast binding and belt holes. In this post you will learn how to apply the eye-catching, professional looking binding with beautiful, mitered corners. We used a faux leather fabric but a stable knit, such as Ponte di Roma that doesn’t curl or unravel, would also look fantastic.
Click the links here to read the other two blog posts about Joining binding and Belt holes.
What you’ll need
For this technique, you will need:
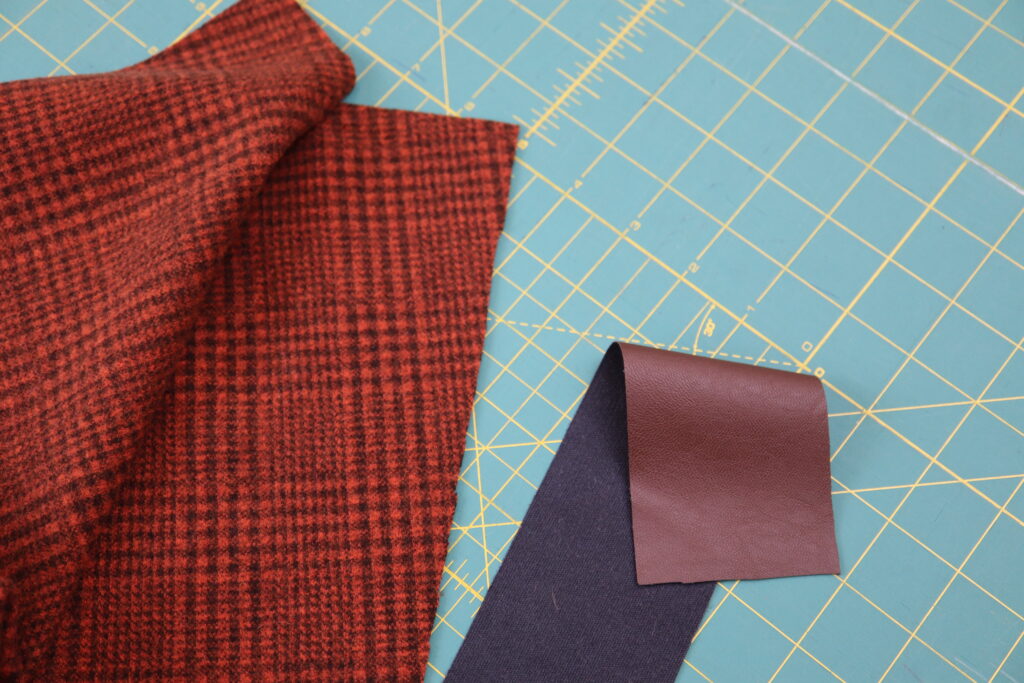
- The binding that you created in our joining binding post
- A ruler and fabric marker
- A sewing machine with a straight stitch
- An iron, ironing board, and press cloth
IMPORTANT: To prepare for the binding to be applied, we fully stitched one of our front cape pieces to the back piece along the shoulder seam. Then we stitched the other front to the back starting from the neck edge. We stopped sewing about 2 – 3 inches from the end of the seam. This is where we will start and end sewing the binding in place.
Sewing instructions
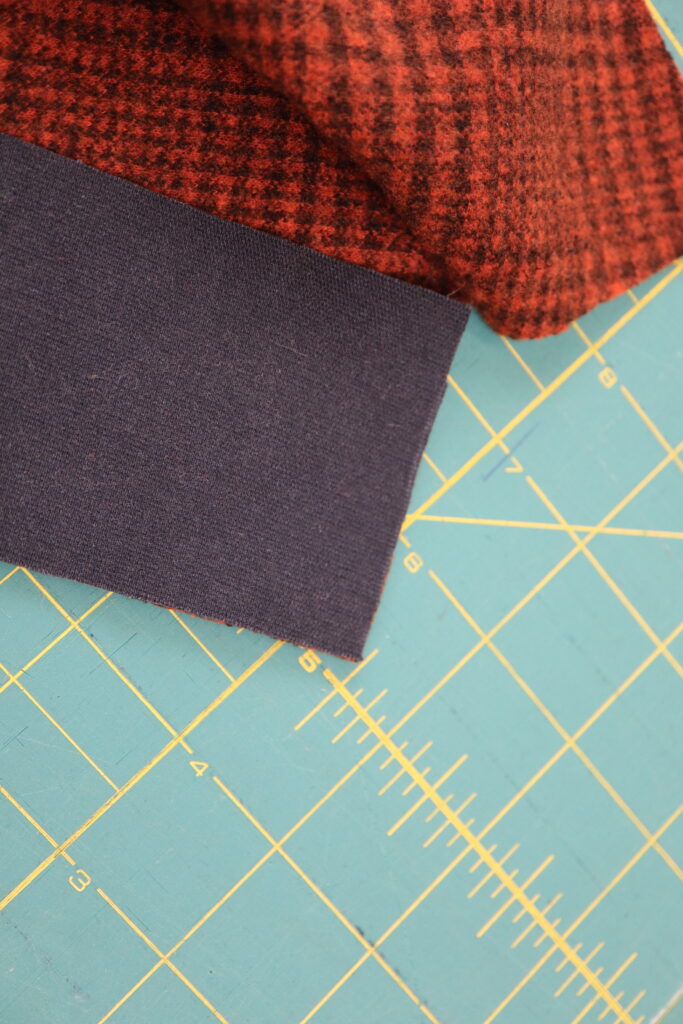
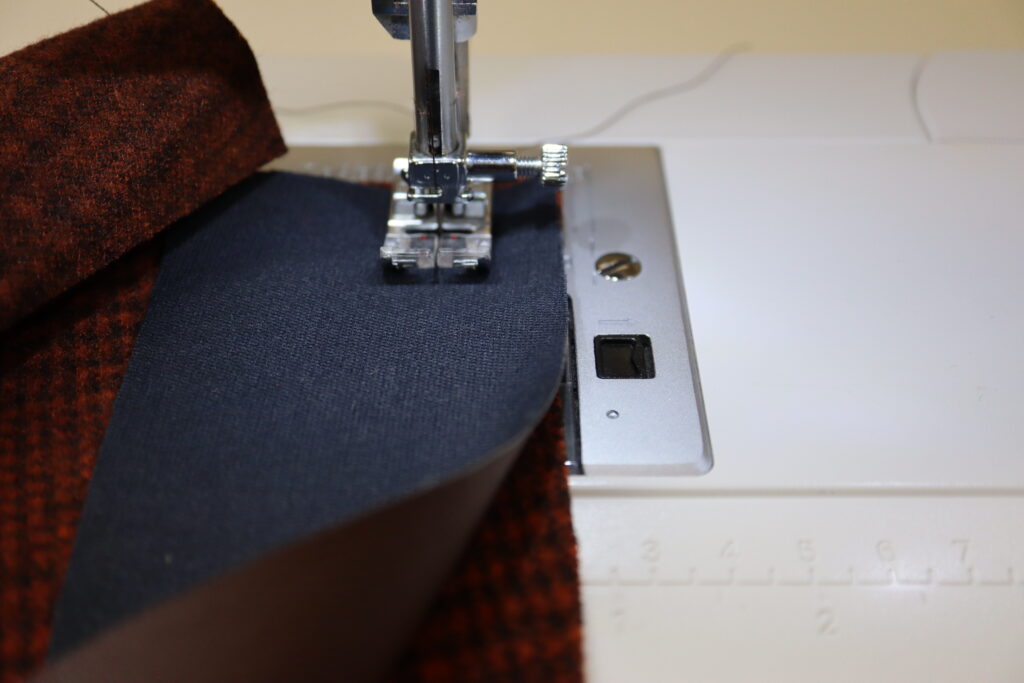
Take the binding and lay it face down over the fabric. Line up the end of the binding with the edge of the shoulder seam. The right edge of the binding should line up with the hem of the cape.
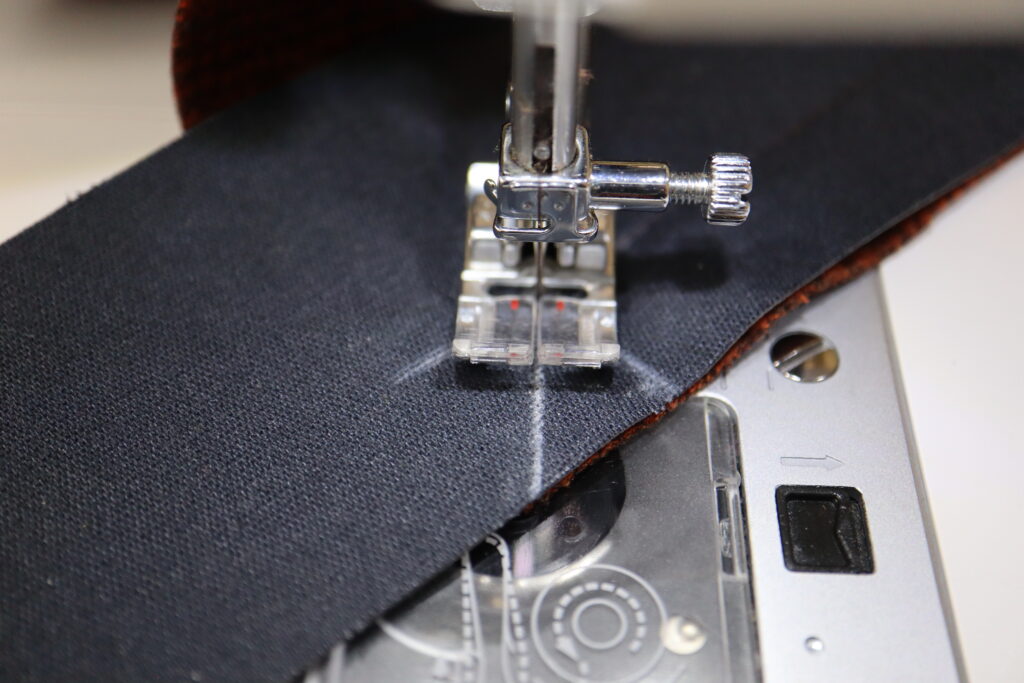
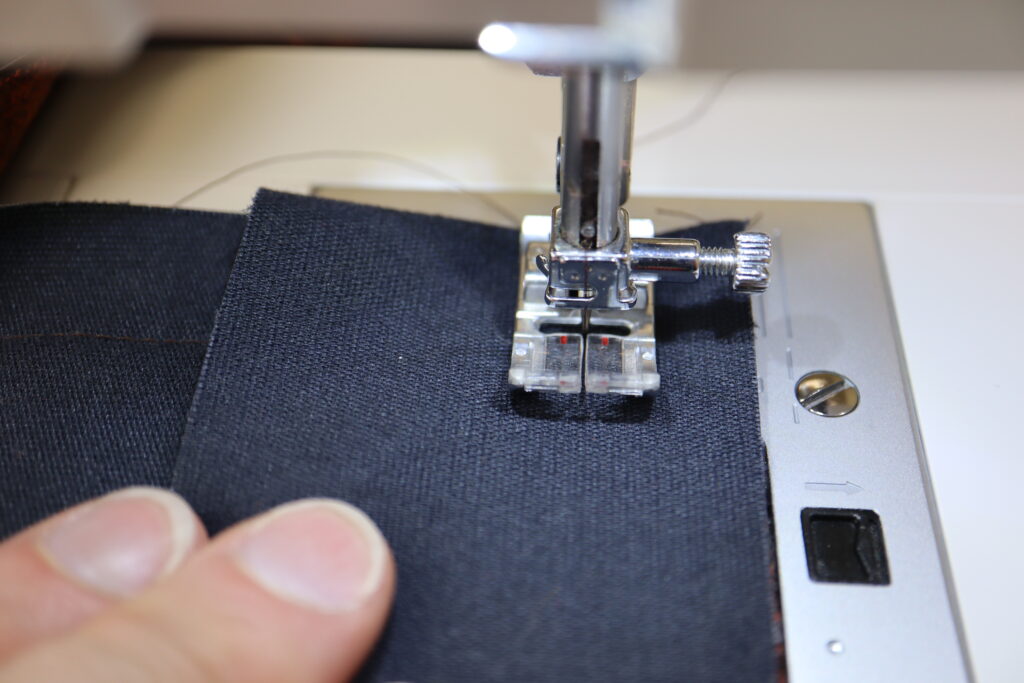
Bring your work to the sewing machine. From the top edge, start sewing the binding in place with a ‘scant’ ¾” seam allowance. It is important that you not take a larger seam allowance. Otherwise, your binding will not be wide enough.
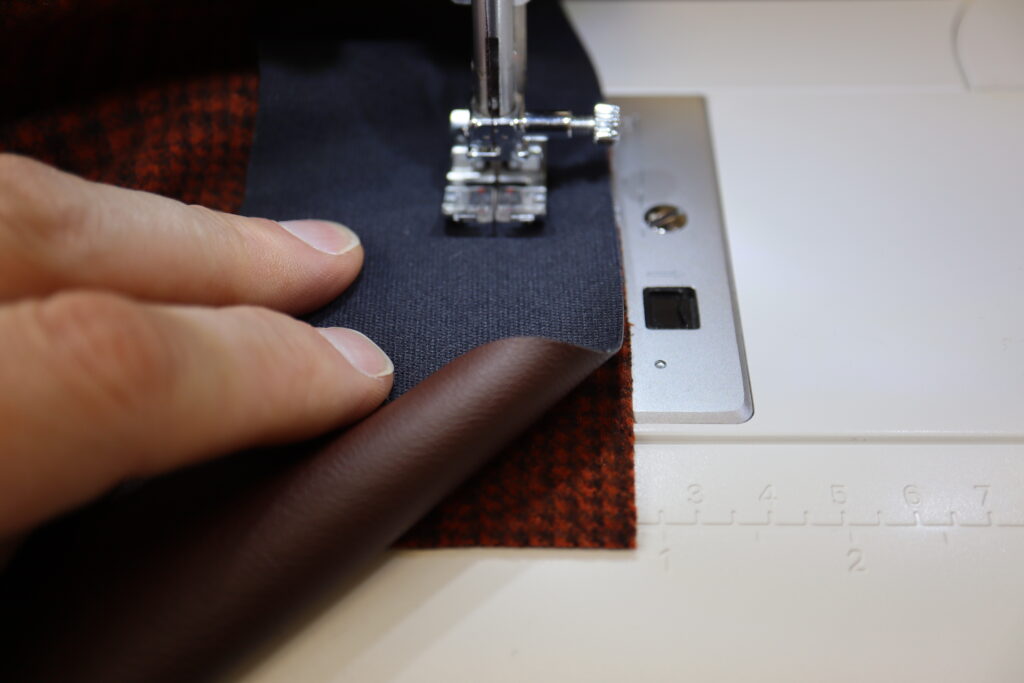
Continue sewing with the scant ¾” seam allowance until you are about 2” away from your first corner. Stop sewing. Leave the press foot down and make sure the needle is in the down position (in your work).
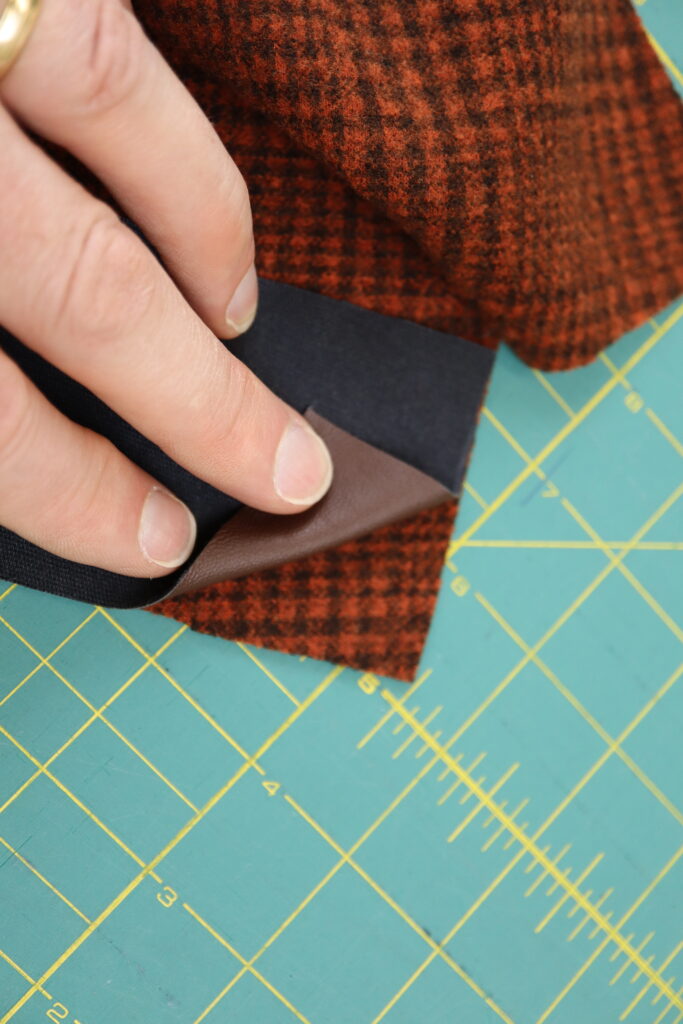
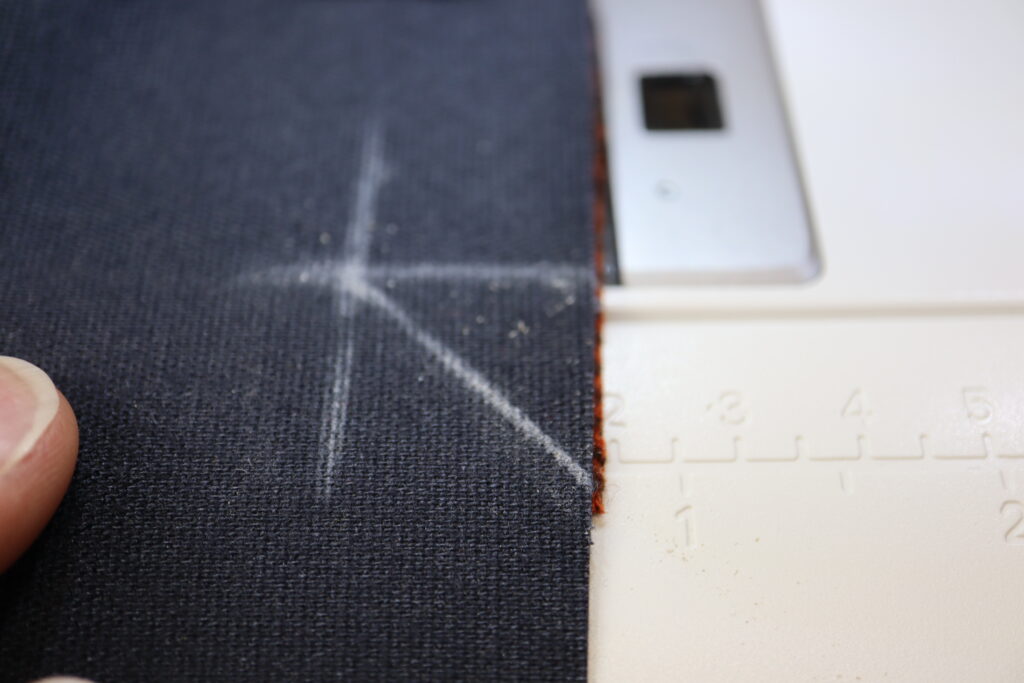
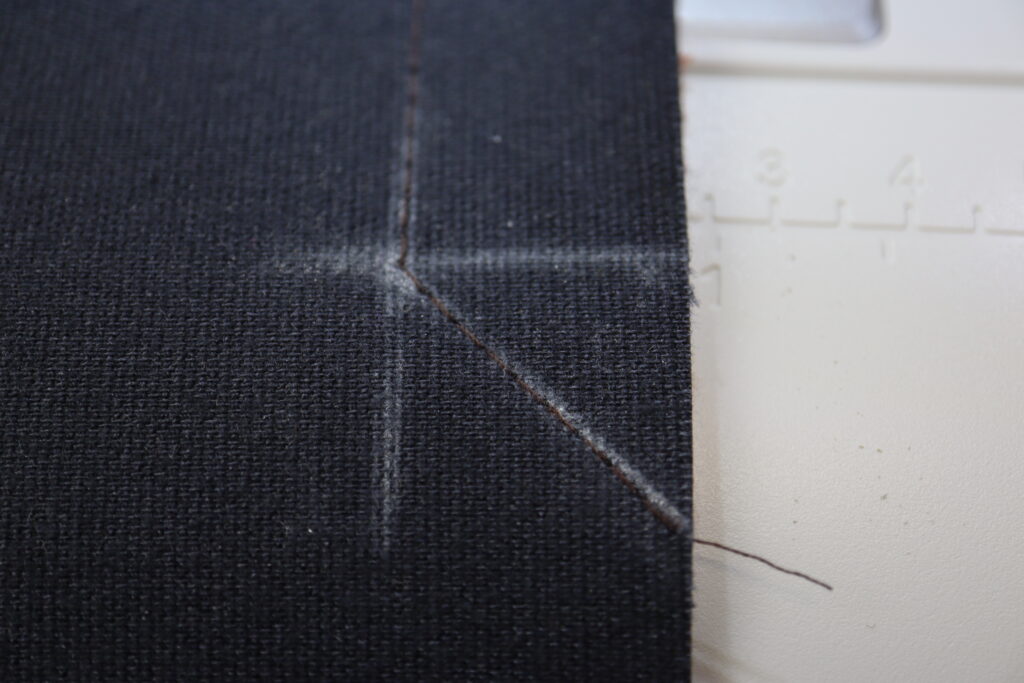
Take your ruler and fabric marker and ruler and make a mark ¾” from the right edge of your work. Then make a mark ¾” from the lower edge of your work. Draw a line at a 45-degree angle from where the first two marks intersect to the corner of your work as shown above.
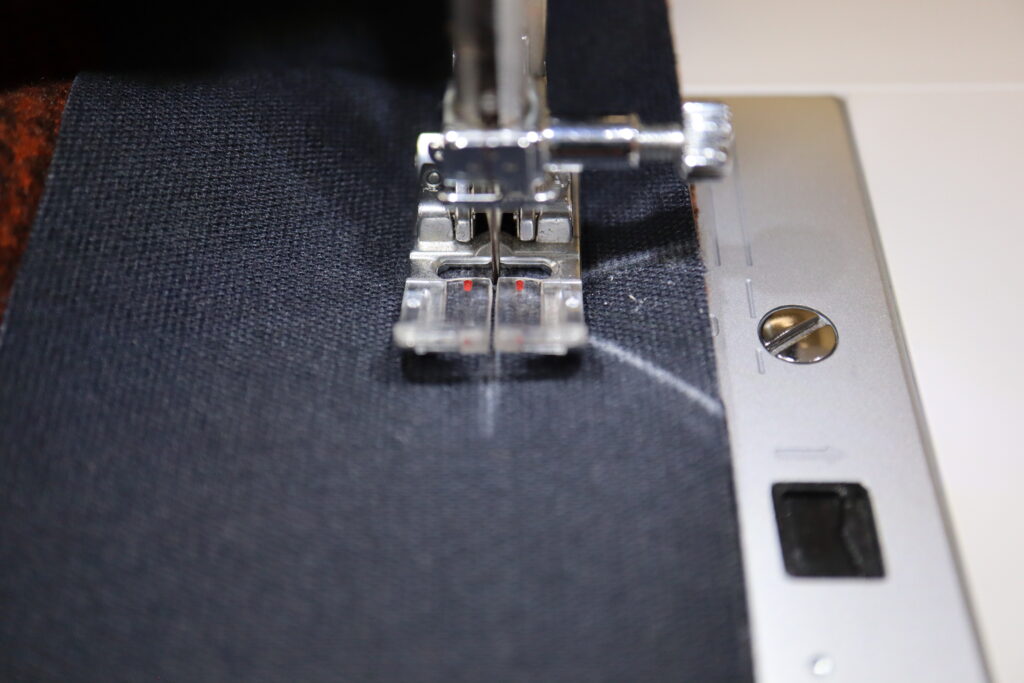
Continue sewing up to the point where the two marks intersect. With the needle in the down position (in your work), raise the presser foot, and pivot your work 45-degrees in a clockwise direction. Lower the presser foot and continue sewing along the diagonal marking and right off your work. There is no need for a back-stitch at this point.
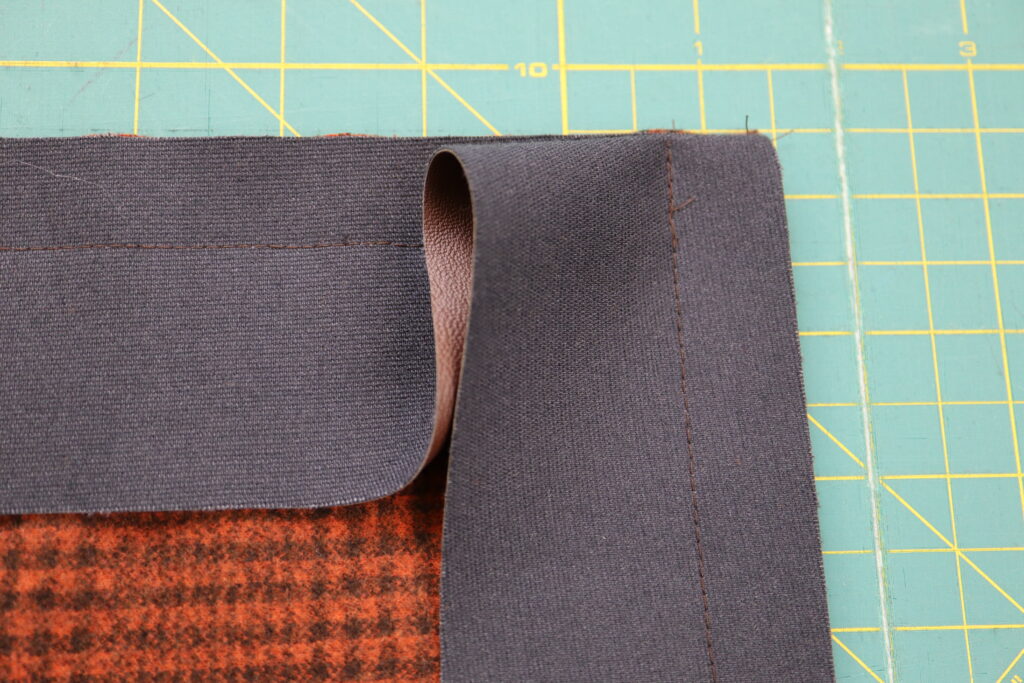
Turn your work 90-degrees in a counter-clockwise direction. Fold the binding back along the diagonal stitching as shown above.
Fold the binding back toward yourself while maintaining the diagonal fold underneath. The top, folded edge of the binding should line up with the top of your fabric and the right edge of the binding should line up with the right edge of your fabric.
Making sure everything is in position according to the previous instructions, stitch from the top edge or your work with a scant ¾” seam allowance.
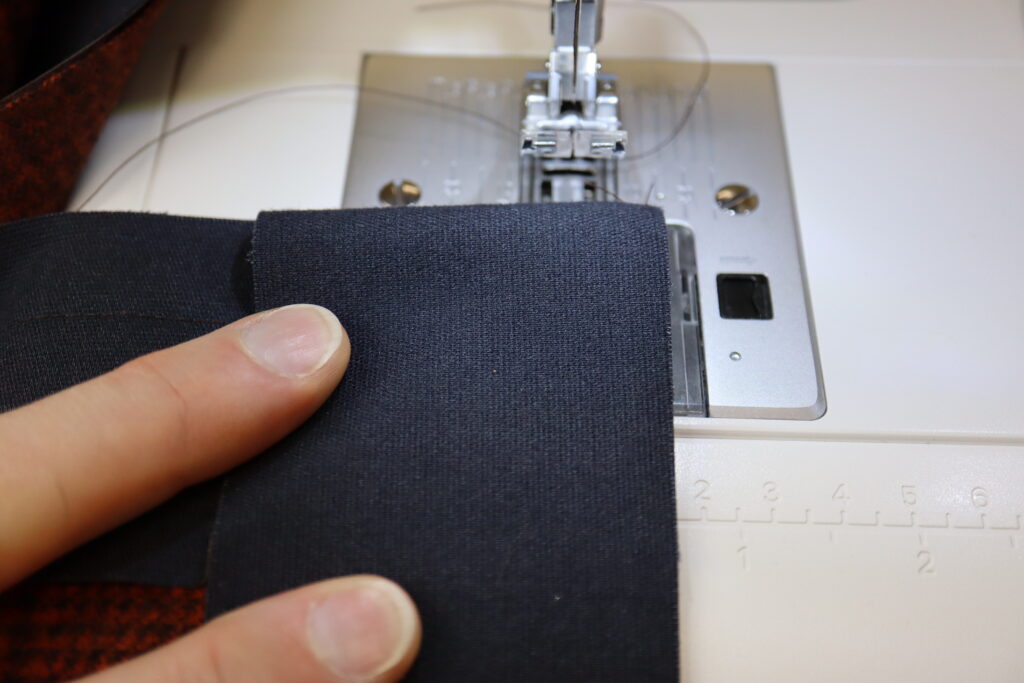
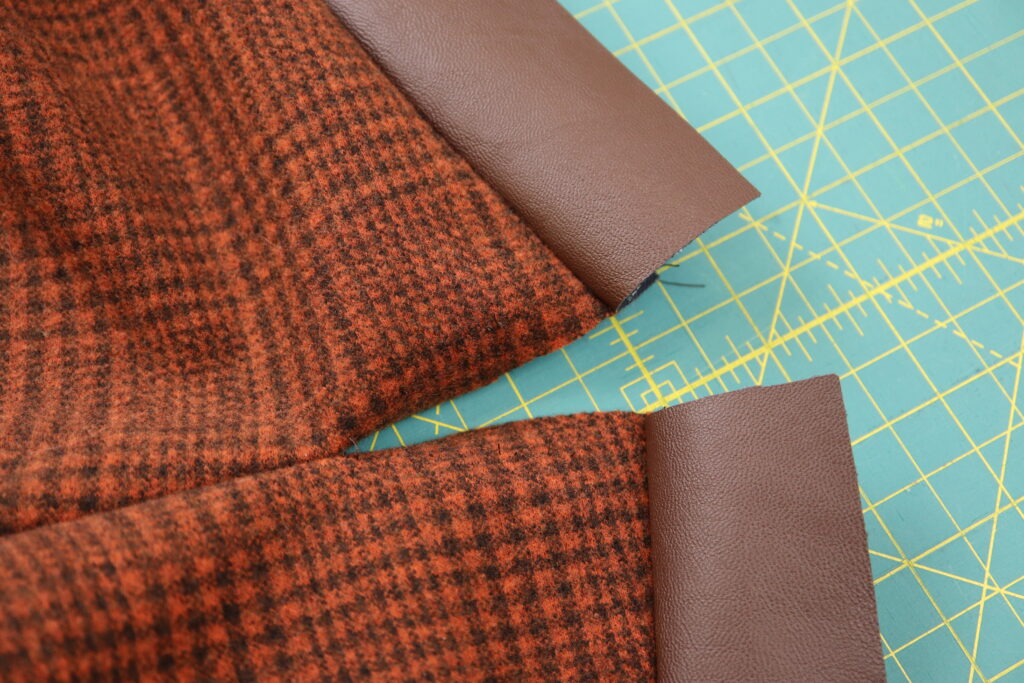
Continues sewing each of the corners in the same way. Eventually you will arrive back where you started and your unfinished seam should look like this (above). With your fingers, press the binding away from your work along the stitching line.
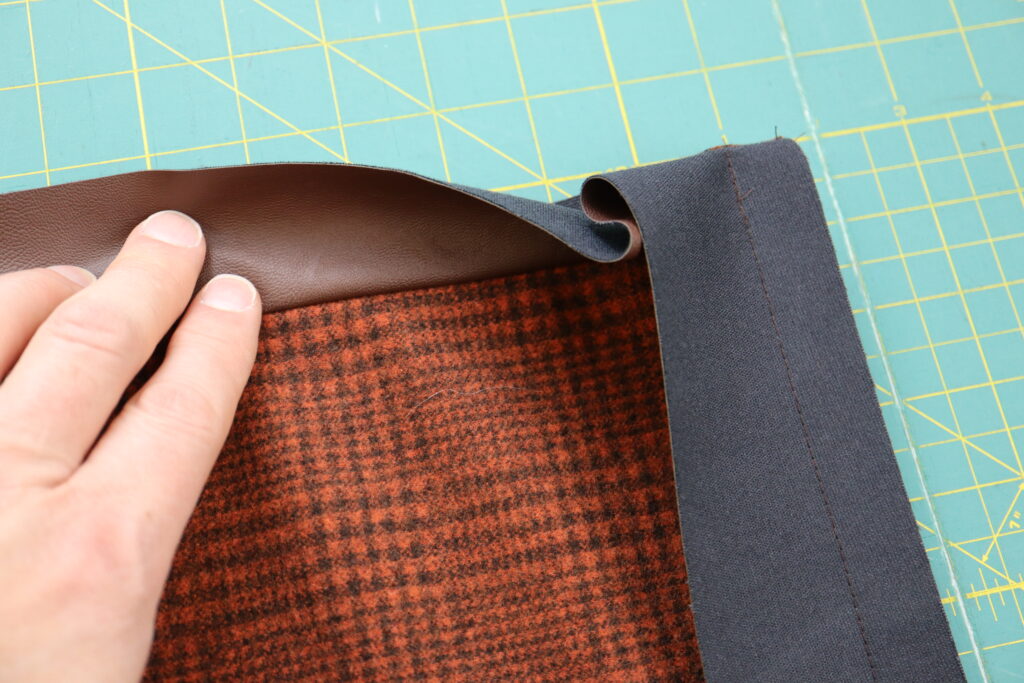
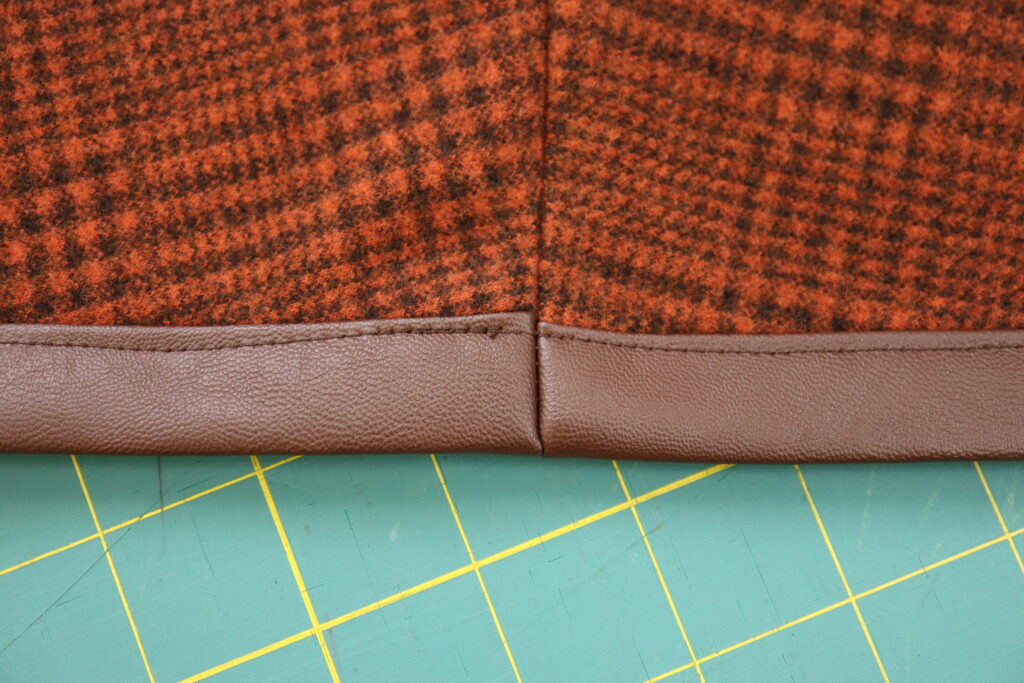
Bring the shoulder seams together. Finish sewing the seam continuing through to the outside edge of the binding.
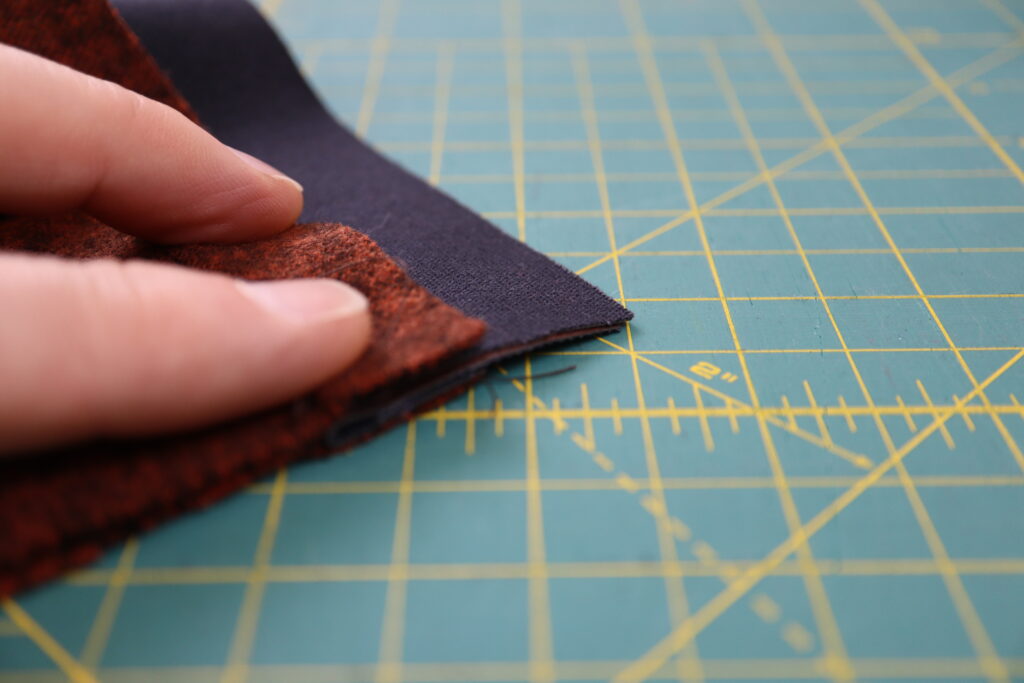
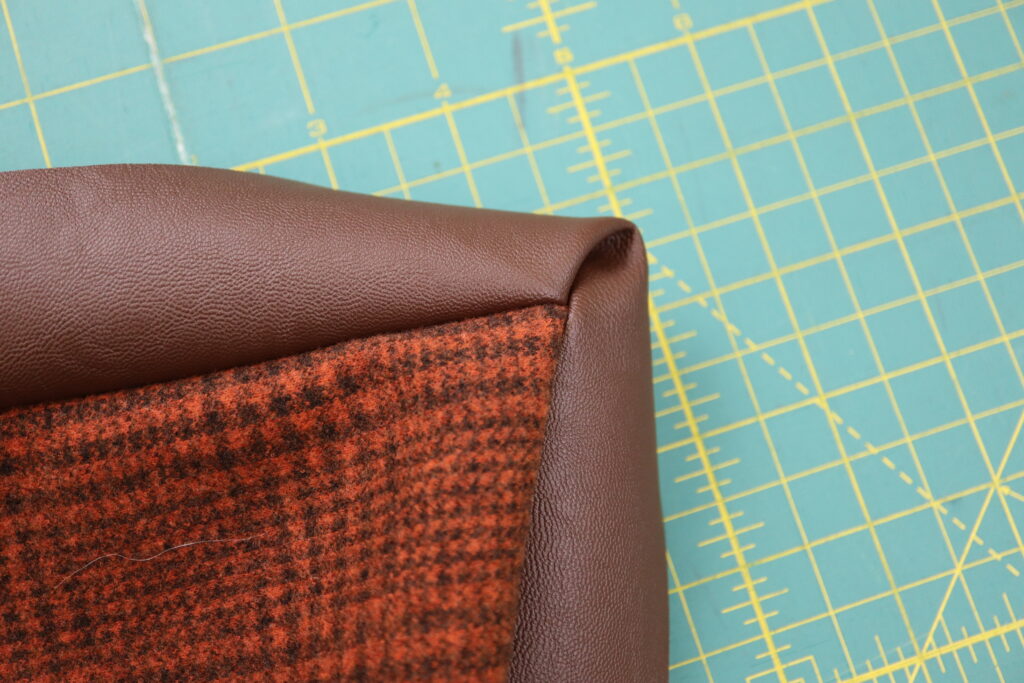
The next step is to wrap the binding around to the back of our work. The edge of the binding should wrap around to the back and overlap the seam. This is why it is important to sew the seam with a scant ¾” seam allowance. When wrapping the binding to the back at the corners, you will find that a beautiful little miter has been created on the right side of your work.
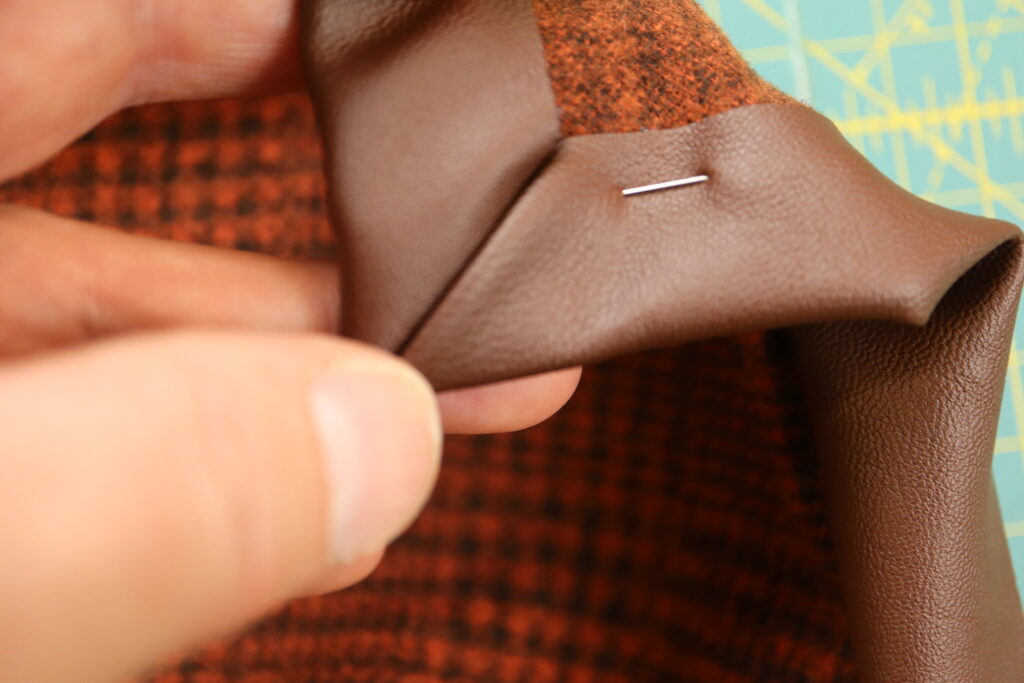
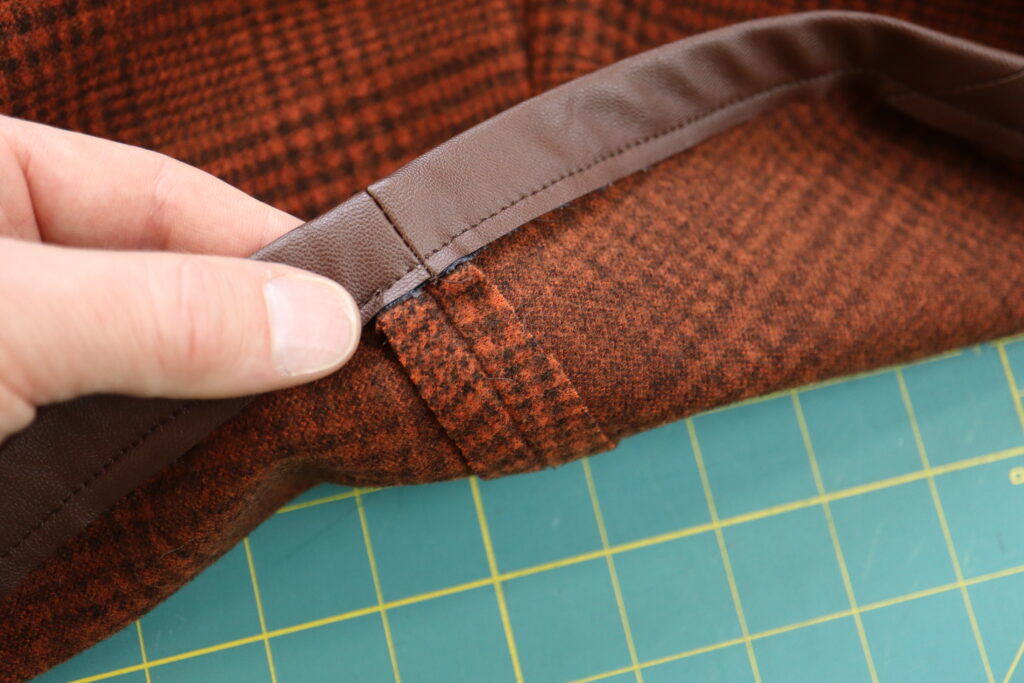
As we wrap the binding to the back of our work, we need to create an equally beautiful miter on the back side. In order to reduce bulk, make sure that the layers of the miter on the back are on the opposite side of the layers of the miter on the front. This may be confusing as you read it, but in practice it should make more sense. Once you’ve folded your miter and are happy with it, place a few pins through all layers to hold it in place. Do not put pins through the faux leather on the front side, as the pins will create holes that are visible from the front. Place the pins where the binding meets the fabric as shown above.
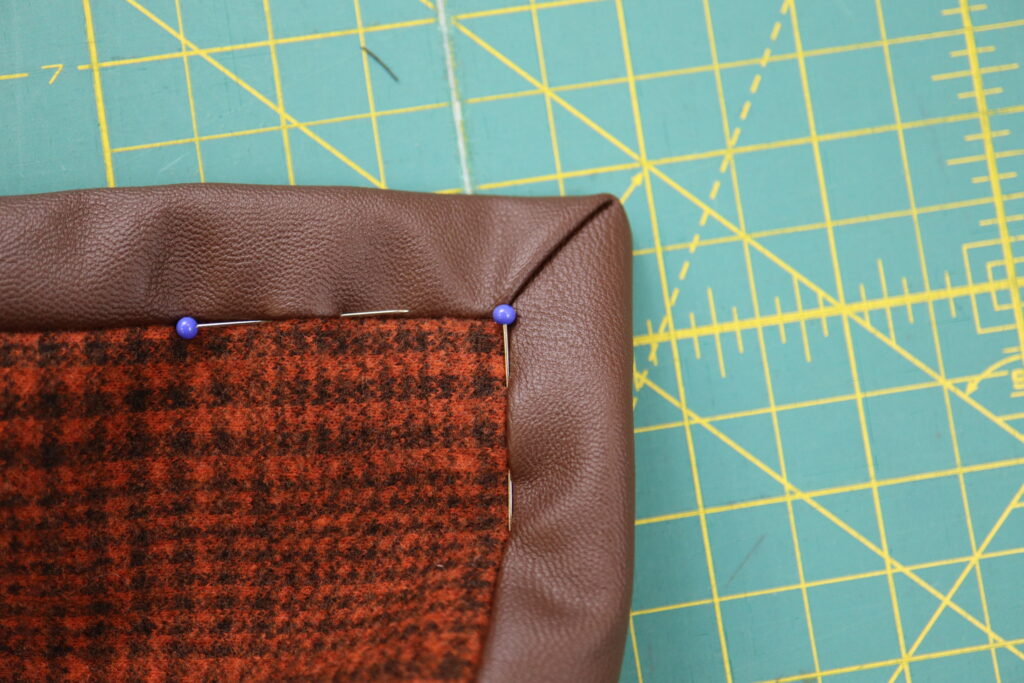
Now you are ready to secure the binding. We started stitching from the shoulder seam (where we joined the ends of the binding together). Stitch through the binding about 1/8” from where the binding meets the fabric. Take special care that the binding is being caught in the stitches on the underside. Pivot at the corners taking care that the miters on the back are staying in place. Carefully follow the curves of the neckline and continue to make sure that the binding is being caught on the underside. When you get back to where you started, overlap your stitches. Note: Make sure to keep the seam allowances at the shoulder OPEN to reduce bulk.

If you’d like to press your binding to create a nicer finish, it is very important to use a lower temperature on your iron and to use a press-cloth between the iron and your work. Faux leather melts very easily and we’d hate to damage our beautiful binding.
If you’d like to see more techniques that we used on our belted cape, click below.


