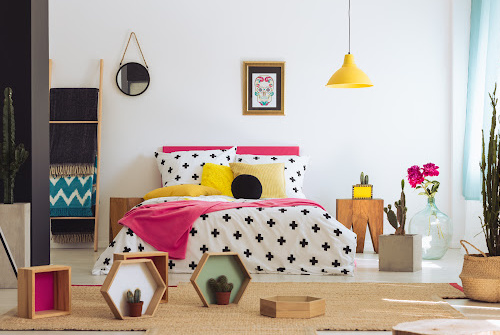
For many DIY decorators, making a custom duvet cover is a wonderful way to personalize your space or the space of your loved ones (customized duvets for kids!). With so many beautiful and fun fabrics on the market there are lots of things to consider. Here is a brief overview and some helpful tips to get you started.
Size
As a savvy consumer, you may have noticed some variation in the ”standard” sizes of modern duvets. To ensure a good fit it would be best to measure your duvet. A 120” long tape measure may come in handy as most dressmaker tape measures are only 60”! Once you have determined the finished size of your duvet, you will want to add seam allowances of 1/2”- 5/8” on each side and at the top, and 3/4” at the bottom (for the closure).

Fabric
The main advantage of a custom duvet is fabric choice. You may choose simple high-quality cotton, a beautiful embroidered silk, or even a shimmery taffeta. You can even use a different fabric on the top and bottom (underside) of the duvet. For example, if you are using silk or taffeta for the top, you may still want to use a high quality cotton on the bottom, as this will feel better against the body. Don’t forget to take fabric care into consideration–can the fabric be machine washed or will it require dry-cleaning?
Another consideration in regards to the fabric is the width. Most fabrics are generally not as wide as most duvets. If you are able to find a nice wide fabric, you can save yourself some extra sewing, but for the most part, you will need to join panels to create the width you need. Keep in mind that a seam right down the middle of your duvet may not be aesthetically pleasing. If you require two panels to create the width, try placing one panel in the middle and then cutting the second panel in half to join on each side of the centre panel. You may even want to add piping or other decorative trim to these seams as a design detail.
Plain fabrics will always be easier to do this with than a patterned fabric, since pattern matching can become quite complicated.
Construction
As mentioned above, you will want to allow a seam allowance of 1/2”- 5/8” around the sides and top. If you are doing a standard seam 1/2” will suffice. Keep in mind that you will want to finish the raw edges to keep them from fraying. If you would prefer the tailored, clean look of a French seam (which also helps to finish the raw edge), allow 5/8” seam allowance.
There are a few different options for the closure at the bottom of your duvet. A zipper is a great choice. A standard duvet zipper is 150cm by 60” long which should provide a large enough opening to insert or remove the duvet. Snap-tape is another great option–this is a tape that has the snaps already applied. Velcro is another handy option, but make sure to close the opening while laundering, so the hook side of the Velcro doesn’t catch on the fabric! Buttons and buttonholes are a lovely detail, but also the most labour intensive option.
Keep in mind that if you are making the effort to create your own duvet, choosing the highest quality materials that you can afford will help it to look better and last longer.If you need fabric or other items for making your own duvet cover or doing any sort of craft, come and shop with us at Fabricana.


1 thought on “How To Make A Duvet Cover: A Simple Guide”
Thank you for this informative guide to Duvet covers. I once bought a duvet which pieced the two fabrics width wise giving the covet the appearance of having a wide, decorative border at the lower third of the cover. It made a nice change from lengthwise piecing.
Sincerely,
Anne Bone