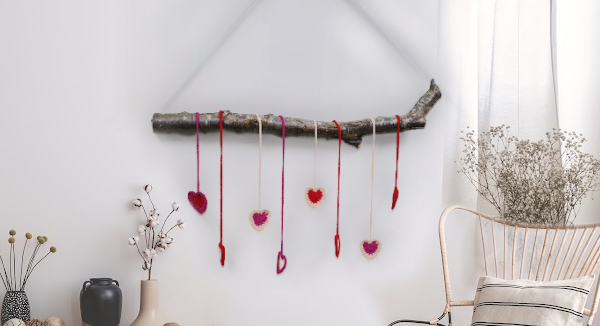
Oh, my goodness! As someone who is fairly new to crochet, I loved how quick these little hearts were to make. If you’re looking for a quick and fun way to bring a little bit of St. Valentine’s Day into your décor, this Bohemian-styled, crocheted heart mobile is perfect. The crocheted heart pattern is adapted from the medium-sized heart pattern by Planet June. We have altered the pattern to use two colours of yarn and we have added a long chain at the top of the hearts in order for them to hang. Perfect for a Boho-chic home decor look!
We use American terminology. Techniques used are the magic ring, chain-stitch, slipstitch, single-crochet, half-double-crochet, double-crochet, and triple-crochet.
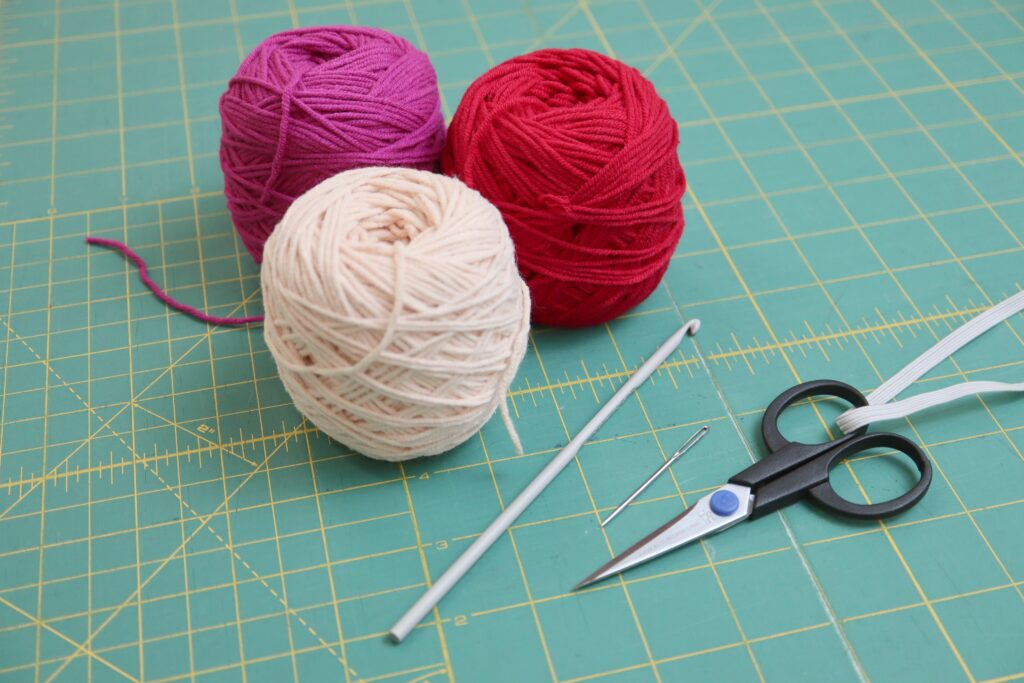
Here’s what you’ll need:
We used 3 colours of Sirdar Stories DK (easy to work with blend of Cotton and Acrylic)
A 4mm crochet hook
A fine yarn needle to weave in ends
Scissors
A stick or dowel to create the framework for the mobile
Cord – to hang the framework
Small screws and screwdriver OR craft glue
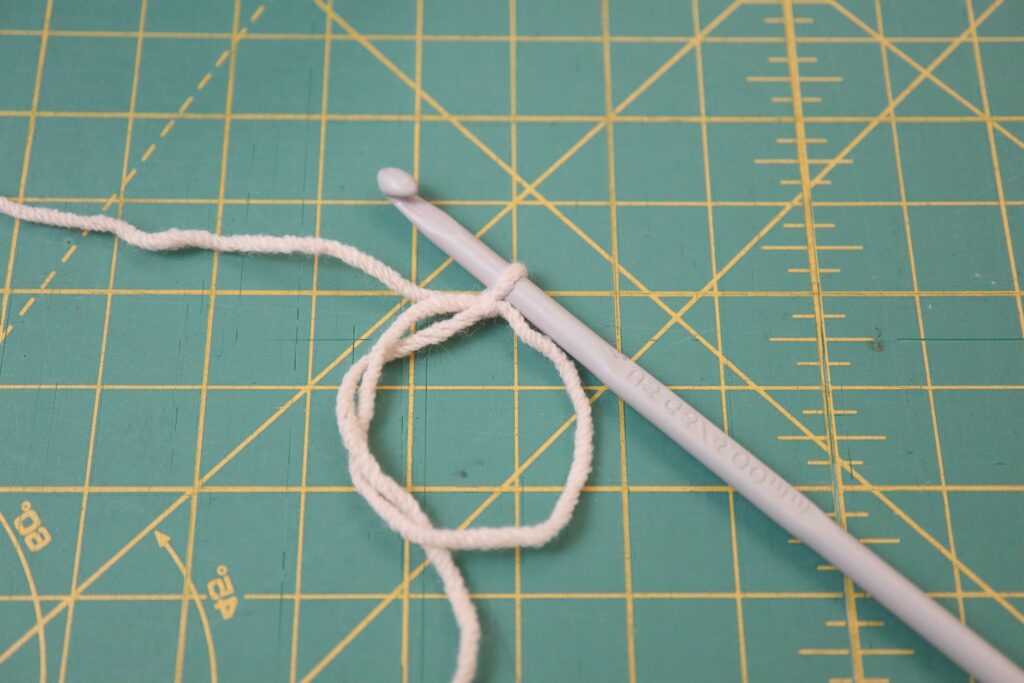
Steps 1: Start with a magic ring. The magic ring allows you to pull the stitches at the centre of the heart very tight, so there is practically no hole in the centre. If you are unfamiliar with the magic ring, there are several videos on YouTube to show you how to do it.
Step 2: Chain two.
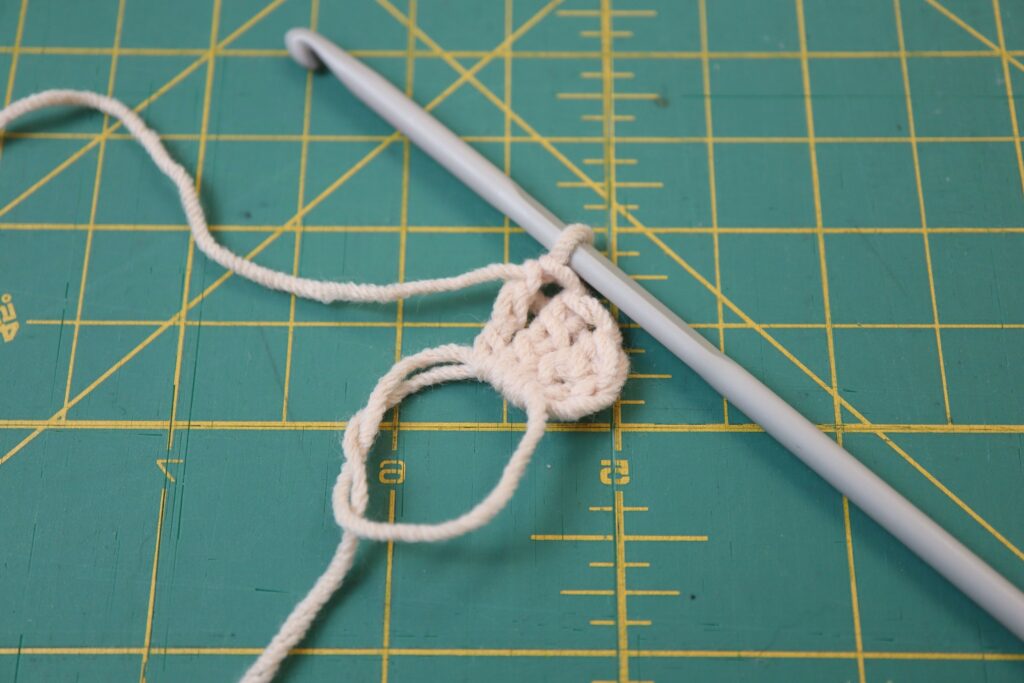
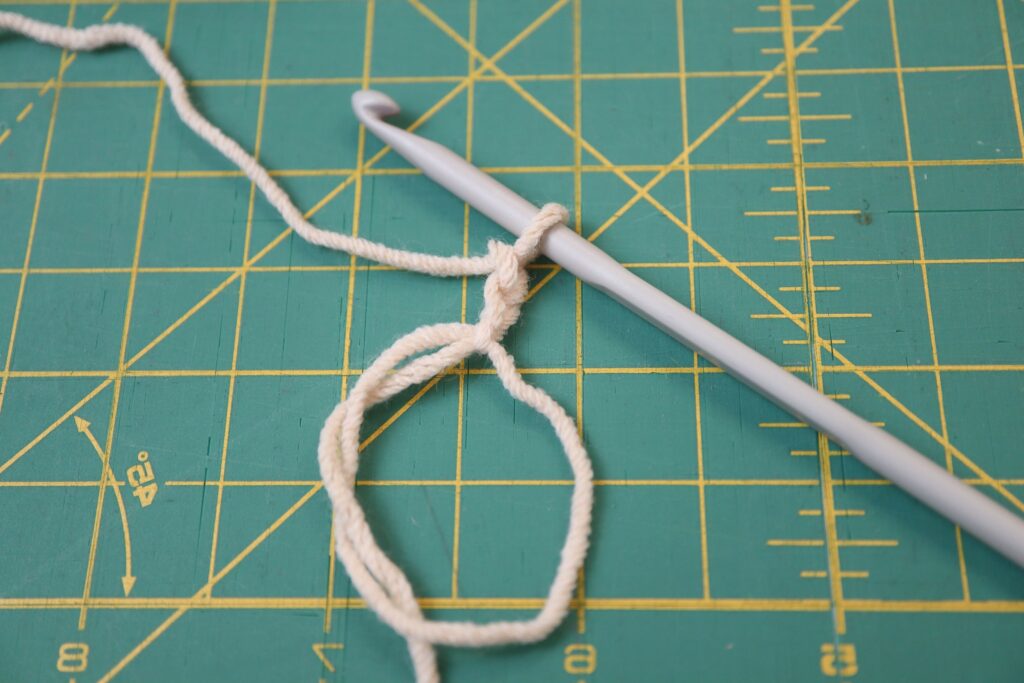
Step 3: Make three triple-crochets into the magic ring and slide them toward your original chain stitches.
Step 4: Make four double-crochets into magic ring and slide them over as well. Pull the tail of the magic ring to reduce the size of the ring.
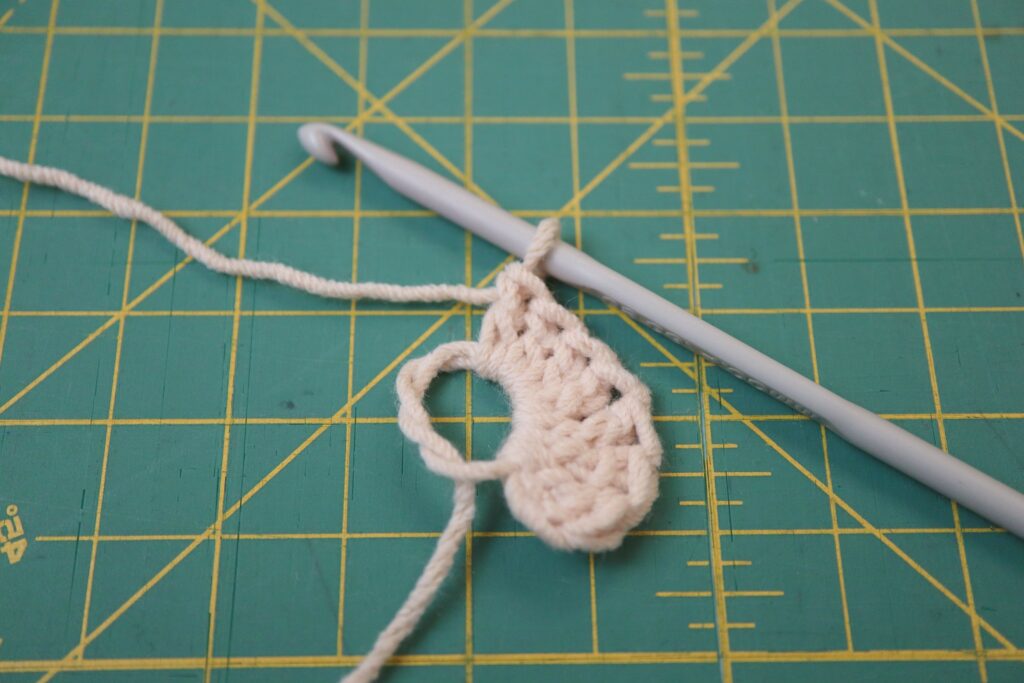
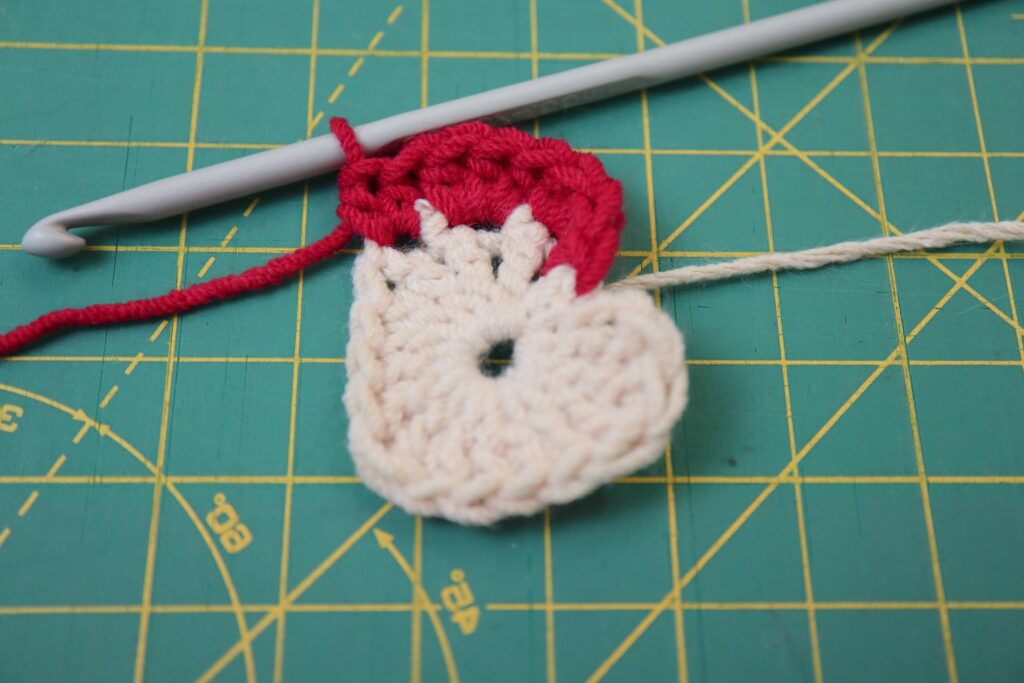
Step 5: Make one triple-crochet into the ring. This will be the bottom point on the heart.
Step 6: We are now making the second half of the heart. Make four double-crochets into the magic ring.
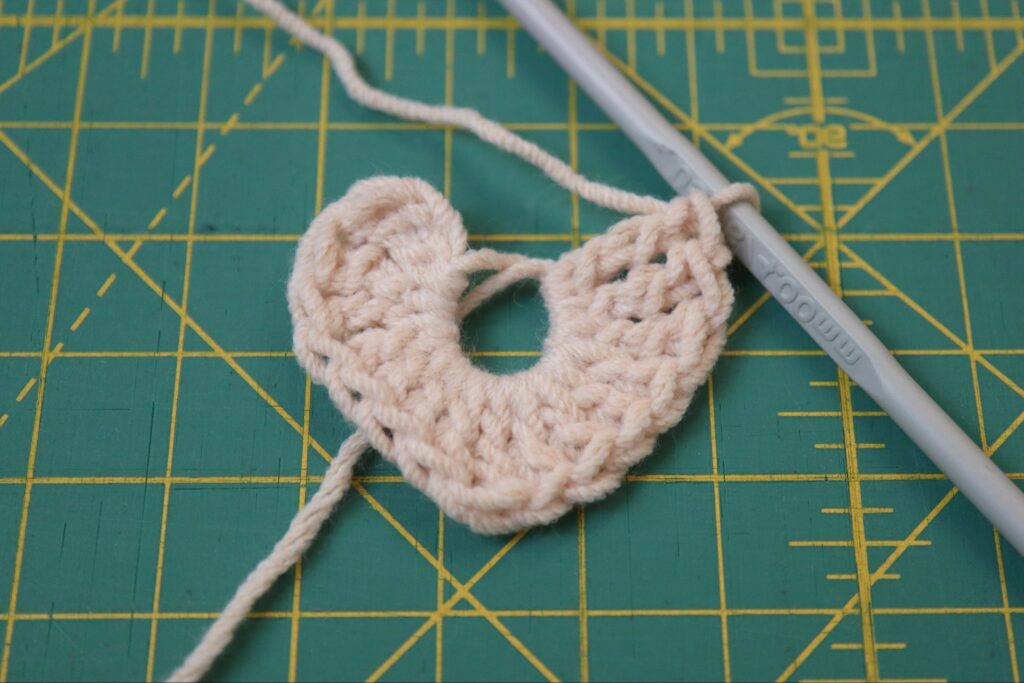
Step 7: Make three triple-crochets into the magic ring.
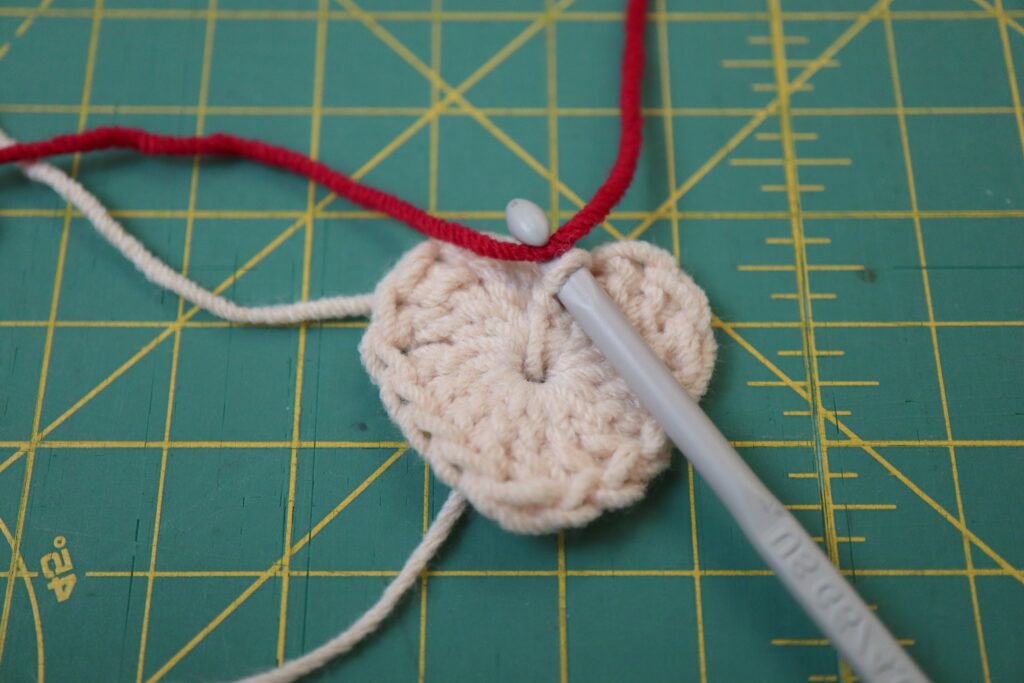
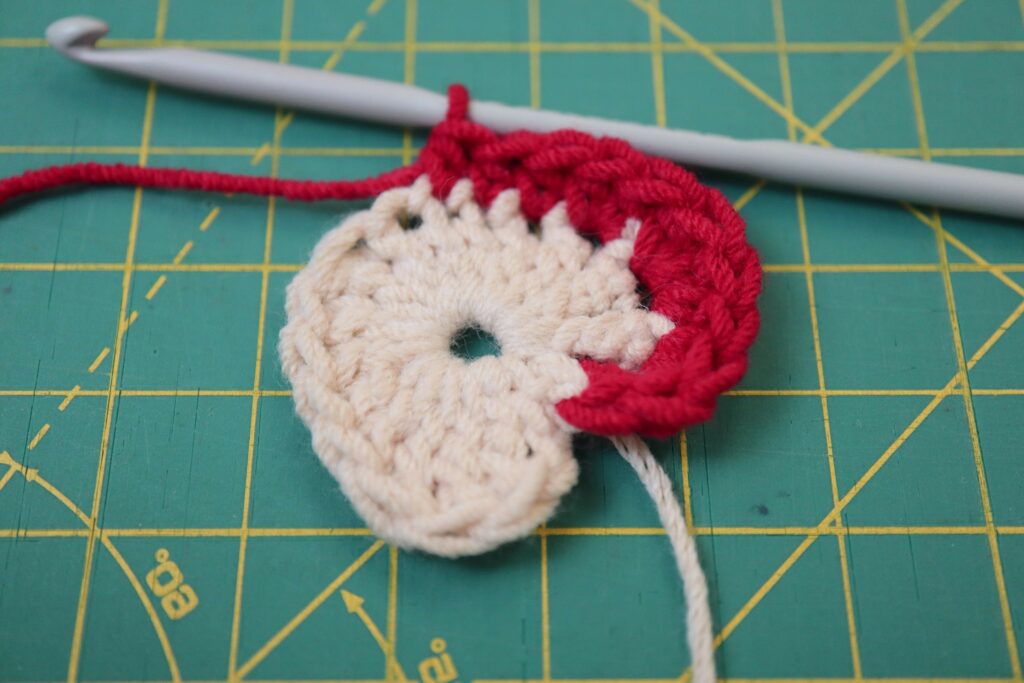
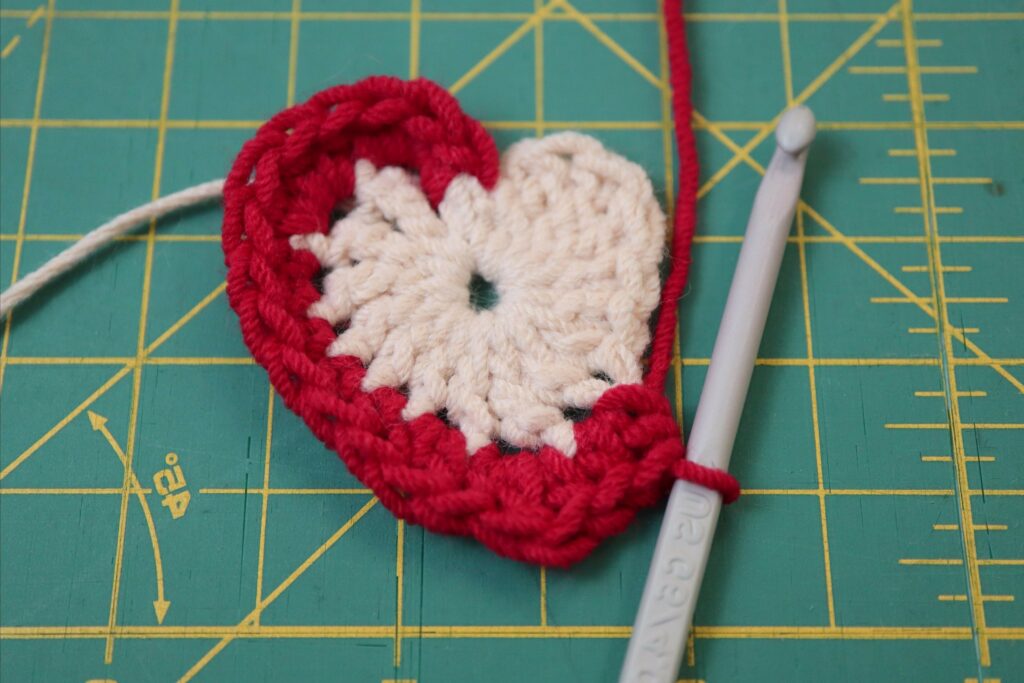
Step 8: Pull the tail of the magic ring again as shown in second photo above (not too tight – we need to slide our crochet hook into the hole very shortly).
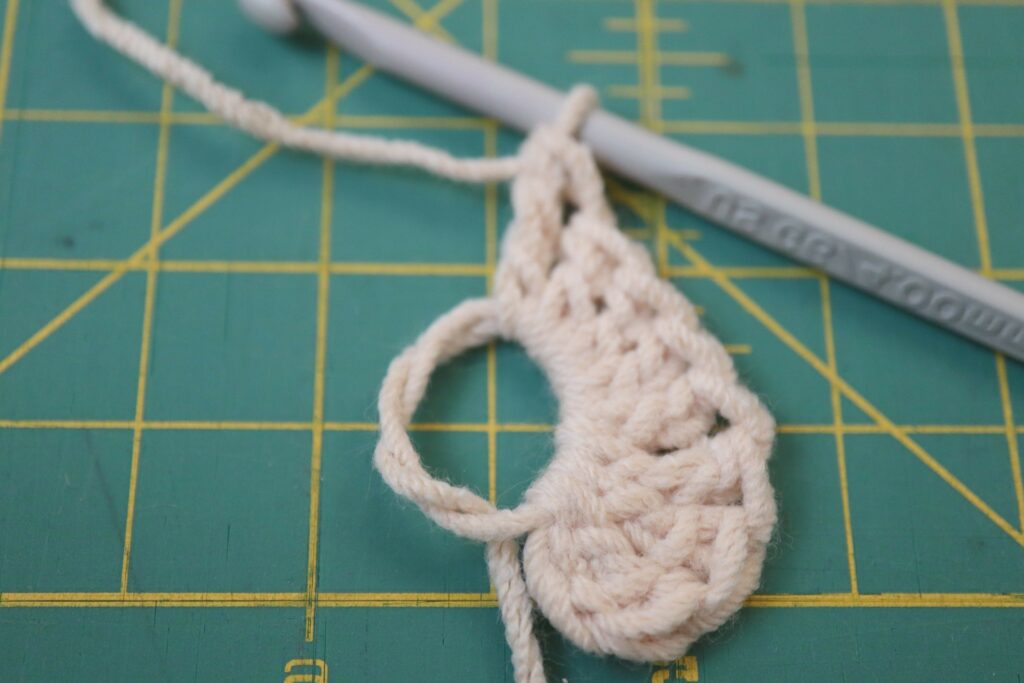
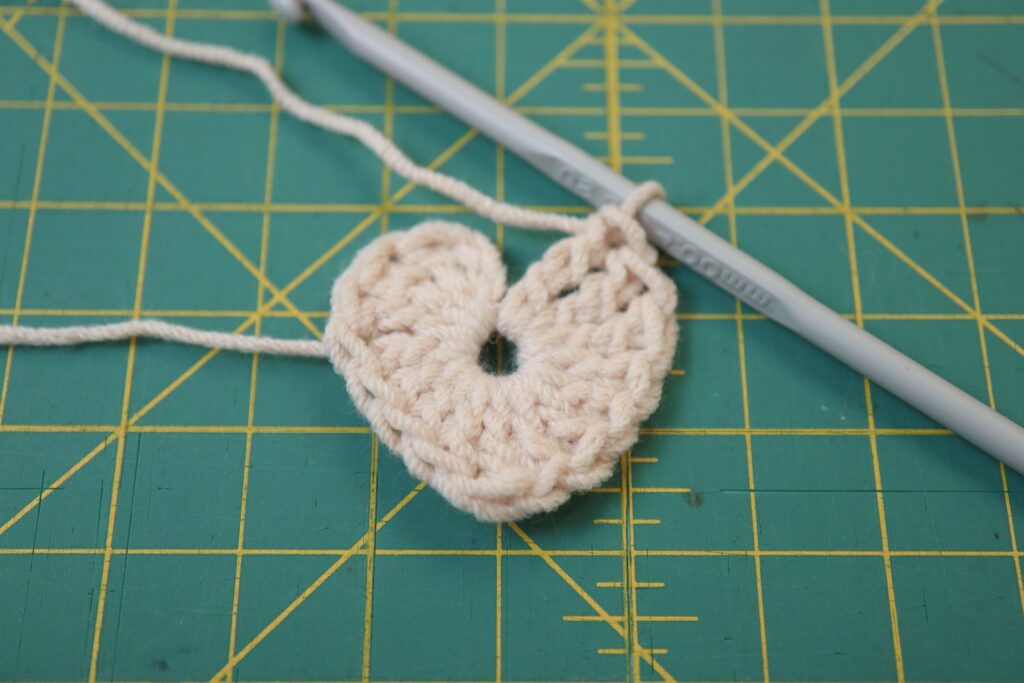
Step 9: Chain two.
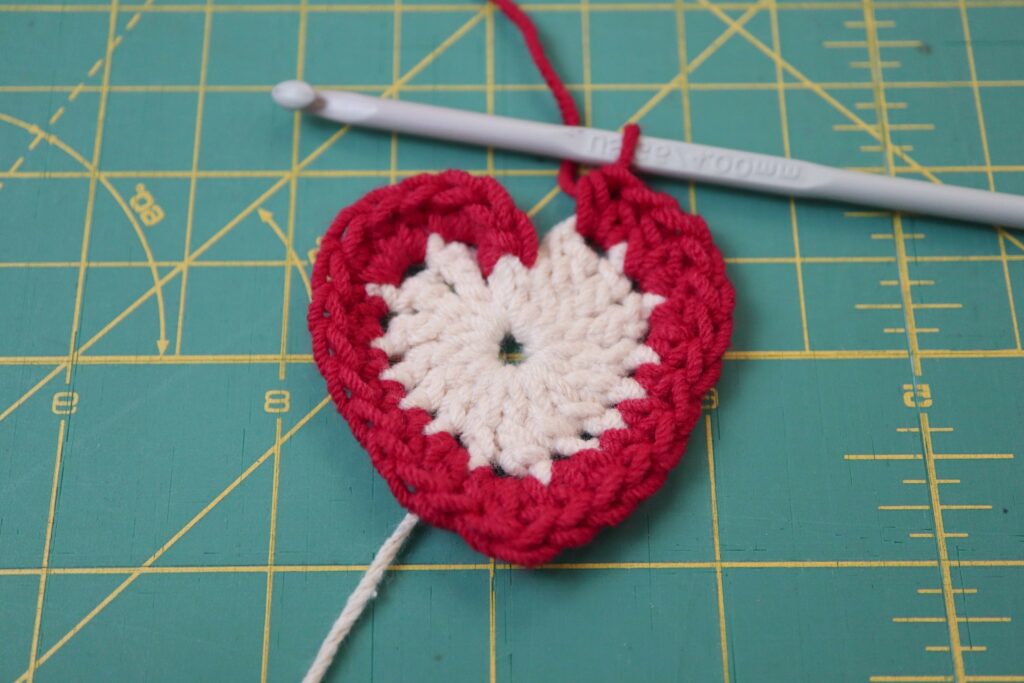
Step 10: Make a slip stitch into the centre of the heart through the hole. This will help create the nice shape at the top of the heart. Make sure that the hook is sitting toward the front of your work before continuing to the next step (do NOT turn work).
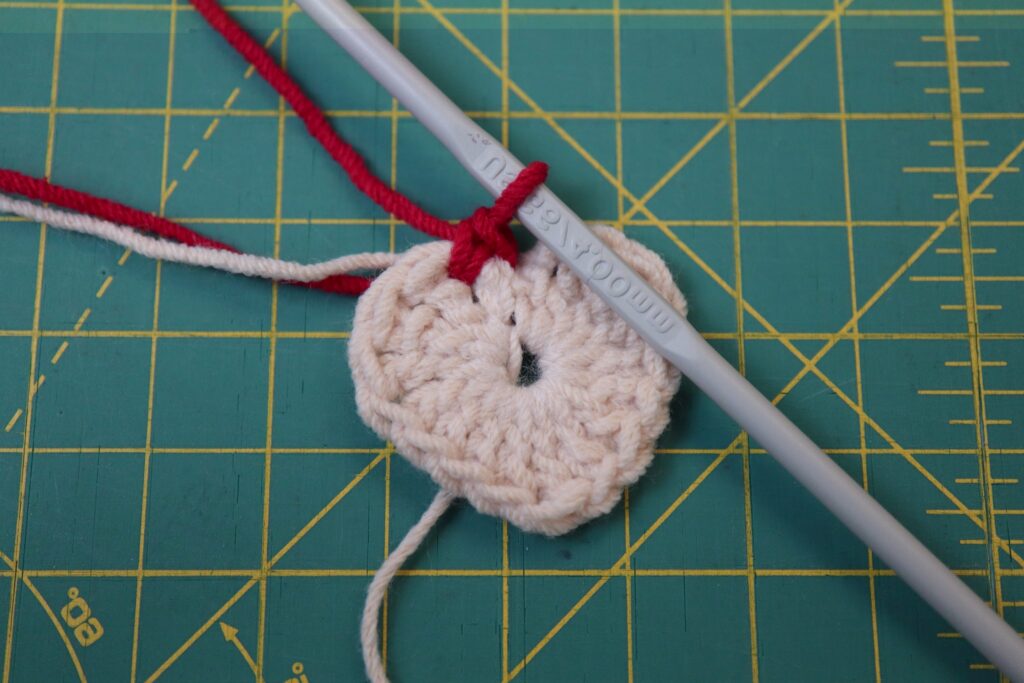
Step 11: Pull the new colour though the stitch on the hook.
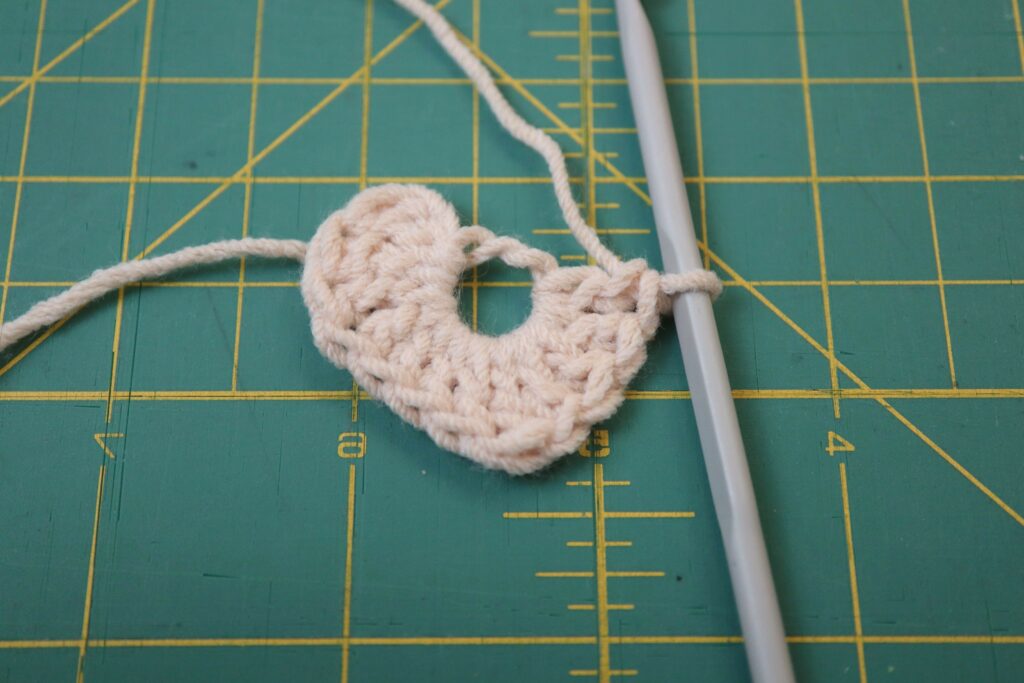
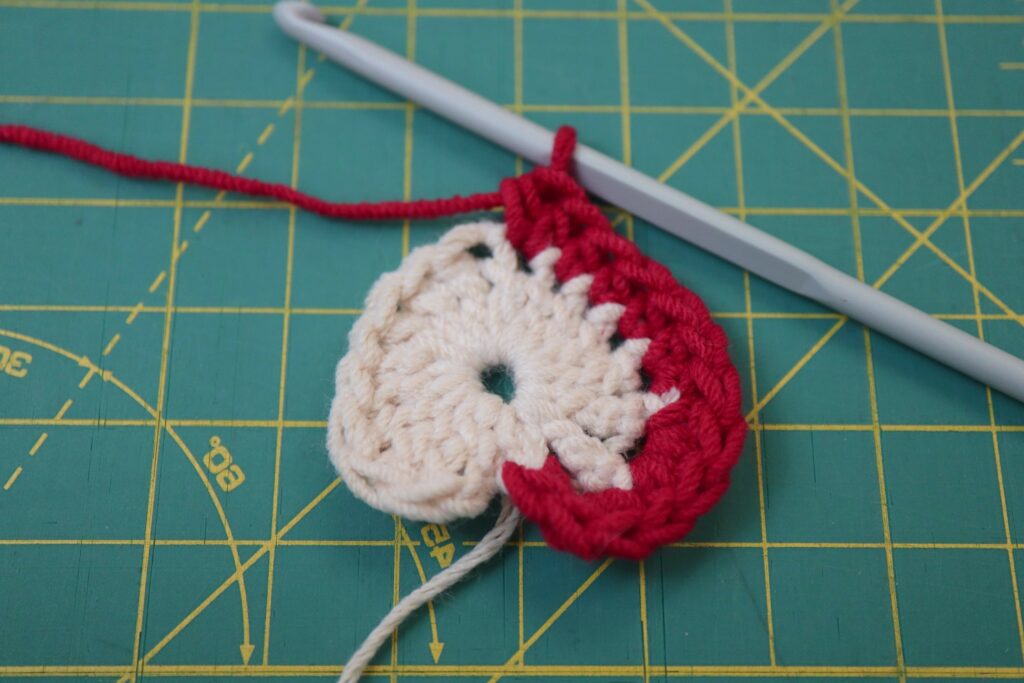
Step 12: Using the new colour, make a single-crochet in the first chain space (the “chain space” is the little loop between your original two chains and the first triple-crochet you made). If you’re feeling confident, catch the two tails in with this stitch. This will save you from having to weave them in at the end.
Step 13: Make two half-double-crochets into the first stitch (after the original chains). Again, if you can catch in your tails, that would be awesome.
Step 14: Make three half-double-crochets into the next stitch (catching in the tails if possible).
Step 15: Make two half-double-crochets into the next stitch (without catching in tails). If you had been catching in the tails up to this point, trim the tails close to your work. If not, leave the tails and weave them in at the end.
Step 16: Make one half-double-crochet into each of the next three stitches.
Step 17: Make two half-double-crochets into the next stitch.
Step 18: In the next stitch, make one half-double-crochet, one double-crochet, and one half-double-crochet. These will create the pointy end of the heart at the outer edge.
Step 19: Make two half-double-crochets into the next stitch.
Step 20: Make one half-double-crochet into each of the next three stitches.
Step 21: Make two half-double-crochets into the next stitch.
Step 22: Make three half-double-crochets into the next stitch.
Step 23: Make two half-double-crochets into the next stitch.
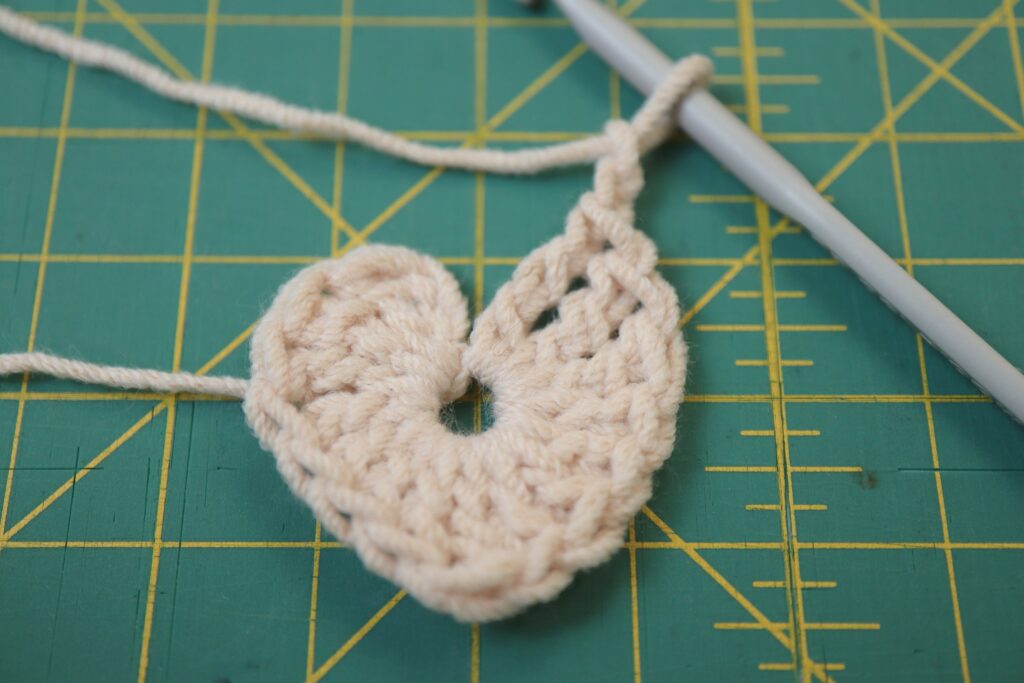
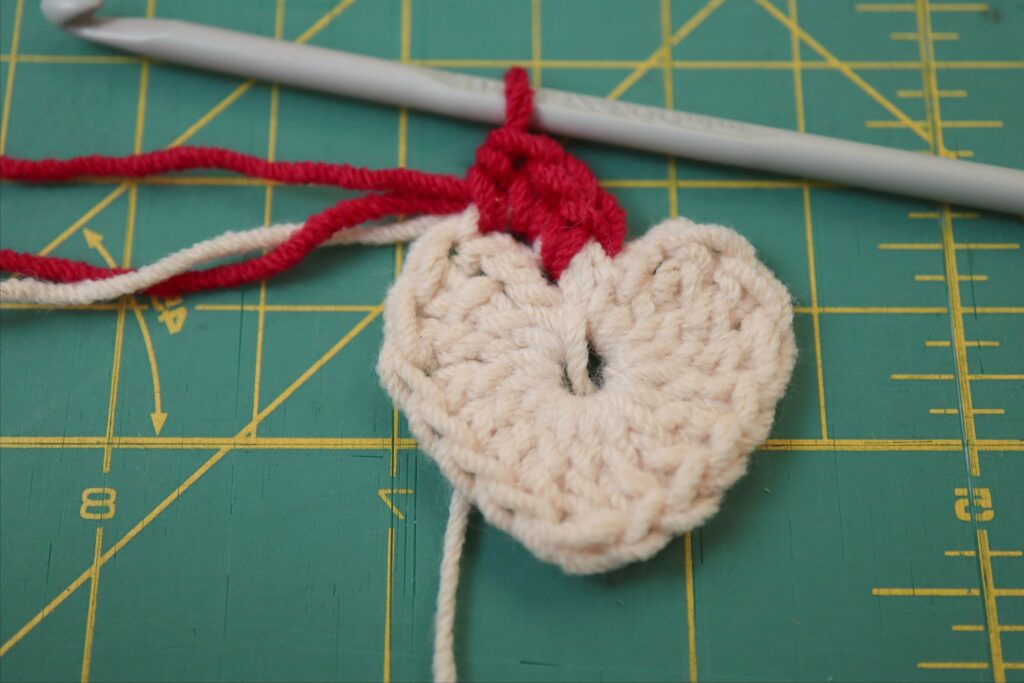
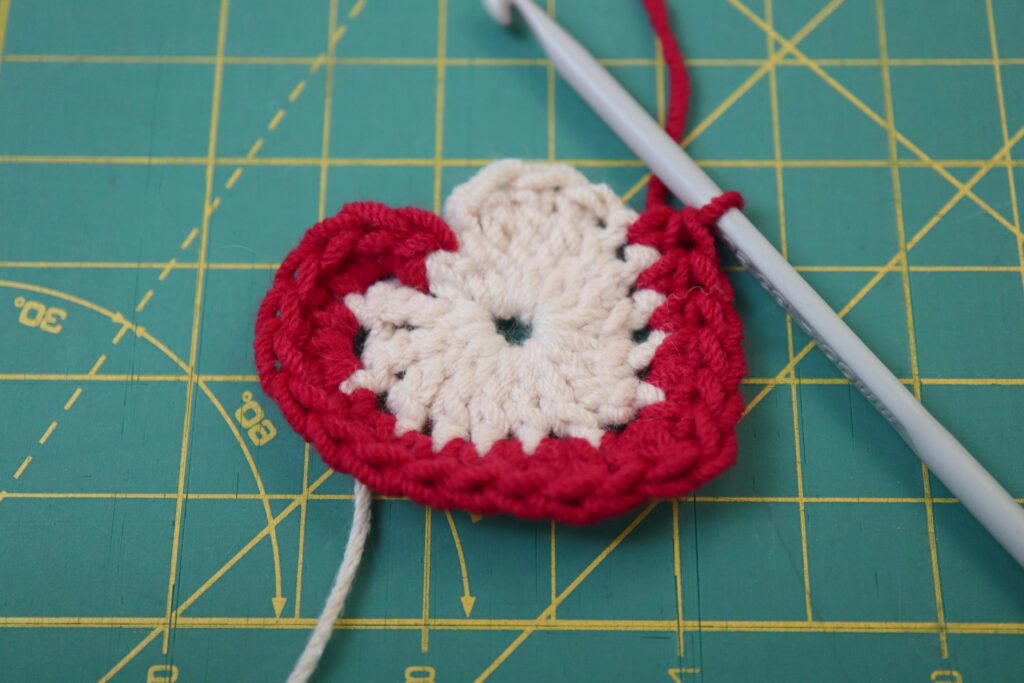
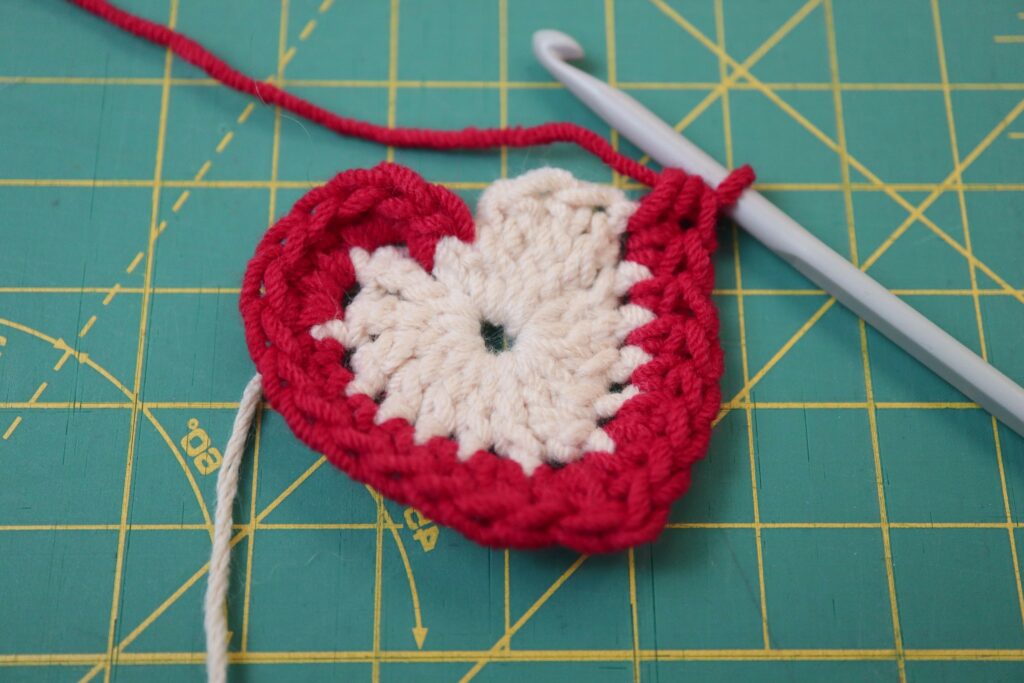
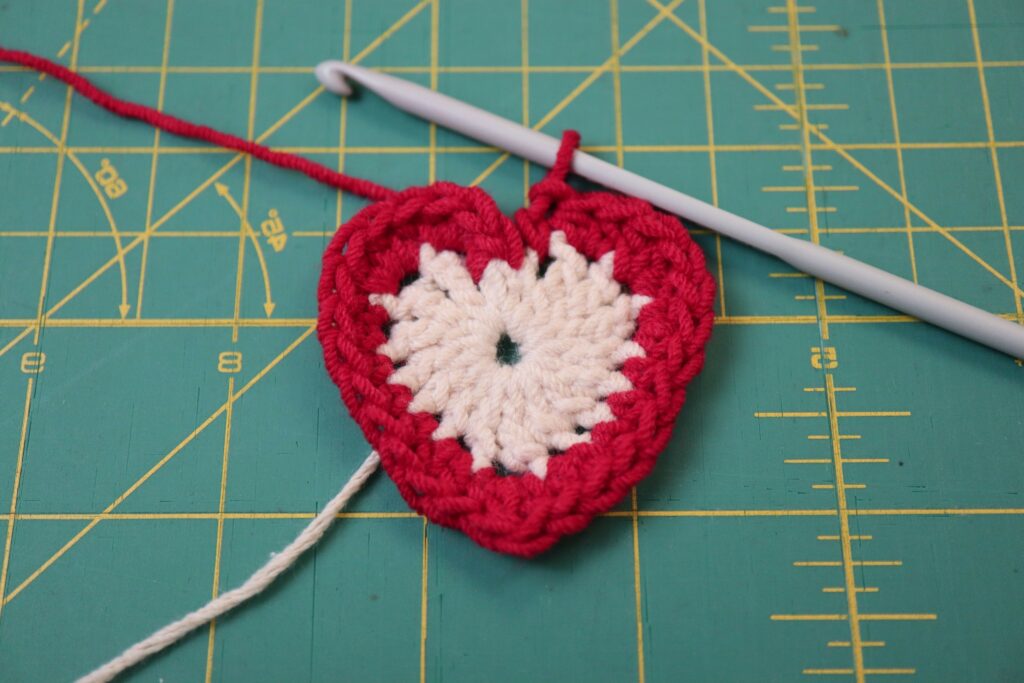
Step 24: Make one single-crochet into the chain space.
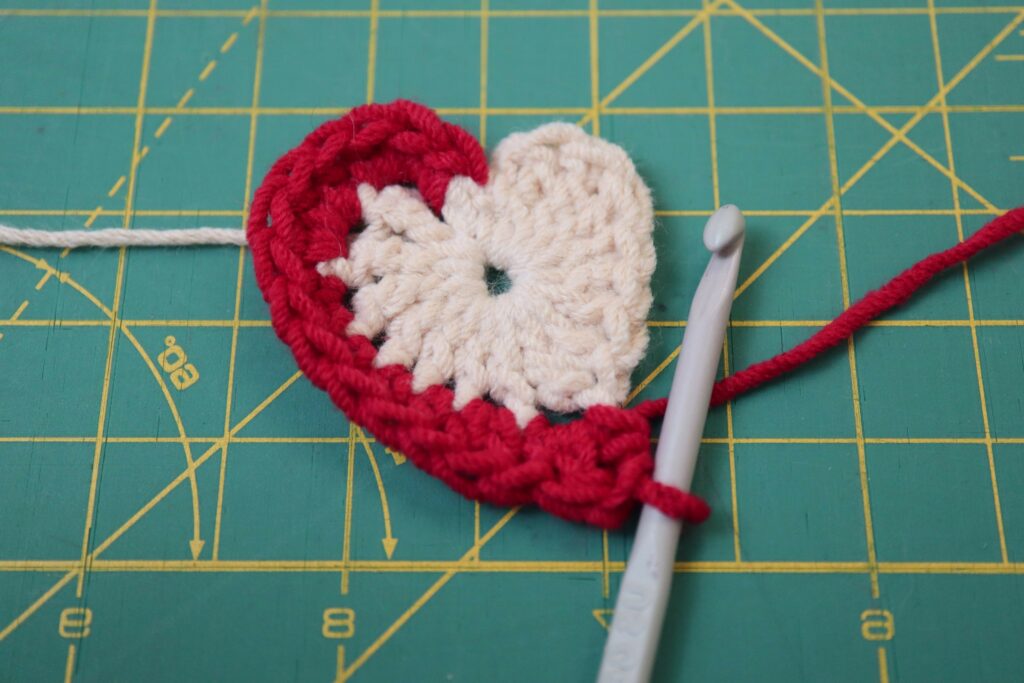
Step 25: Make a slipstitch into the first stitch of the second colour used.
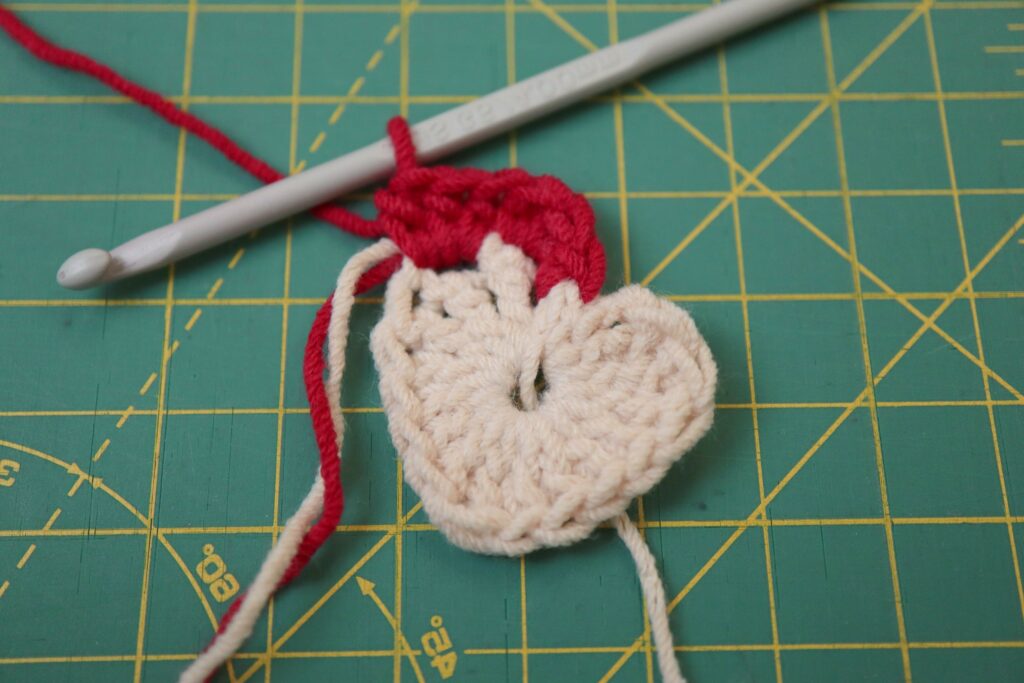
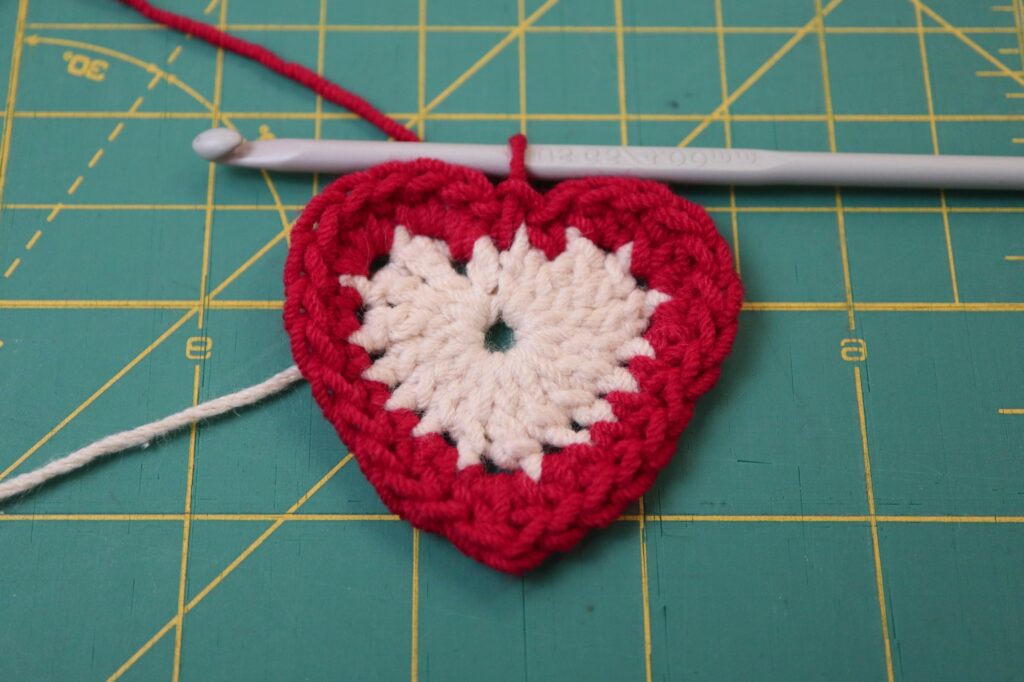
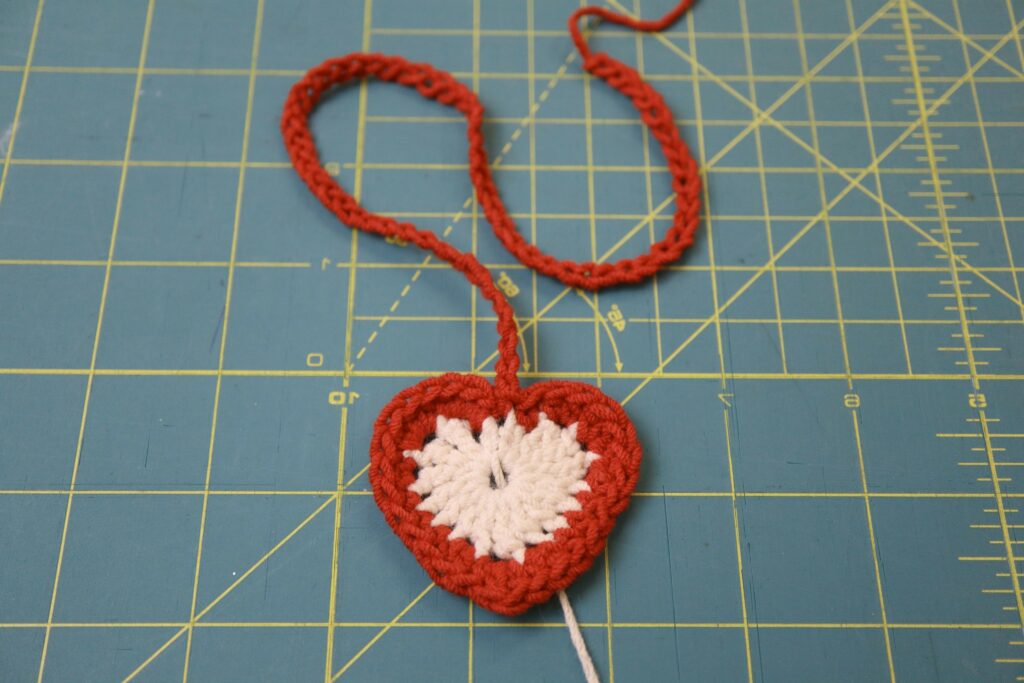
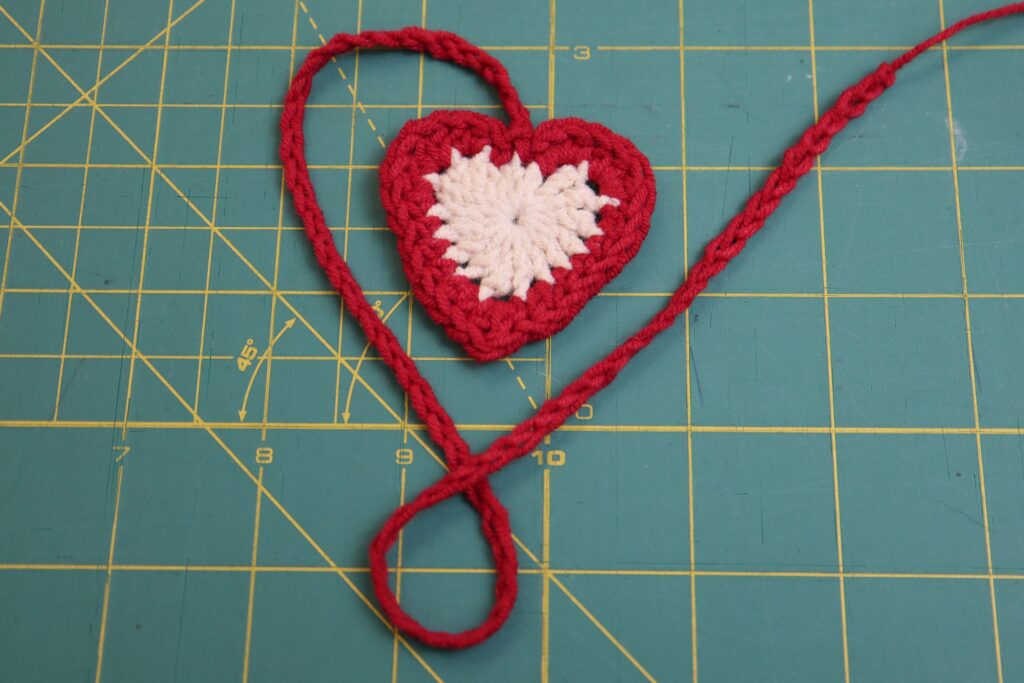
Step 26: Chain sixty. This is how the heart will hang.
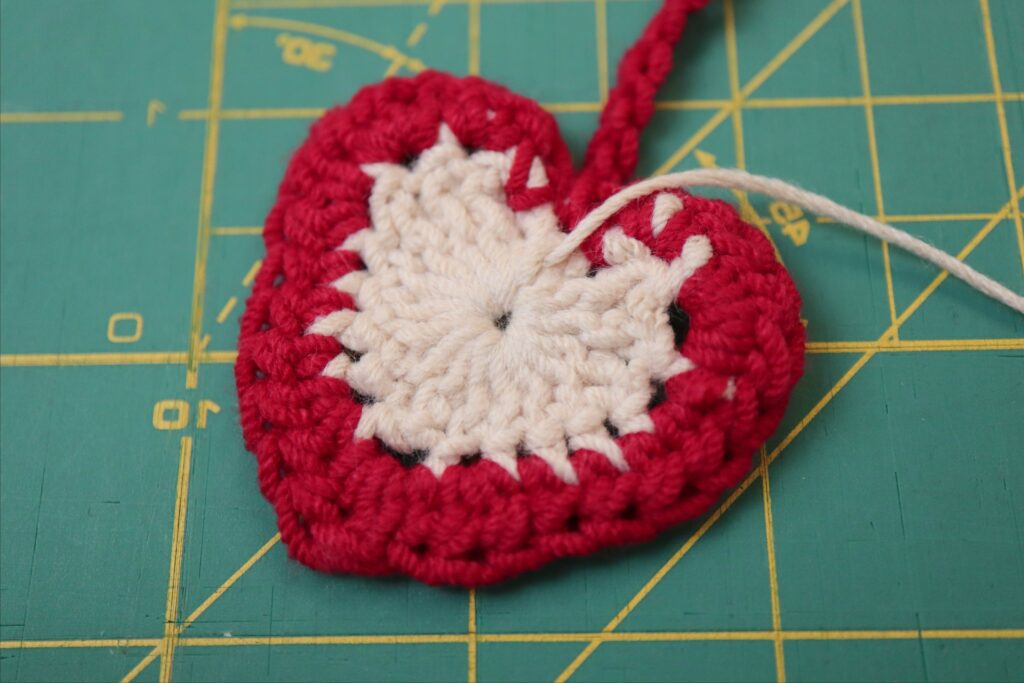
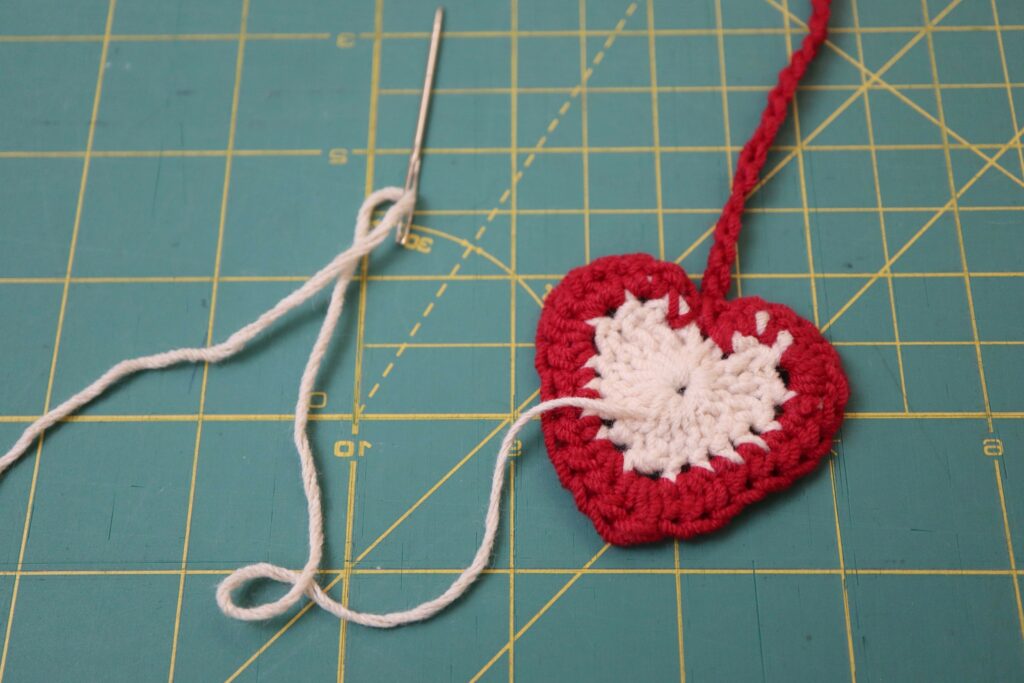
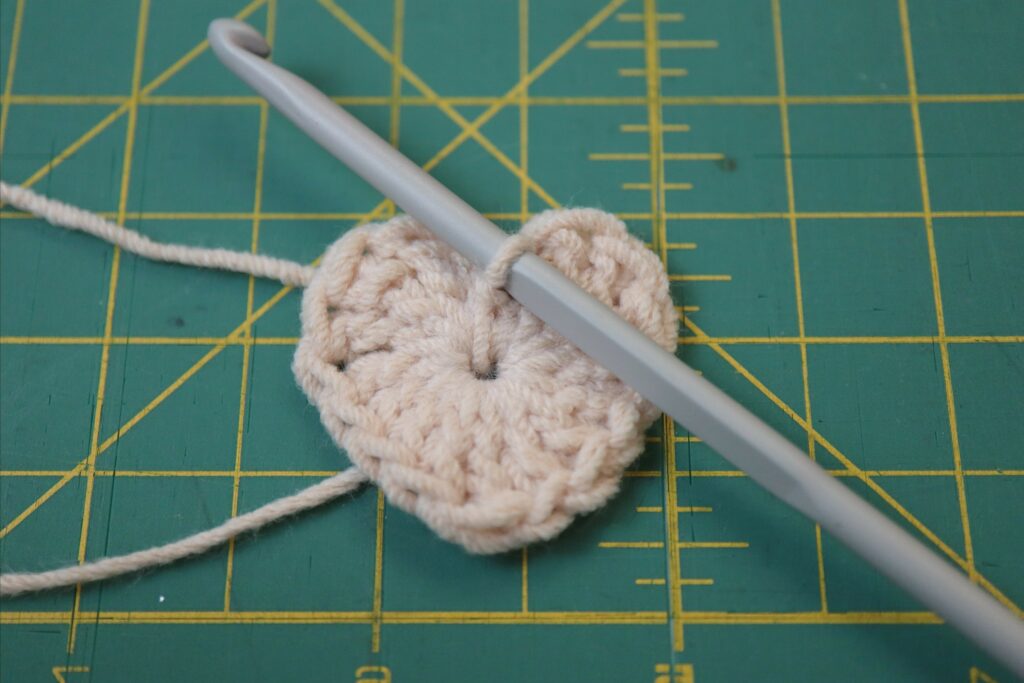
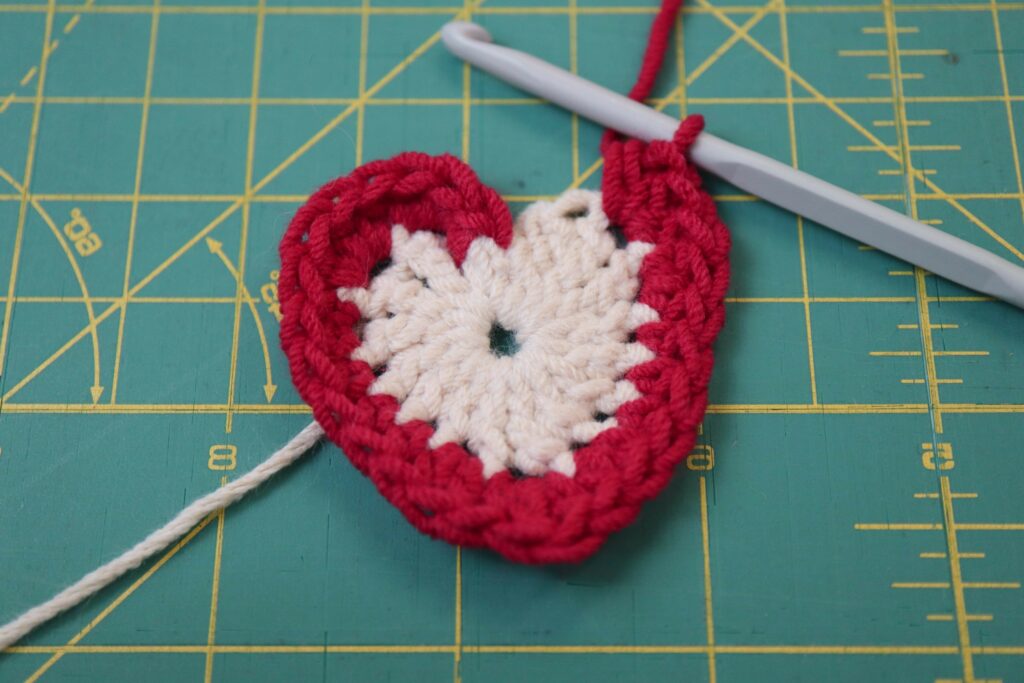
Step 27: From the back of the heart, pull the magic ring closed as small as you can. Weave in the end using your darning needle. If you have additional tails from where you changed colours, weave the ends in now. Trim all tails close to your work.
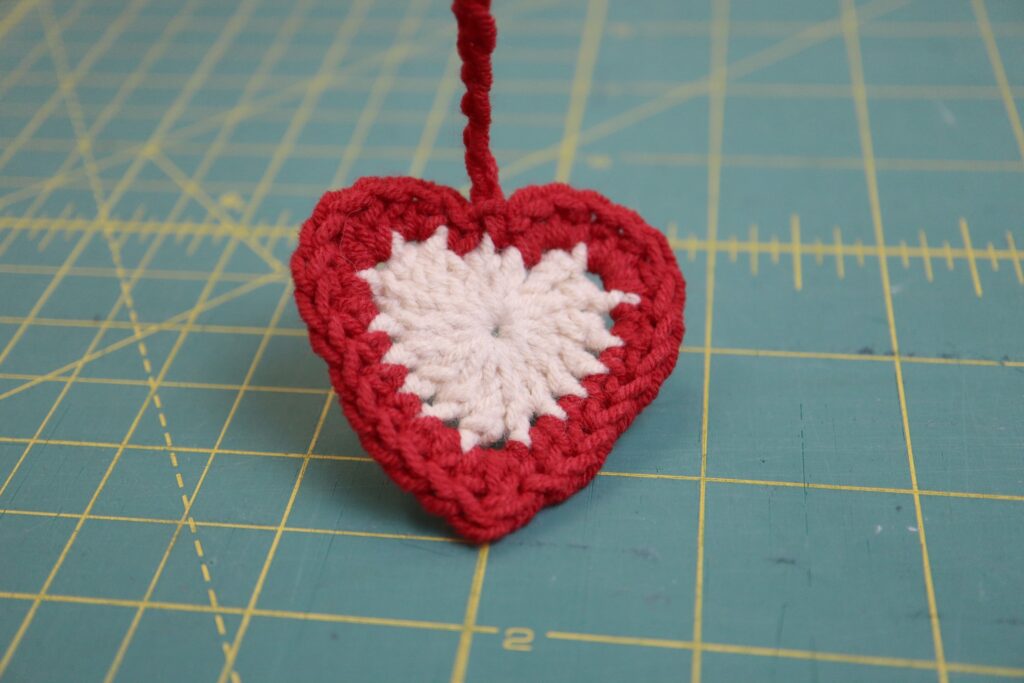
Here are a couple photos of the finished heart. We made seven more for a total of eight. We varied the colours, so each colour is used equally.
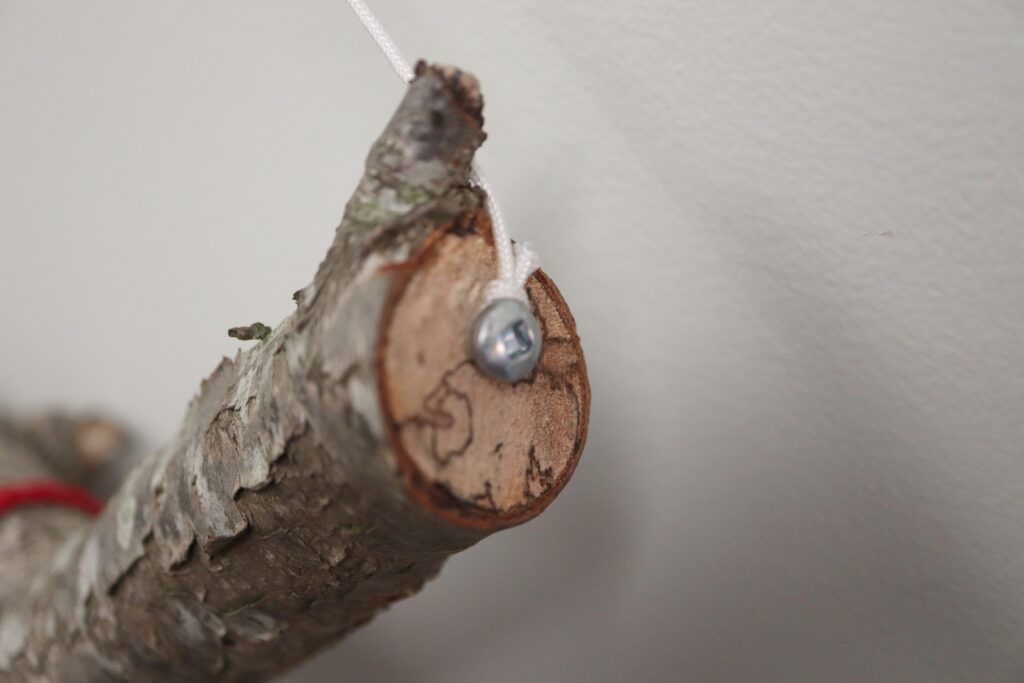
I placed small screws into the ends of our stick in order to secure the cord to hang our mobile, but didn’t tighten them all the way. I made a slip knot in the cord, looped it around the screw, pulled the slipknot nice and tight and then finished tightening the screw. I then trimmed the cord close to the screw.
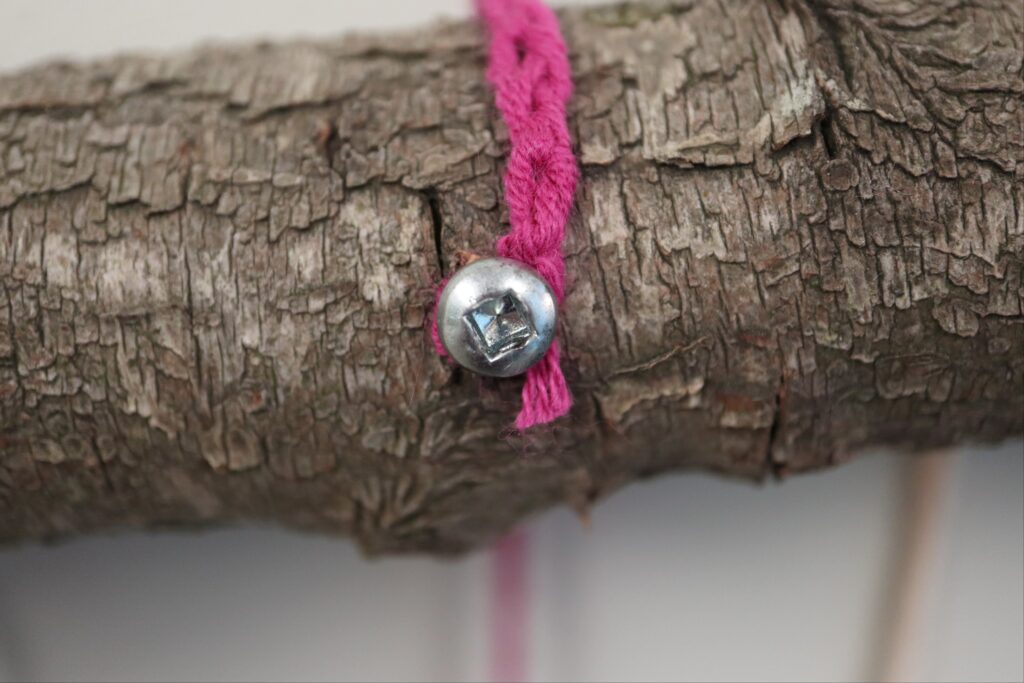
To secure the hanging hearts, I placed the screws (evenly spaced) in the back of the stick (the side that will face the wall), but I didn’t tighten them all the way. Then I placed one of the loops of the chain around the screw, wrapped the chain around the screw a couple of times, and finished tightening the screw. I then trimmed the end of the chain close to the screw. NOTE: I wanted to hang the hearts at different levels, so I planned the placement before securing them to the stick.
If you don’t want to use screws, you could use a strong craft glue to secure the chains to the stick or dowel. Be very careful not to get glue where you don’t want it. Also, if you are using glue, make sure that you have secured the chain with a knot before trimming it, to make sure it doesn’t unravel.


1 thought on “Boho Crocheted Heart Mobile”
Very nice and easy, I will try with other colours for Easter 🐣