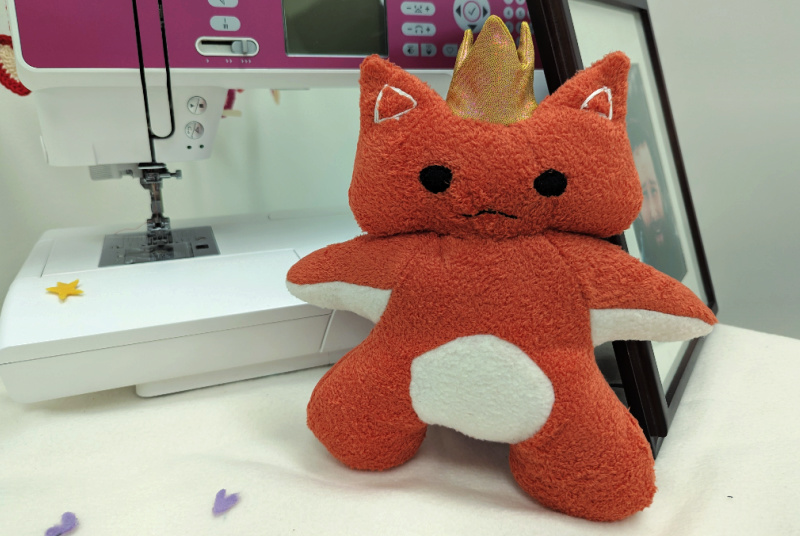
We put together this super adorable Stuffed Animal DIY for you! Including the free downloadable pattern! Now, I’ve never sewn a stuffed animal let alone made a stuffed animal pattern, but I think it turned out pretty darn cute. You can make the stuffy quite unique by using different coloured fabrics, or even one colour of fabric. Personally I love Orange Tabby Cats and thought this stuffed animal design would be perfect for my 2-year-old niece. I’m calling him King Cat and I hope he is well loved for years to come.
Materials Needed
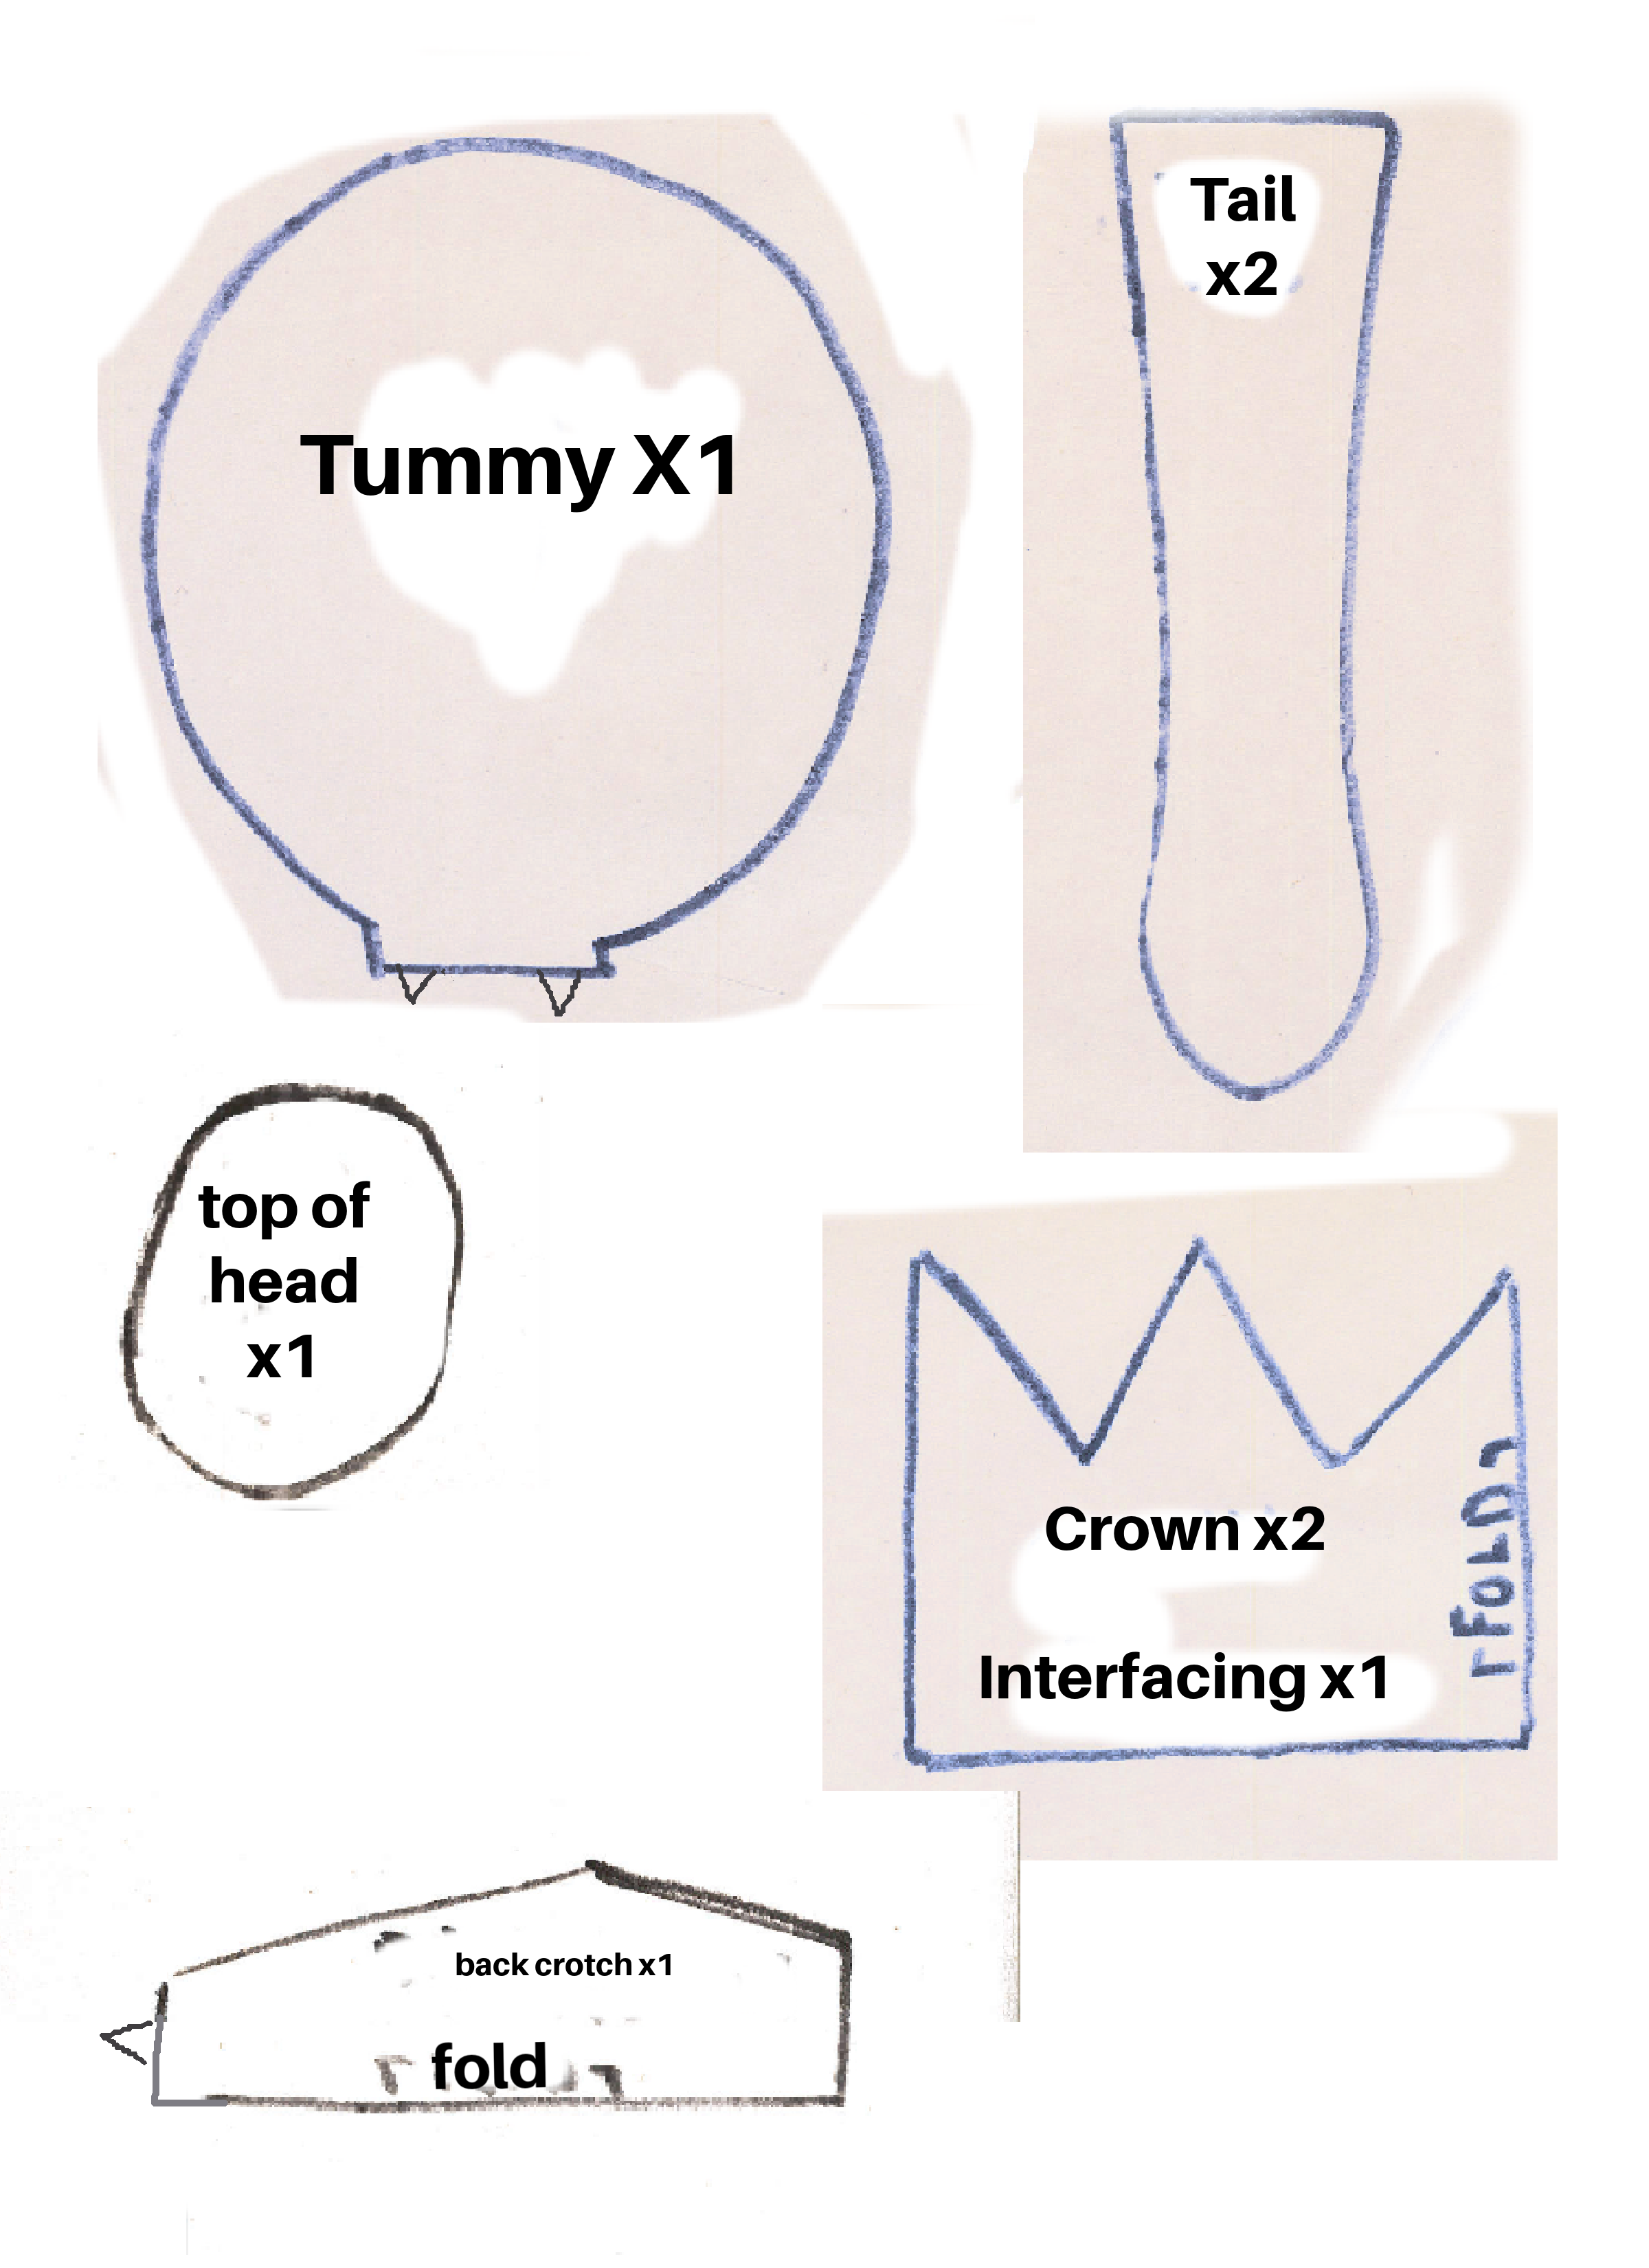
Materials needed for making a solid colour cat.
- 1/3 yard of Fleece (or equally stretchy fabric.)
- We highly recommend using Fleece since other woven fabrics may not be as forgiving or easy to sew for this pattern
- 9″ felt, cotton, or woven fabric for the crown.
- Consider using a different “hat” pattern for your stuffed animal too! A sailor’s hat, a baseball cap, or a train conductor’s hat could be super cute! Just make sure the circular opening is the same diameter as the crown pattern provided here.
- 9″ or less of interfacing for the crown. (I prefer iron on Pellon because it is stiff enough to keep its shape, but any heavy weight interfacing will do).
- Polyfil for stuffing your stuffed animal.
- Matching thread for your fleece and crown fabric.
- Embroidery floss for the eyes, mouth, and ears.
- If you are planning to gift this to a child, do not use buttons or other appliqués that may come off and pose a choking hazard.
- Hand sewing needle
- Sewing scissors
- Paper scissors
- An Iron and Sewing machine
- Your Free PDF pattern! The pattern is scaled to print on 8×11 paper. 3 pages in total to be printed.
Materials needed for making a multi-coloured cat.
- 1/3 Fleece (main body)
- 6-12 inches of contrasting Fleece (for Tummy and Arms Back pattern pieces)
All other materials required are the same as the previous list.
Our pattern pieces are all sewn with a 1/2″ seam allowance unless noted otherwise directly in the instructions.
Sewing Instructions
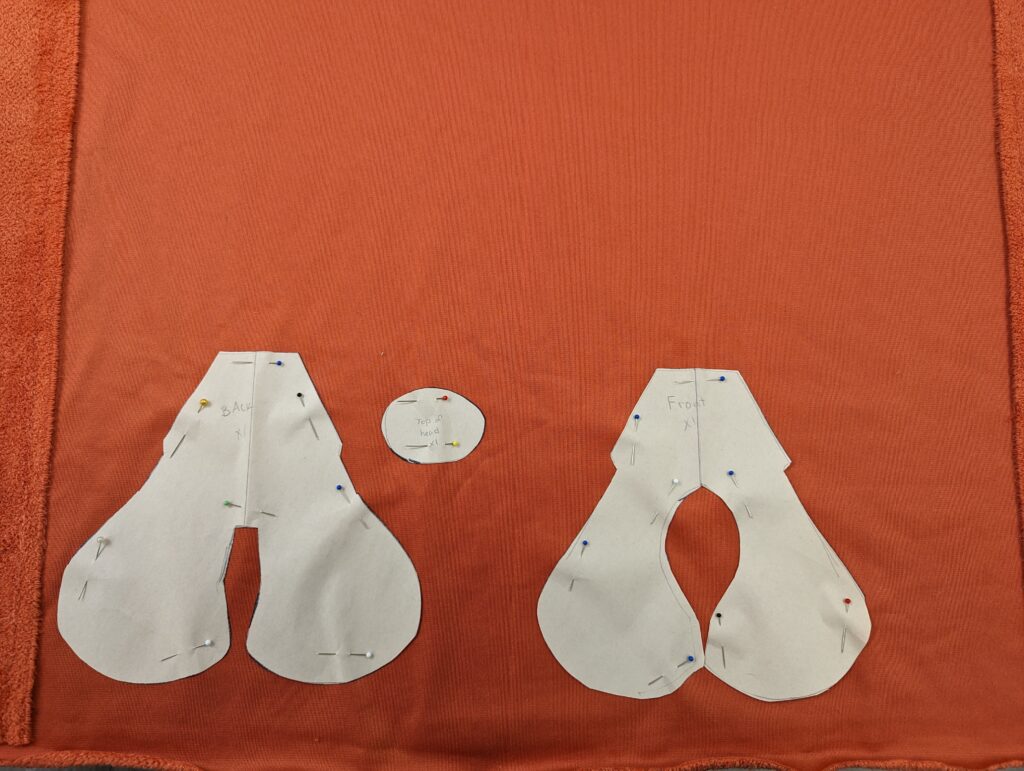
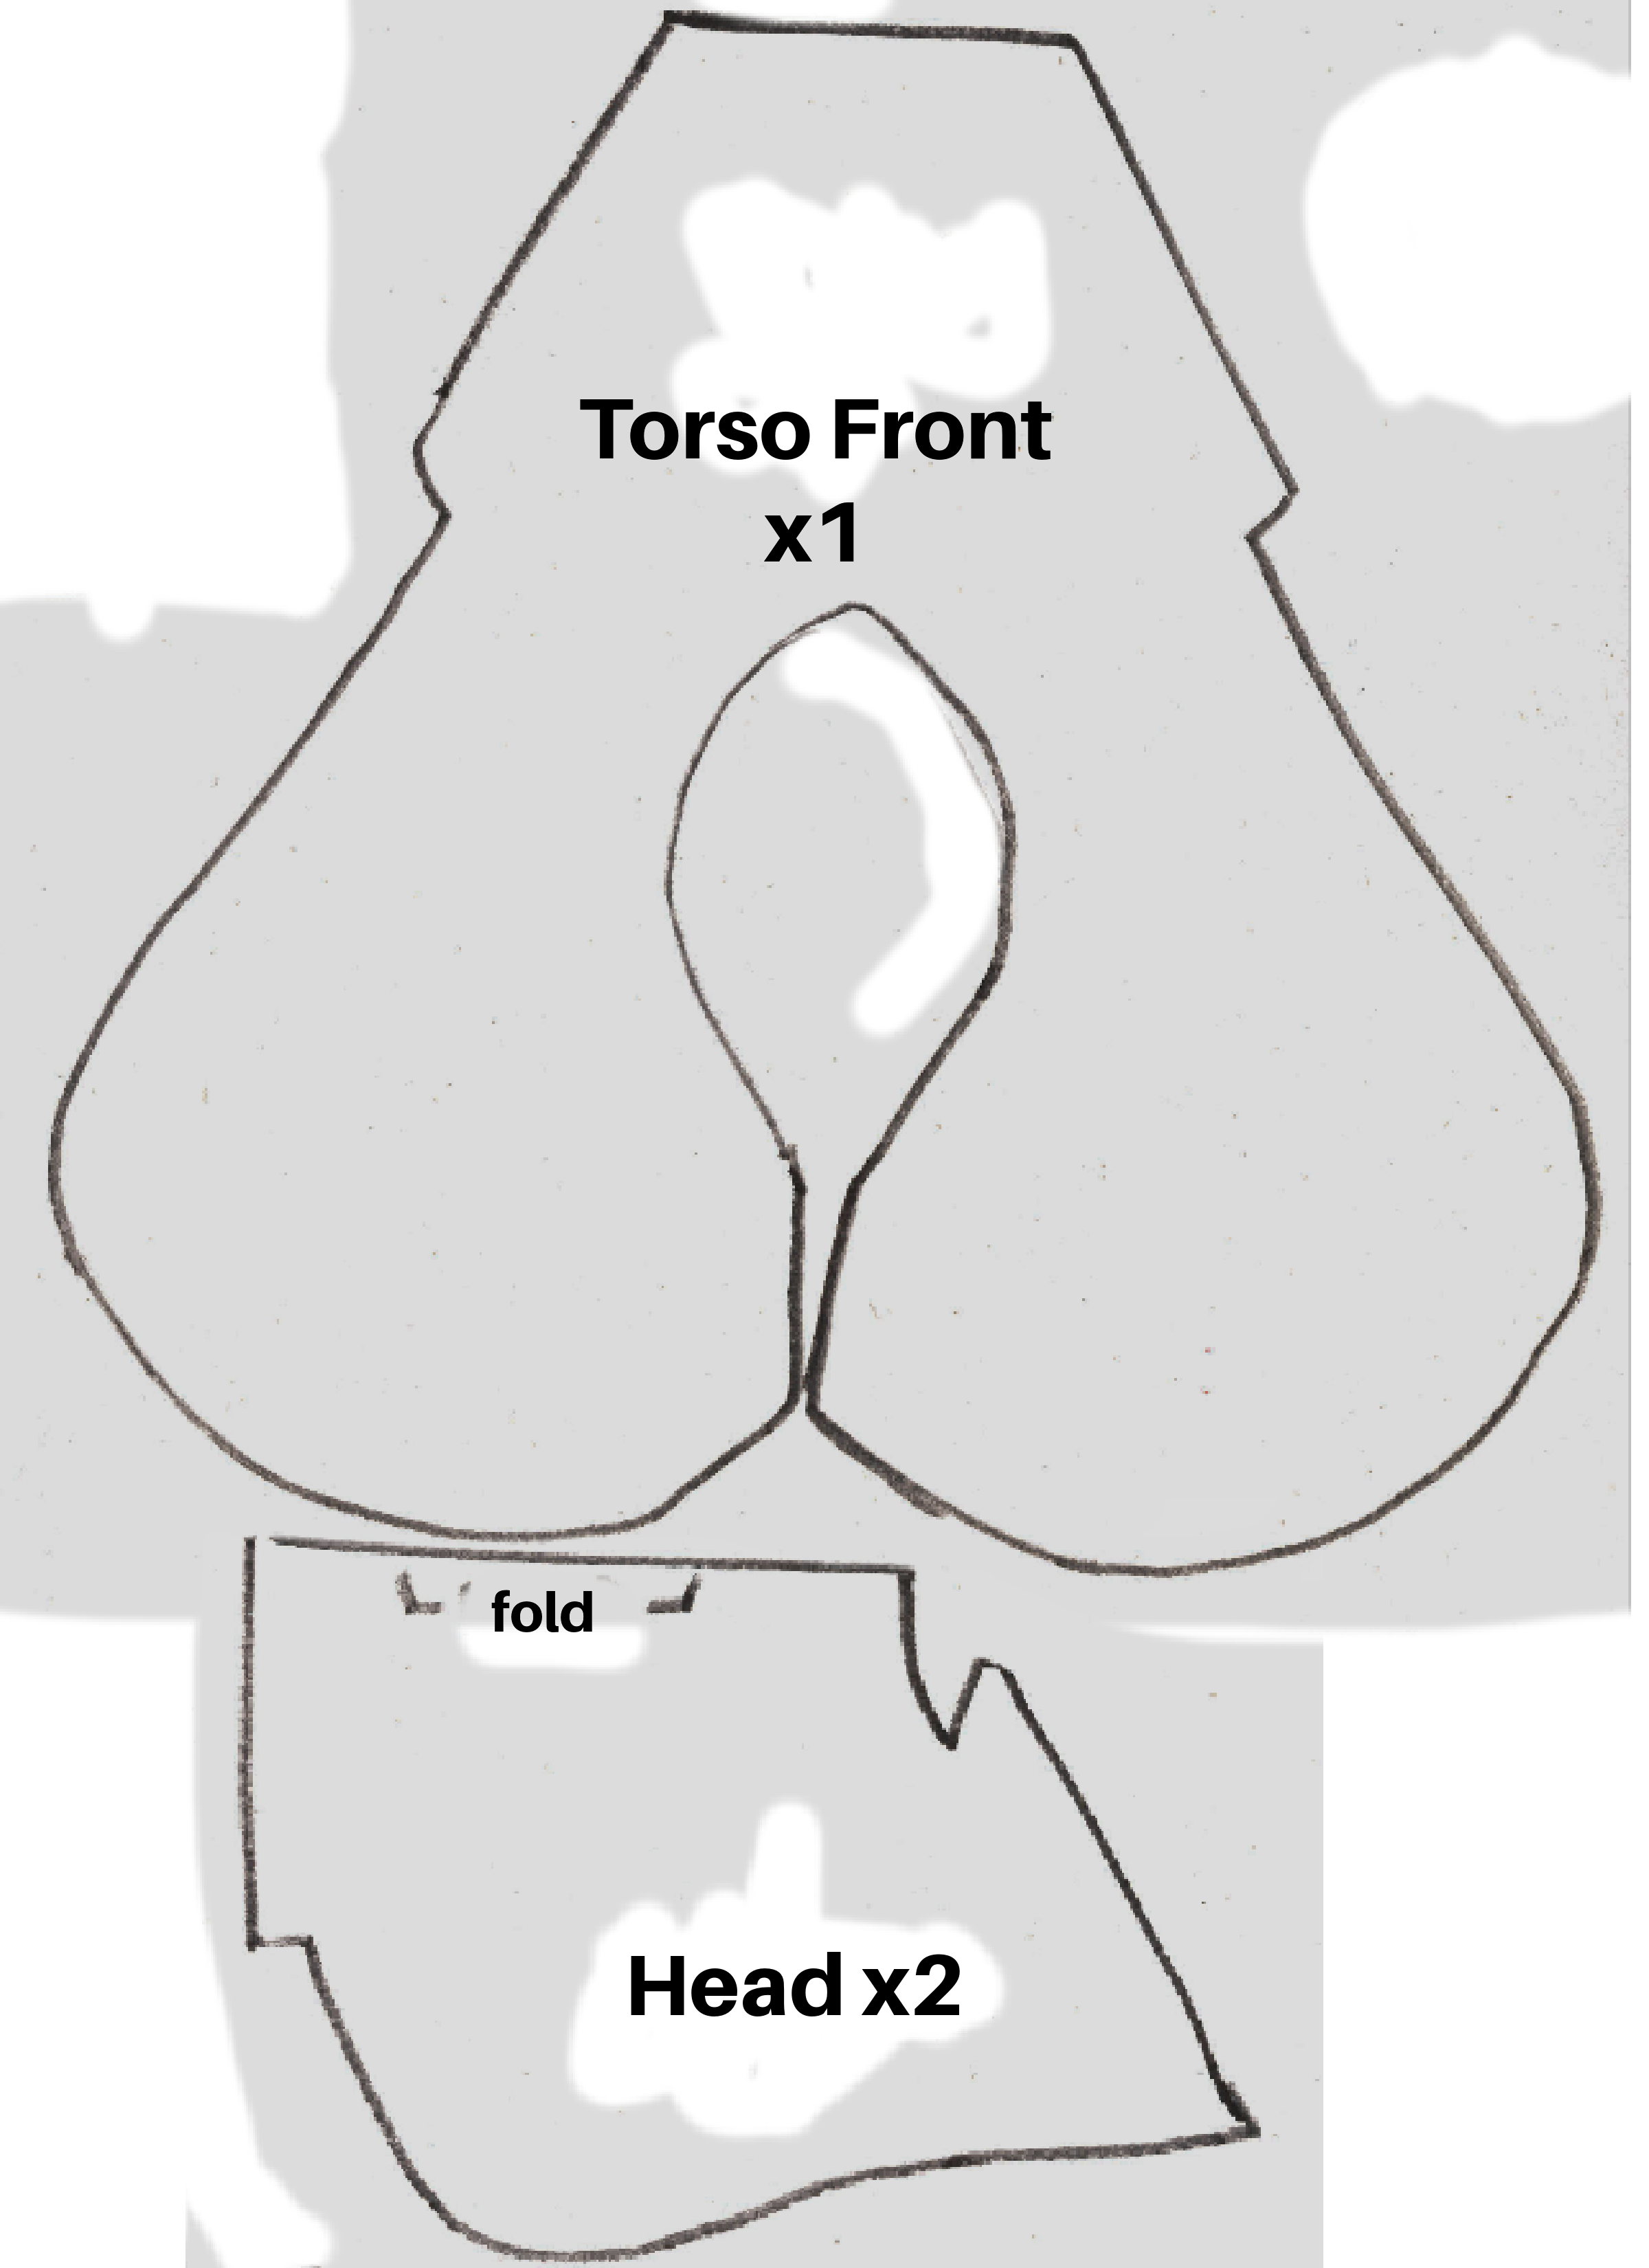
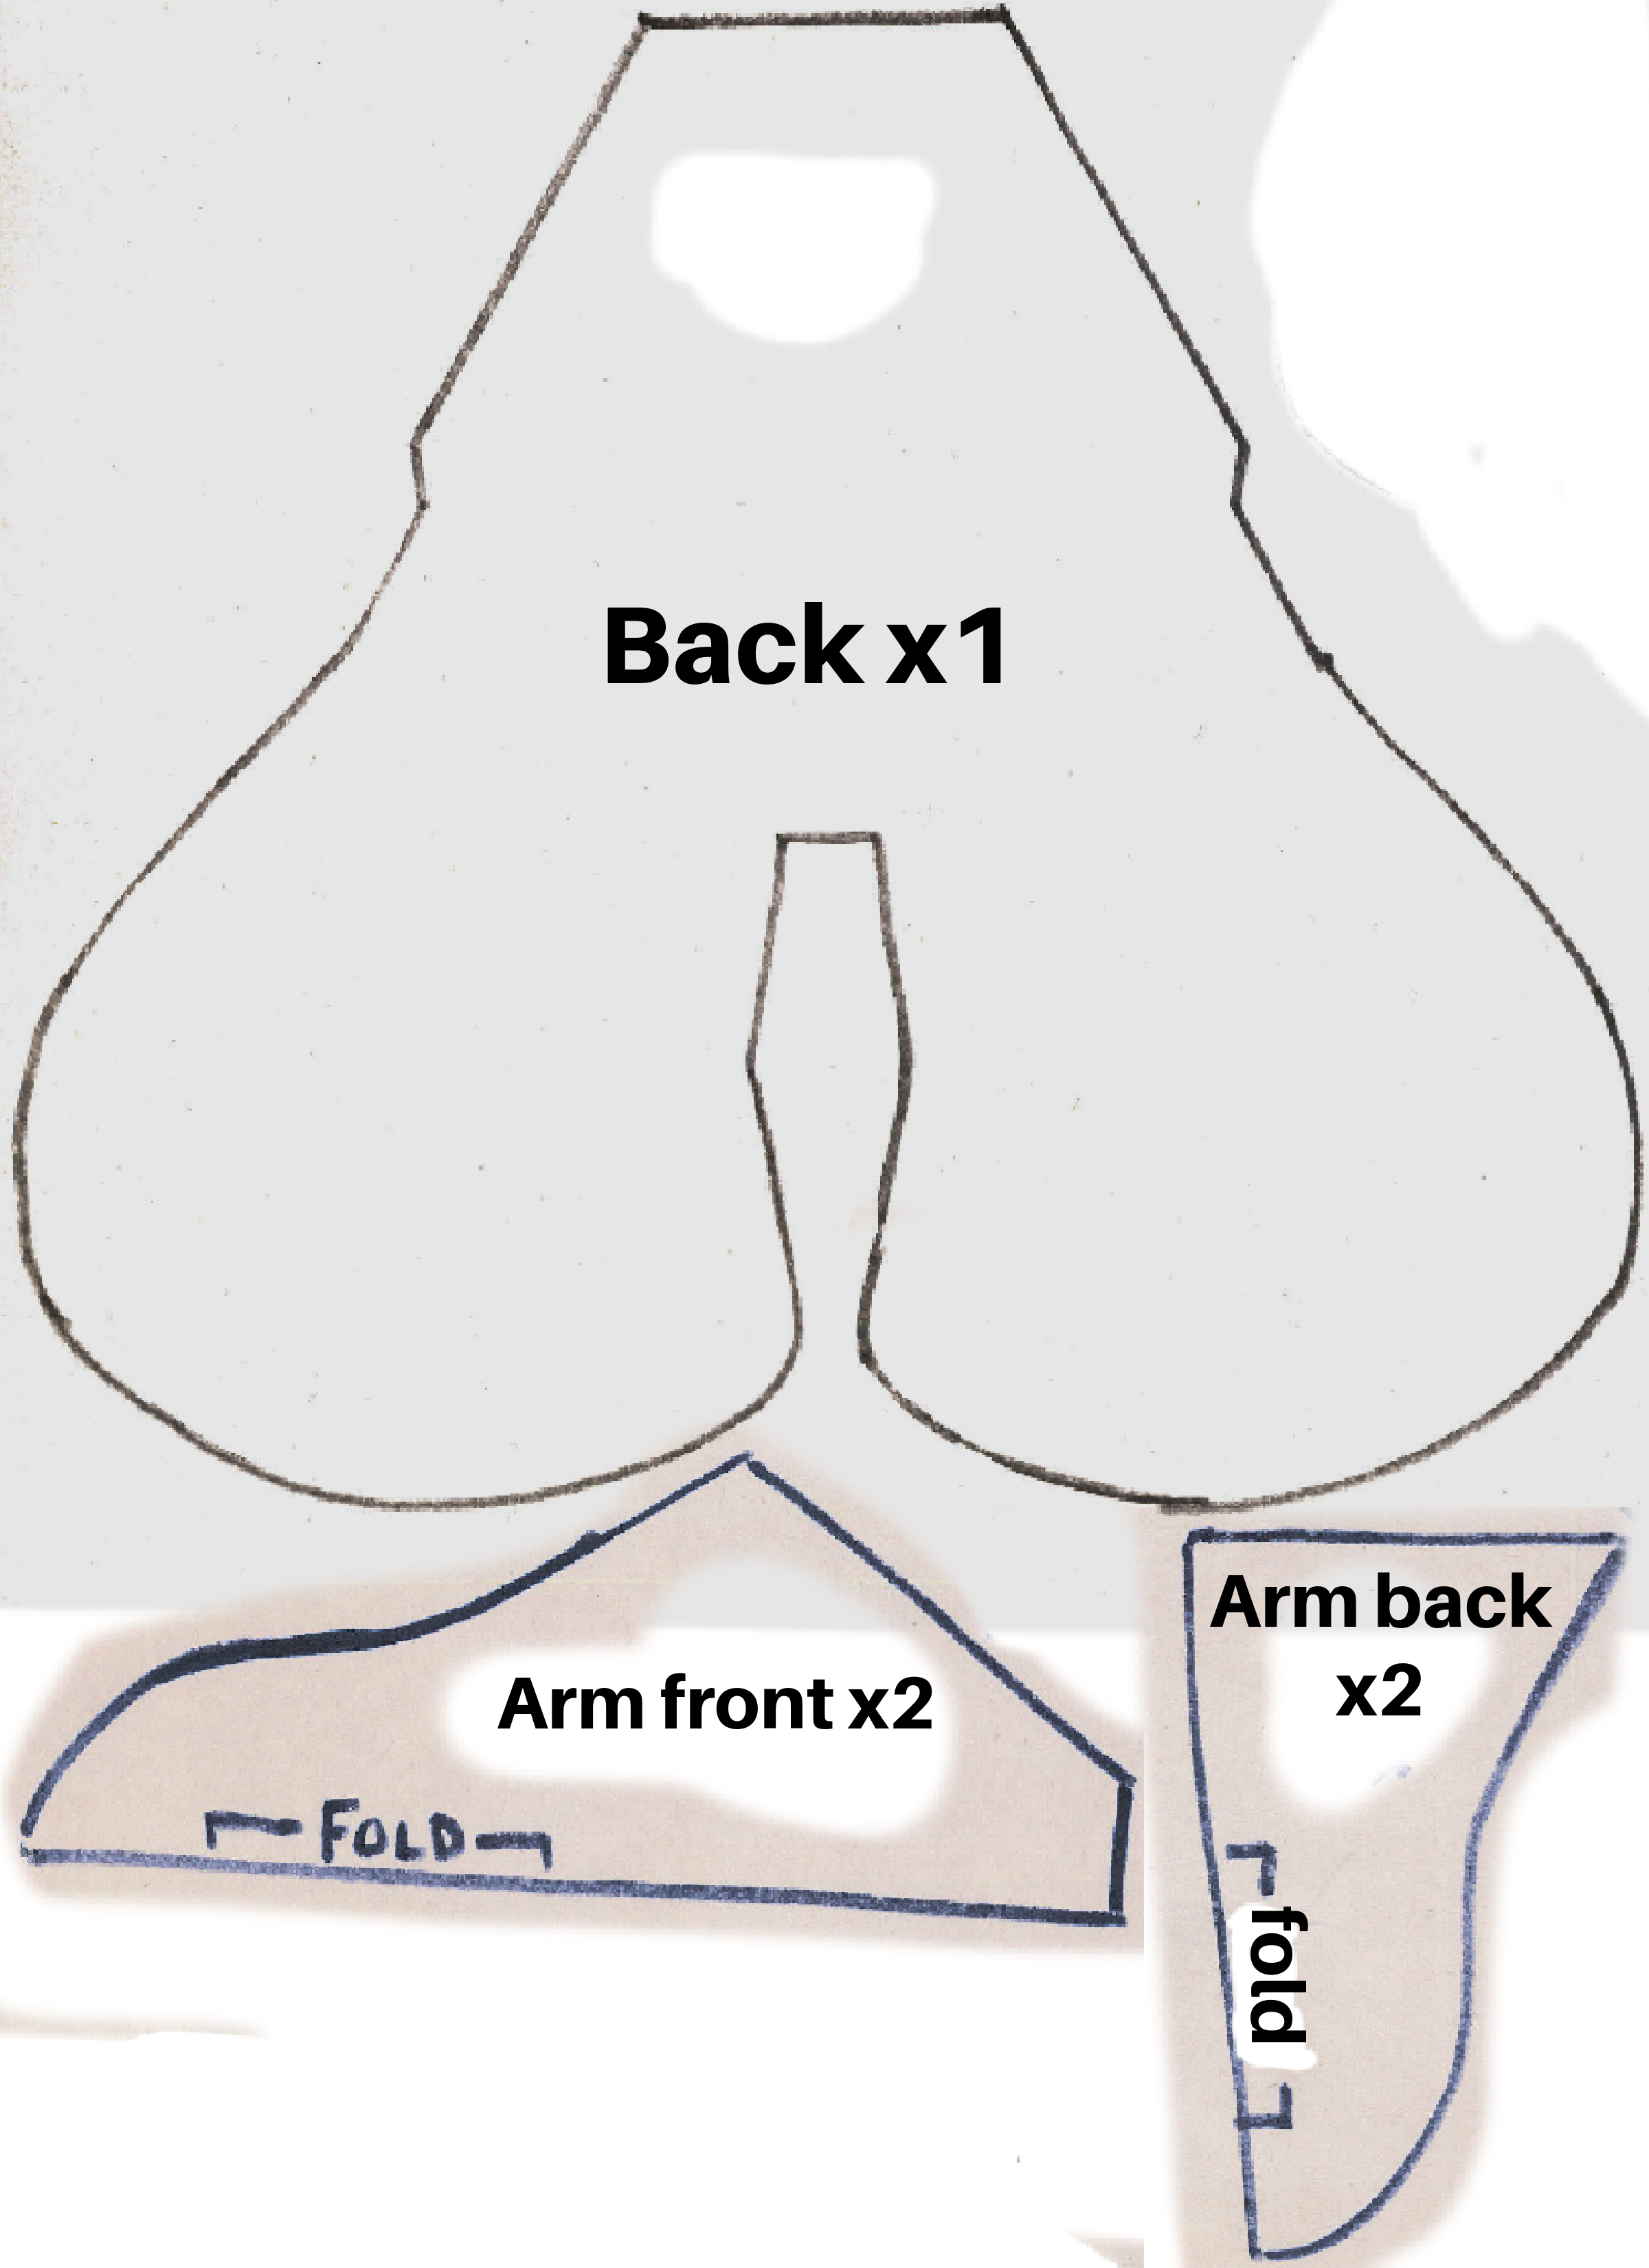
Step 1: Wash your fabric! Since this is a stuffed animal, you will not be able to wash it as often and the fabric should be clean! Cut out your pattern using the free pattern downloads above. Since many of these pieces are cut on the fold, and a few are “cut 1” pattern pieces, open your fabric up and fold it so you have a smaller section to cut as shown below.
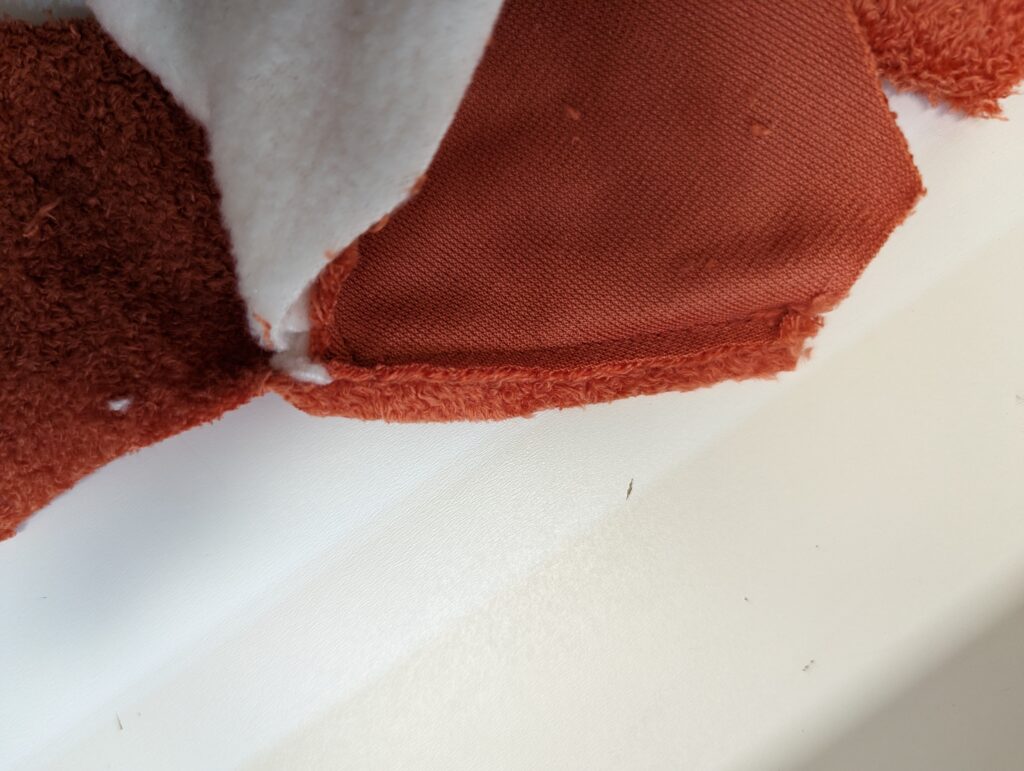
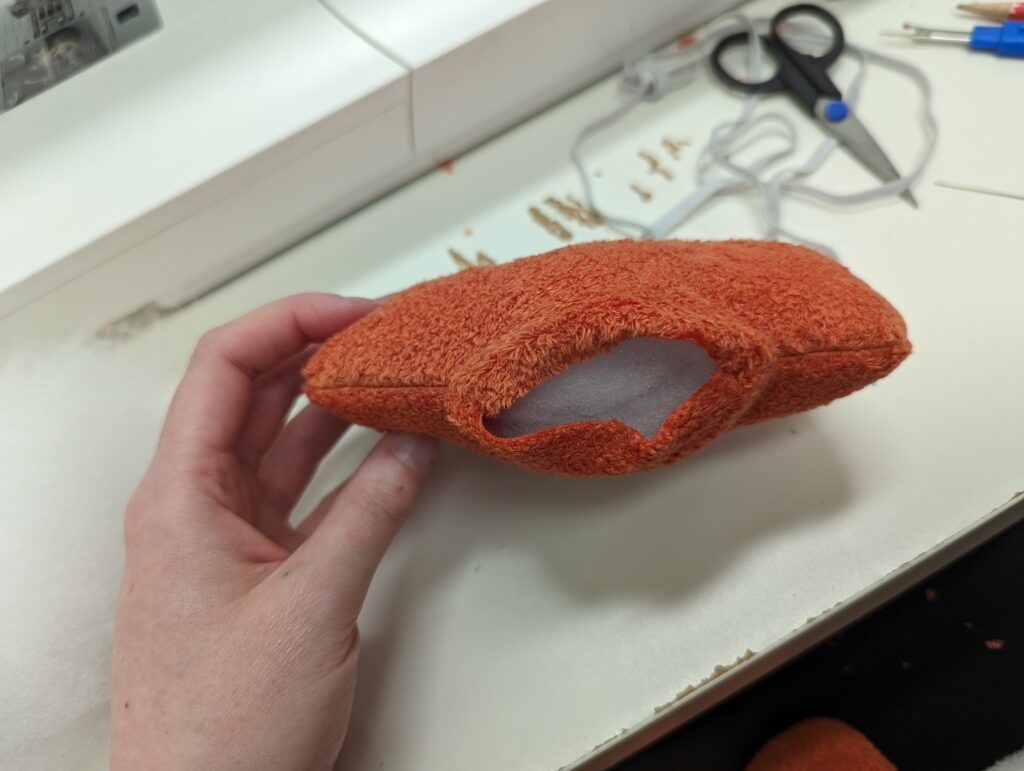
Step 2: Pin and sew the Tummy and Back Crotch together at the adjoining points, raw edges facing the wrong side of the fabric. Then pin and sew the Arm Front and Arm Back pieces together. Sew from the upper curve to the rounded bottom and back up the curve so the top is still open (image 2.3).
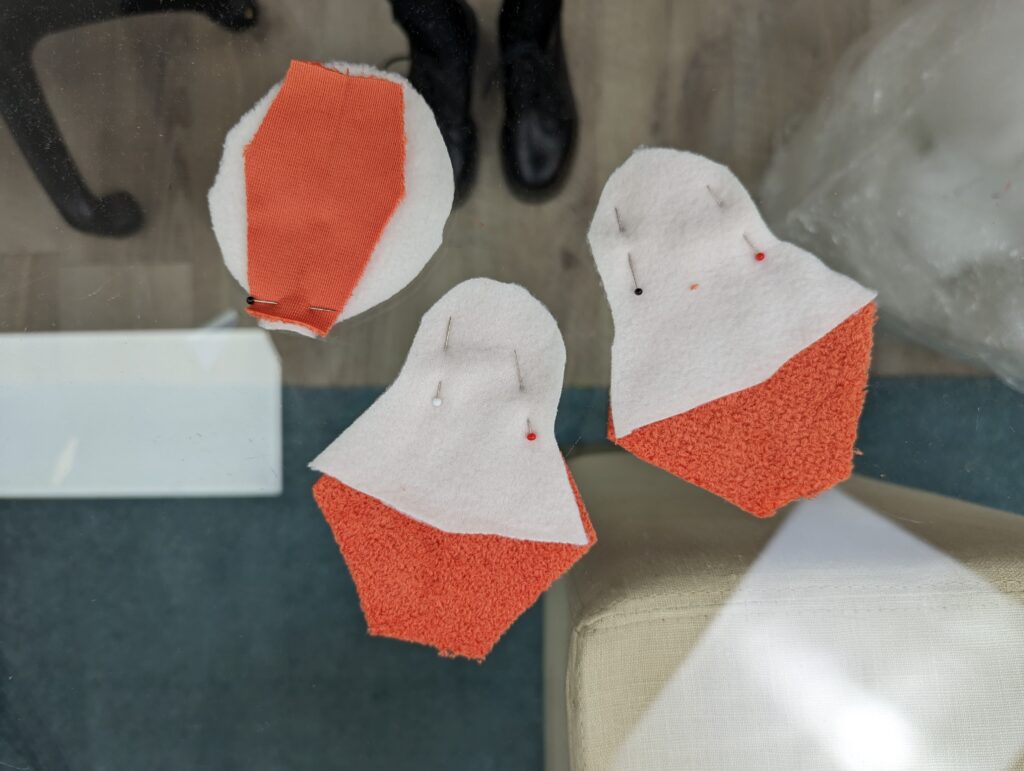
Around the curved edges of the arm, make small snips without cutting into the seam (see image 2.3). This will help the arm to turn smoother.
Step 3: Sew the Tummy piece to the Torso Front piece, taking care around the curves. Make sure all seams are facing inwards, towards the wrong side of the fabric. Do not sew the Back Crotch to the legs or other pattern pieces yet.
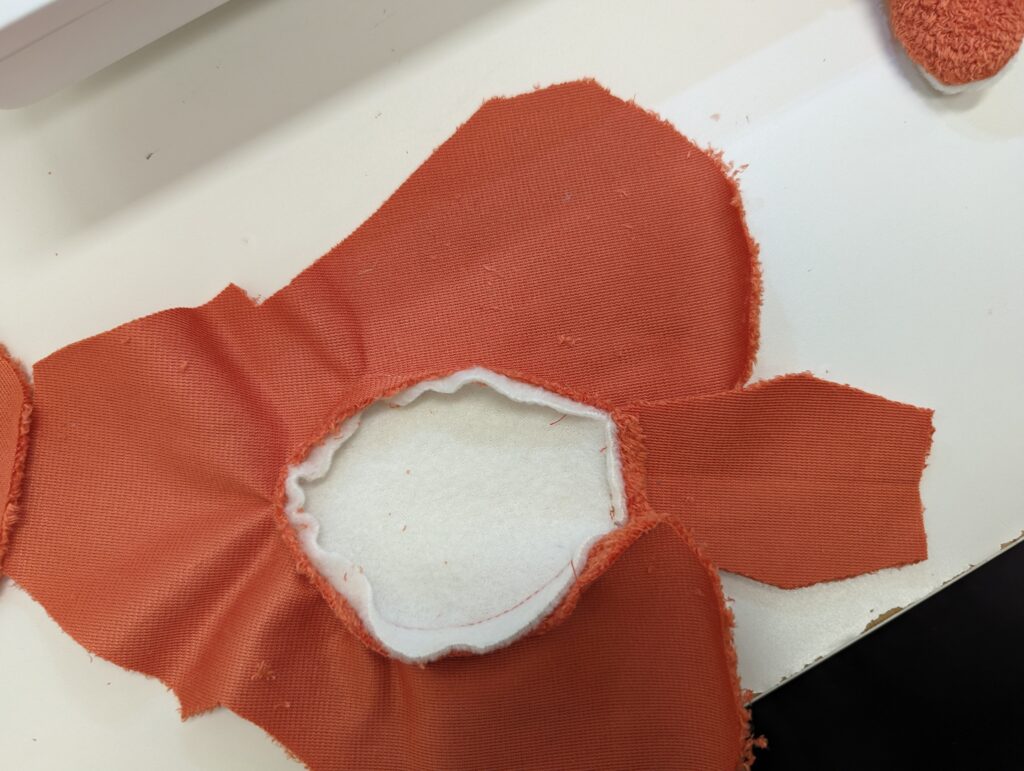
Clip around the curves of the Tummy like you did with the arms.
Step 4: Pin and sew the completed Arm to pattern piece Back. The straight edges should match up. Only sew the straight raglan sleeve edge for now. Repeat this process by pinning and sewing the Arm to the Torso Front piece. Grade the seams.
Step 5: Turn Arm inside out and pinch the under arm seam so it lines up with the adjoining Back and Front pattern piece. Sew one side at a time.
Sew the side seams and the balls of the feet of the stuffed animal.
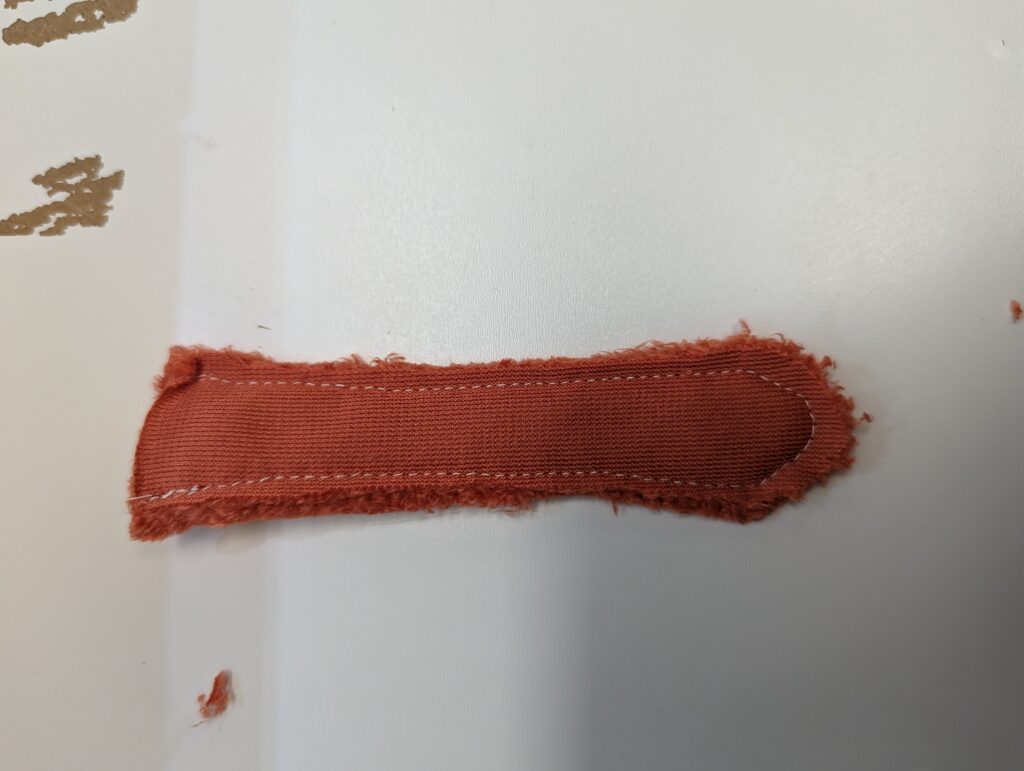
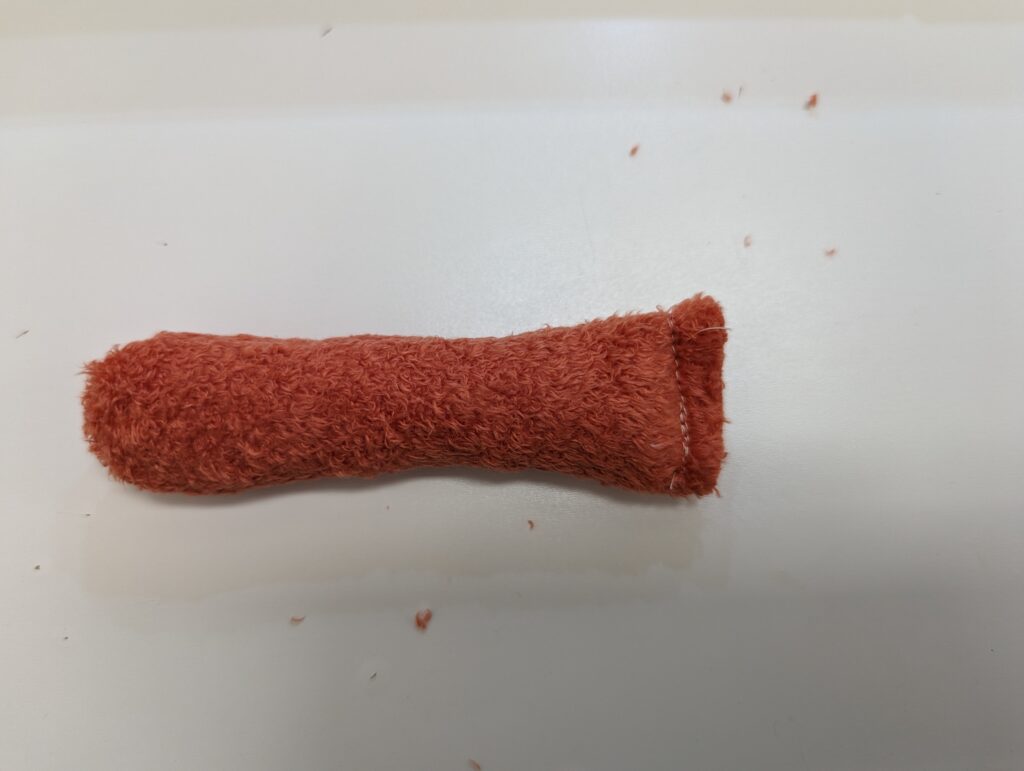
Step 6: Sew the Tail pattern pieces together, leaving the top open. Turn right-side out and stuff with polyfil and sew the top shut. Careful not to over stuff the top so you have room to sew the tail to the back of the stuffy.
Step 7: Pin the top of the Tail to the top of the hole on the Back of the stuffy. The tail should be pinned so the end of the tail is turned up towards the neckhole, this way when you sew the back flap closed with the Back Crotch pattern piece the raw edges will be hidden inside. Sew the tail in place.
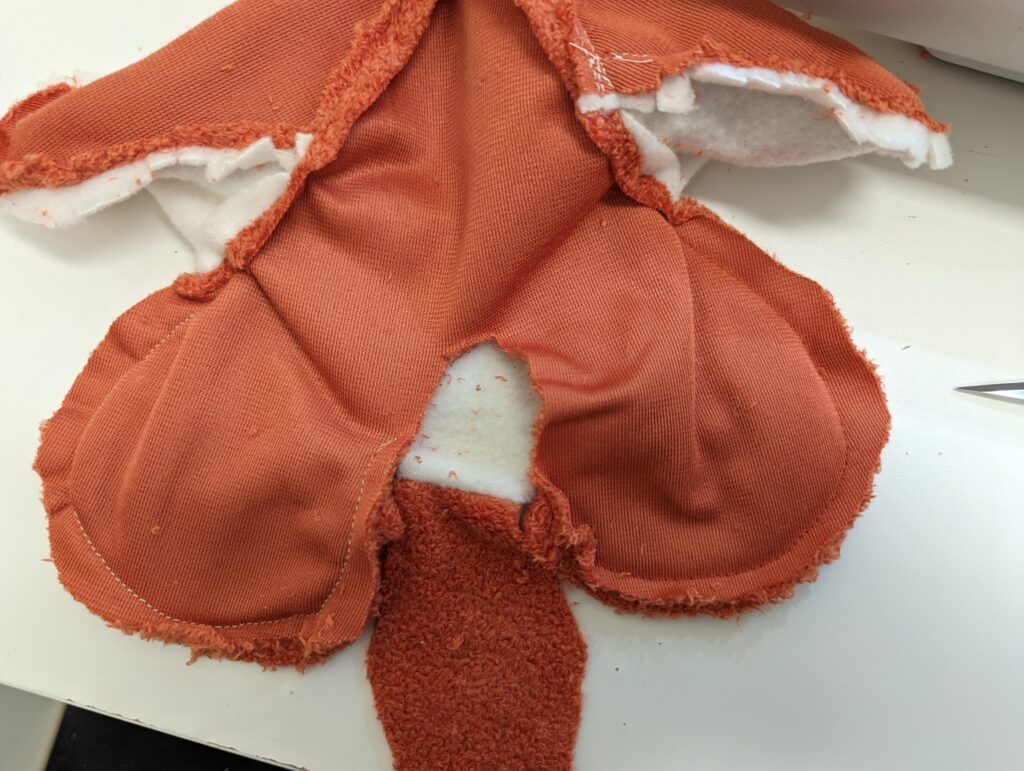
Turn your stuffy right-side out, leave back flap open for now.
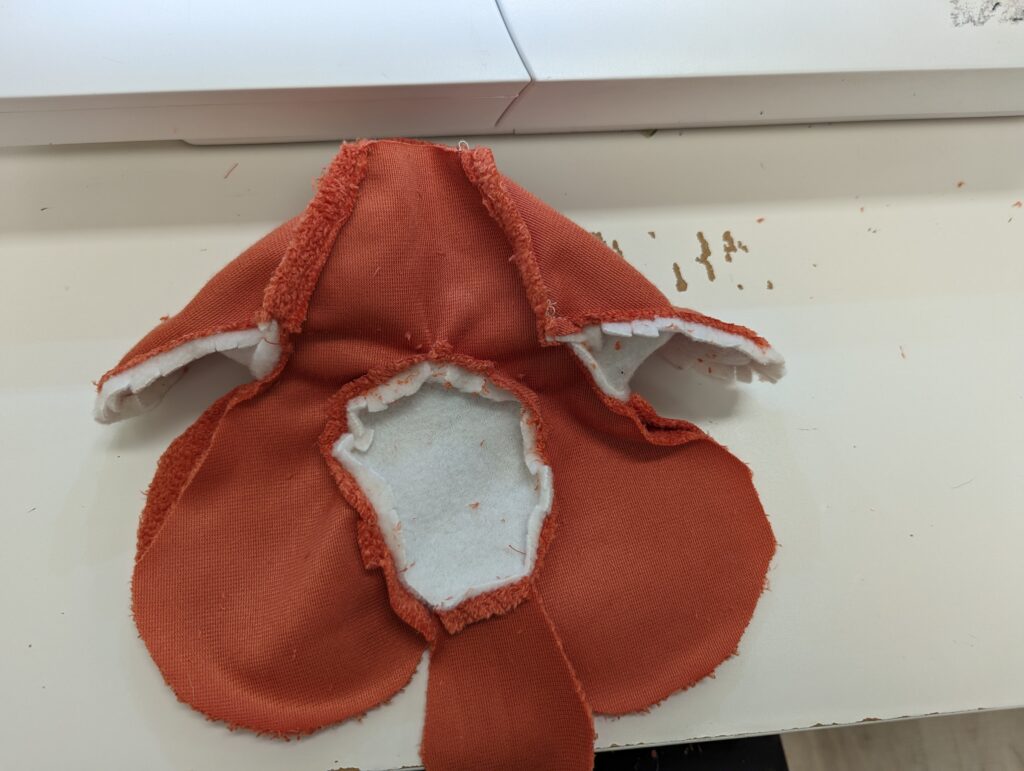
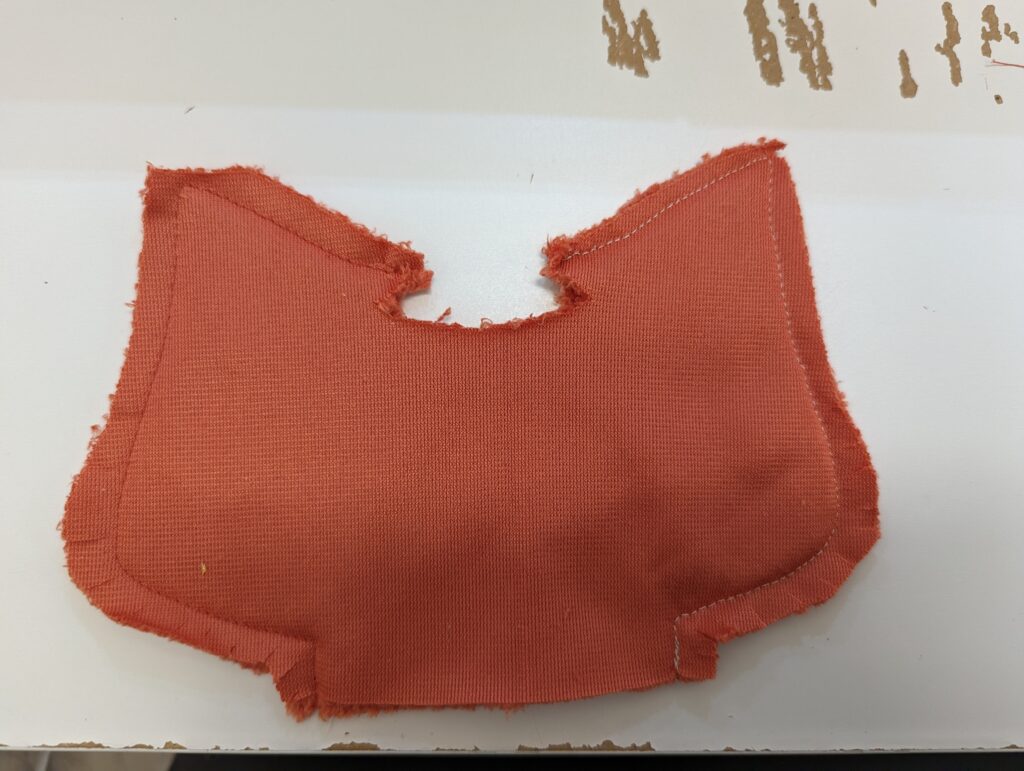
Step 8: Sew your two Head pattern pieces together. Make sure to leave the hole at the top of the head open and the neck hole open. Clip the curves and trim the top of the seams off, taking care not to cut into the stitches.
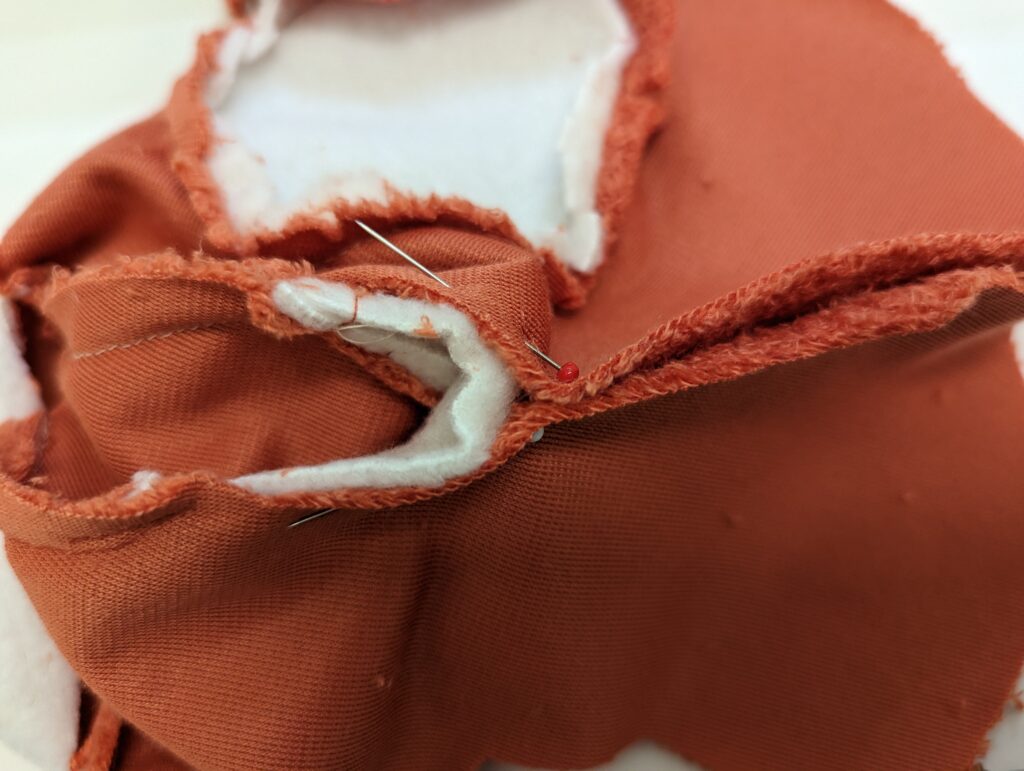
Step 9: Grab your Crown and interfacing. Iron the interfacing onto one side of your crown (wrong side together). Pin and sew the two Crown pieces together and sew. I back stitched at the “valleys” of the crown to make sure it was secure (image 8.3).
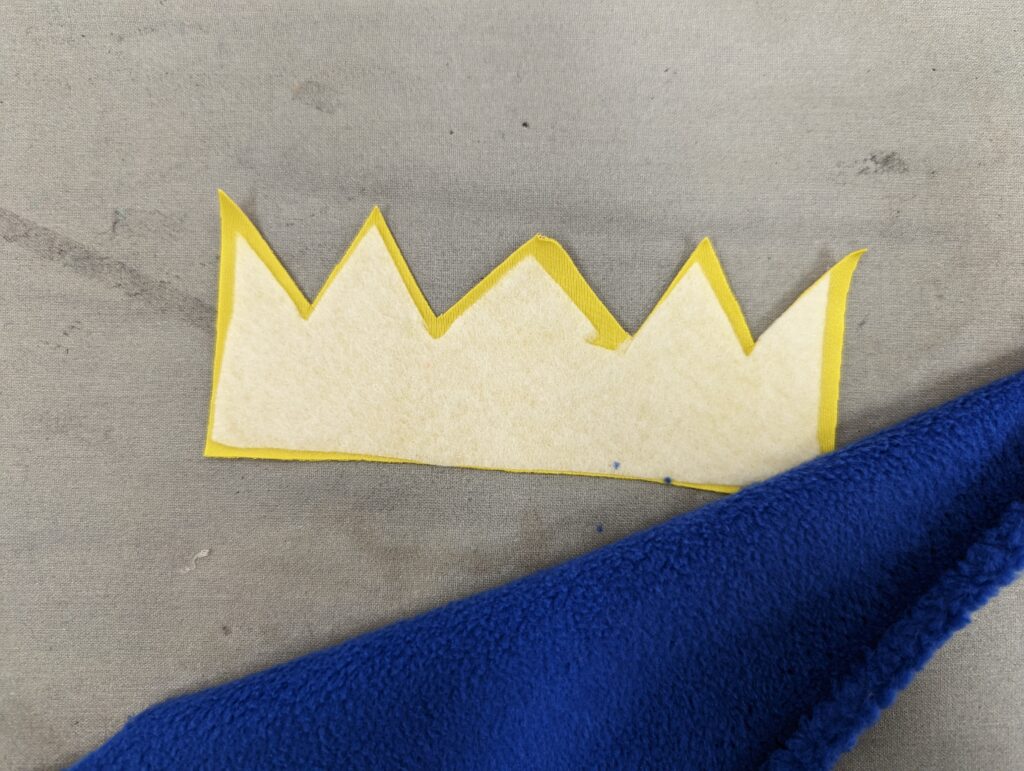
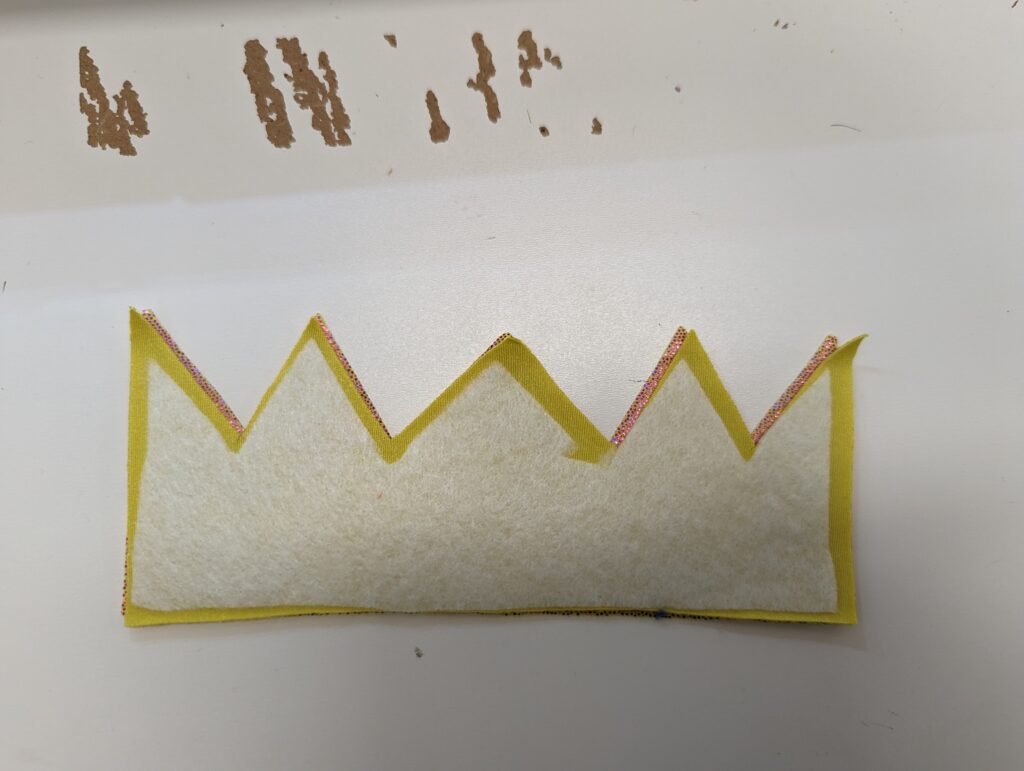
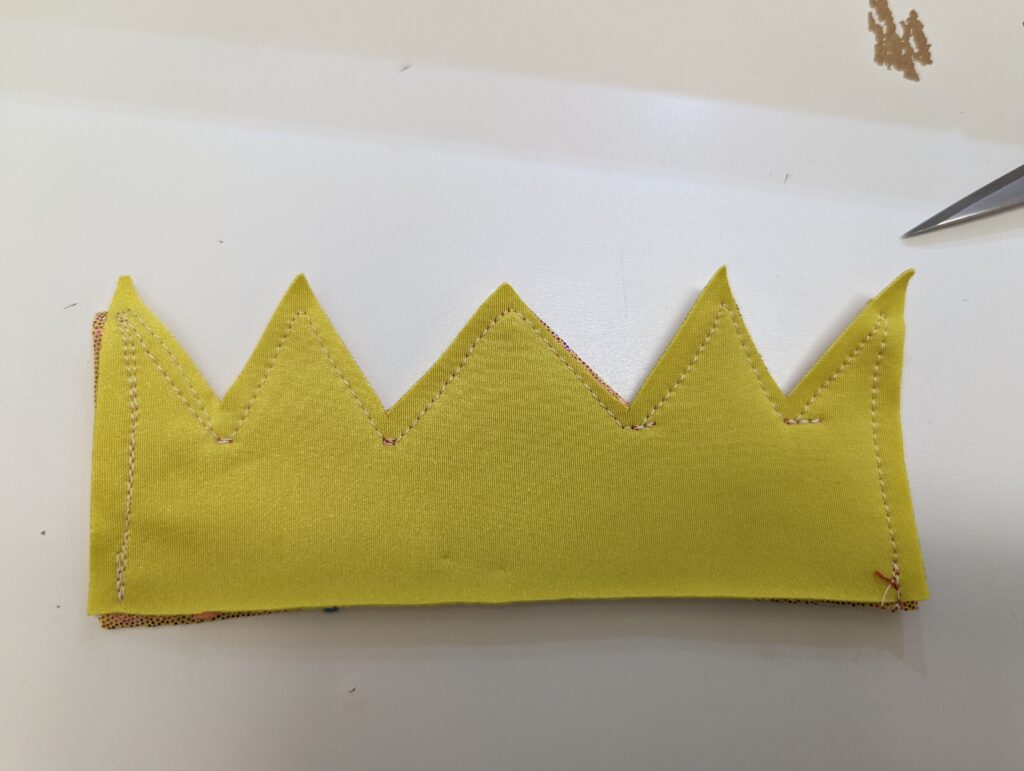
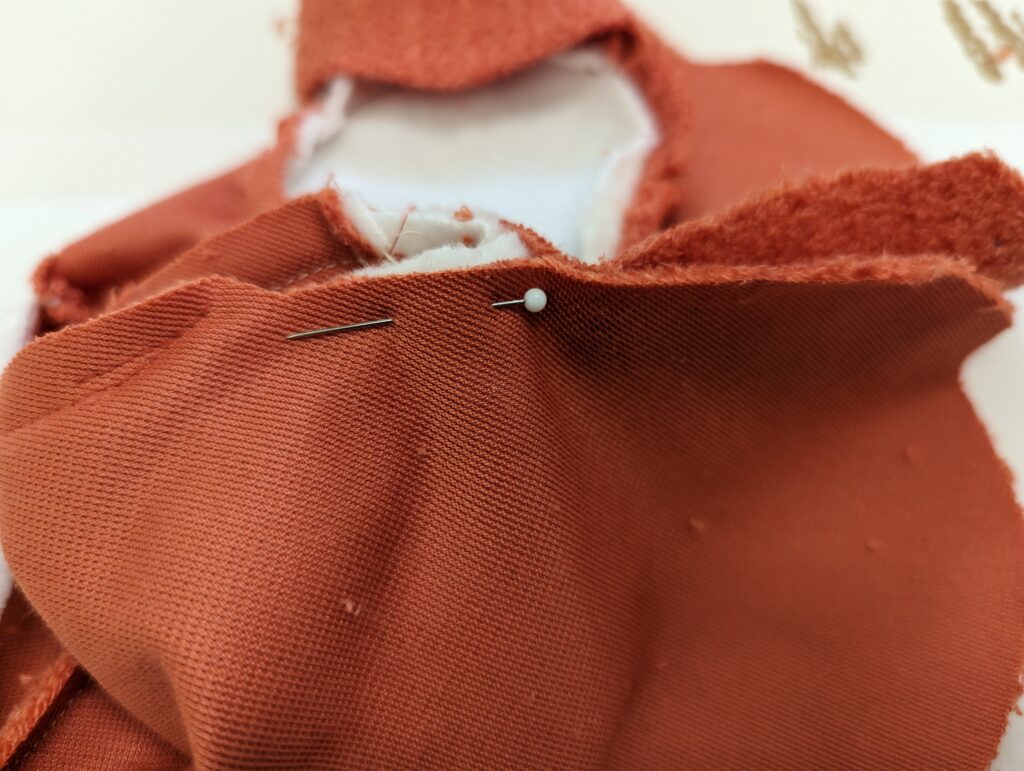
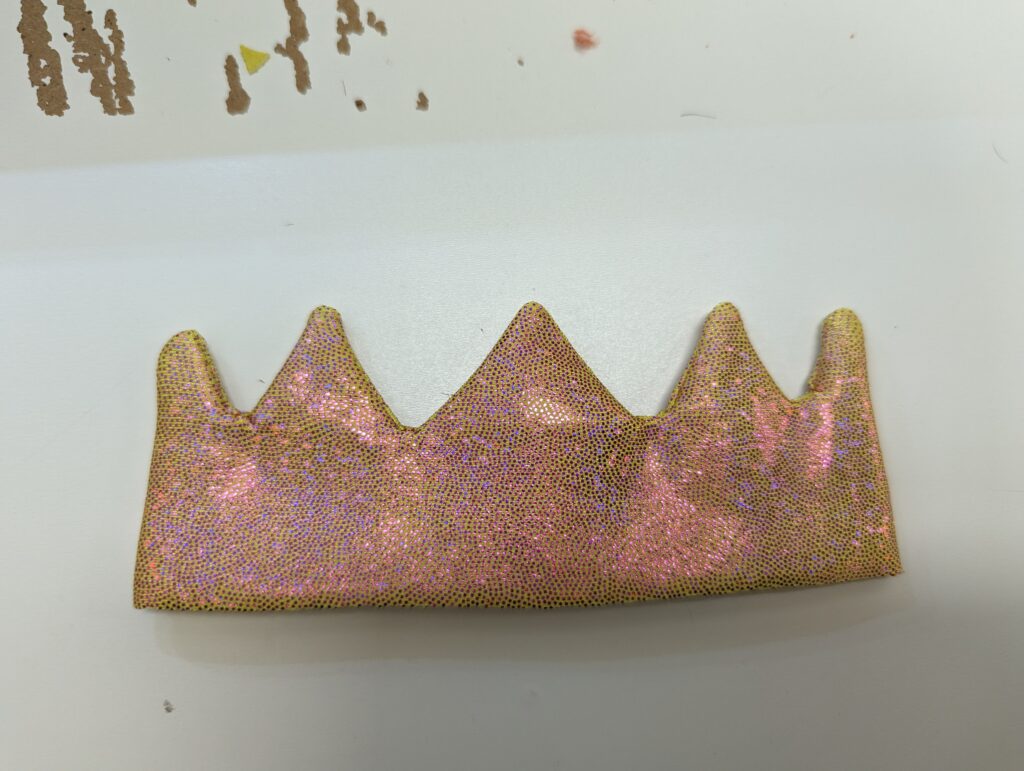
Clip the points of your crown, taking care not to cut too close to the seam. Make a small snip in each “valley” of the crown without cutting the seam (image 8.4). This will make your corners sharper. Turn your crown right-side out, using a point turner if needed. Using a hand sewing needle, stitch the bottom of your crown together so it creates a circle (image 8.6). It may be useful to stay-stitch the bottom of the crown together to make the next step easier to sew.

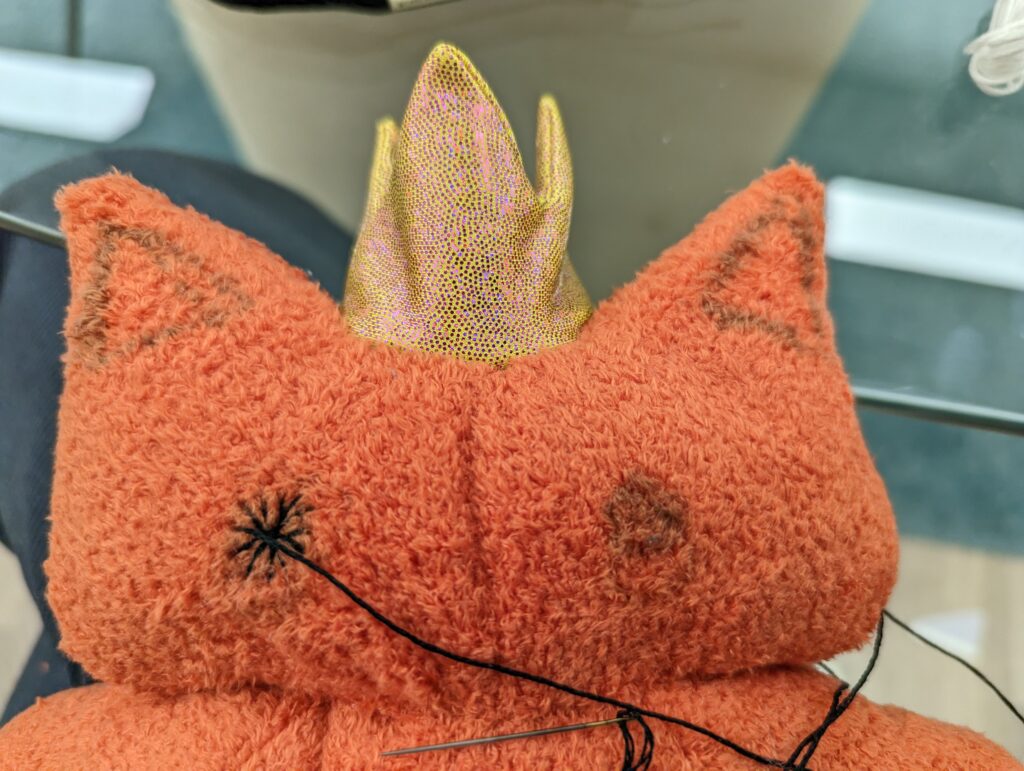
Step 10: Hand-sew the Top of Head pattern piece to the bottom of the Crown. Make sure to leave an over-hang/seam allowance. Using that seam allowance, hand-sew the Crown with the Top of Head piece to the hole at the top of the Head pattern piece. Make sure your fabric has the right-side facing out so your invisible stitch has the seams facing the right direction!
Step 11: Hand-sew the Back Crotch piece to the hole on the back of the torso. The flap should sit snuggly and should not take away any of the “curve” of the legs. The legs should be sewn to the crotch already. Make sure that you sew the raw edges of the tail so that they are on the inside of the stuffed animal. Make sure you are sewing with the right-side facing out so the seams are hidden.
Stuff your Torso and Head piece with polyfil! Make sure it is packed tight.
Step 12: Hand sew the head of your stuffed animal to the torso. Make sure the “neck” is inside the neck hole so the head fits snugly. I wanted the head to be very close to the torso so I used the bottom 3/4″ of the head/cheeks to secure it to the stuffy’s shoulders.
Next grab your embroidery floss! I sketched out where I wanted the eyes, mouth, and ears to be using a fabric marker. I used a wide chain stitch to fill in the eyes after marking the eyes out with a simple straight stitch.
And just like that you’re done! I found sewing a stuffed animal wasn’t too hard once I had all the pieces laid out. This is a pretty easy design and a great stuffy to sew as a first timer. If you want to make it easier on yourself simply fill in the “hole” at the top of the head and skip the crown sewing portion since that is the trickiest part of the sewing.
Let us know how you did! Share what you created and don’t forget we’re always here to answer questions. Comment below or message us on Facebook and Instagram. We love interacting with fellow sewists on our posts. Until next time!


