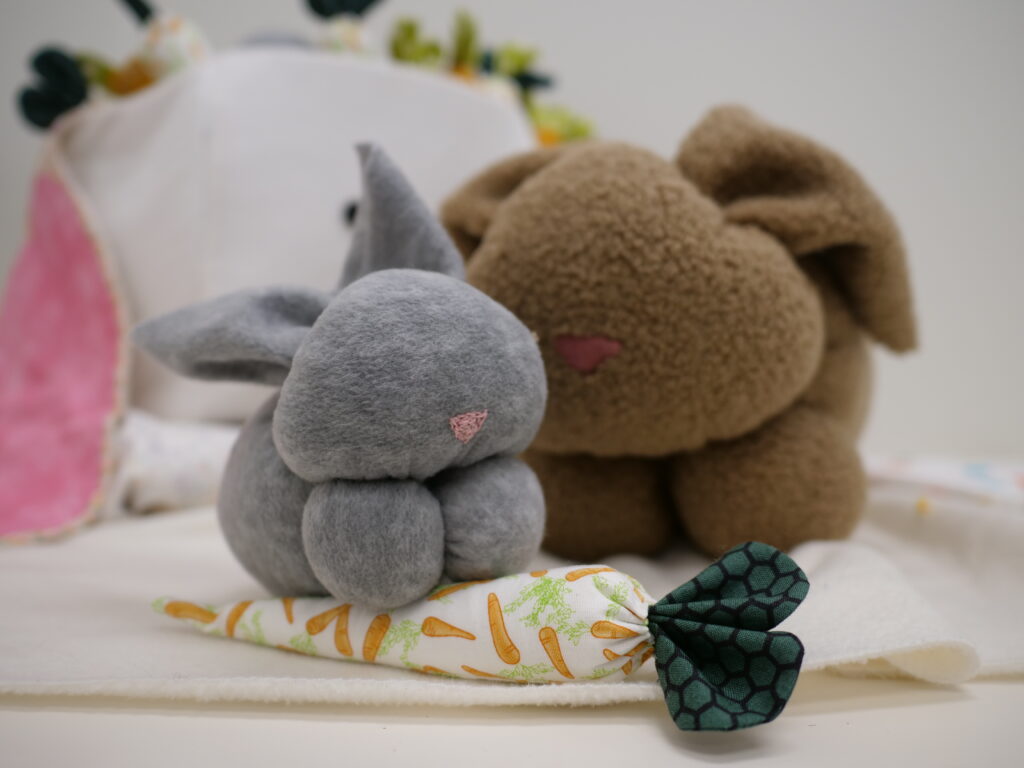
Looking for some adorable bunny decor? It’s always better to gift a toy bunny then a real bunny on Easter, so why not learn how to make one and use up those scraps? You can either buy new yardage for this fast project, or use up some left over fabric from another project! This bunny DIY was put together by our staff at the Coquitlam store that were inspired by some crochet designs online! The DIY was adjusted to work with fabric too and written out for everyone to enjoy. Let’s get hopping.
Material Needed
Make sure to check the size guide below to know how much fabric and stuffing you need for each sized rabbit!
- Fabric (any fabric that doesn’t fray at the edges)
- Fleece
- Crocheted or knitted squares and circles
- Hemmed or fray checked cottons
- Heavy duty thread
- Hand sewing needle
- Scissors
- Tailors Chalk or Pins
- Stuffing/Batting
- For sizes A & B: A few handfuls
- For size C: One bag
- For size D: 30″ x 30″ pillow form
Cutting Size Guide
Sizes
Size A) 12″ square (or 1/4 yard = 3 bunnies)
Size B) 16″ square (or 3/8 yard = 2 bunnies)
Size C) 27″ square (or 5/9 yard = 2 bunnies)
Size D) 56.5″ square (or 1.25 yards = 1 bunny)
Body
8.25″ square
11.5″ square
20″ square
42″ square
Tail
2″ square
3″ square
5″ square
10.5″ square
Feet (two)
3″ square
4″ square
7″ square
14.5″ square
Sewing Instructions
Step 1. For A, B, and C mark lines with chalk or pins as seen in image 1. For D mark lines with chalk or pins as in image 2.

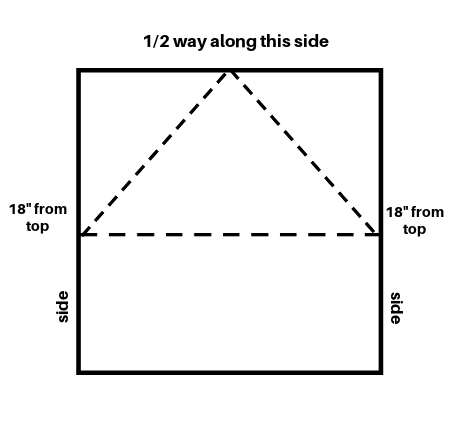
Step 2. Using a gathering stitches, start from one side and stitch around the triangle (shown in images above) using 1 thread. Gather gently and fill the pocket that forms with stuffing.
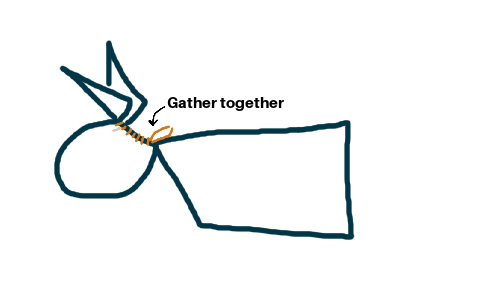
Pull thread tightly and tie off. You’ve now created the head and ears!
Step 3. Using a 1/4″ seam allowance for remaining steps. Bring remaining side portions together with a whip stitch or blanket stitch on the inside.
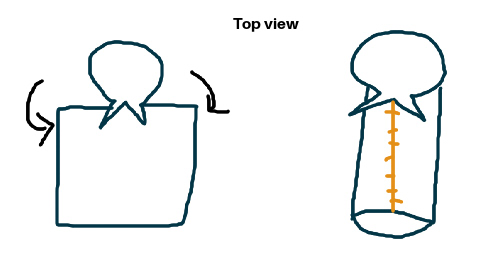
You’ve created the body!
Step 4. Sew a gathering stitch around the open end of the body, stuff the cavity, tighten up the stitches and tie off the circle to form the bum.
Step 5. Grab your foot squares and tail square. Round the corners of the feet and tail squares with scissors or use crochet or knit circles. Using a gather stitch going around the edge, stuff the balls created (tail and feet), tighten and tie off.
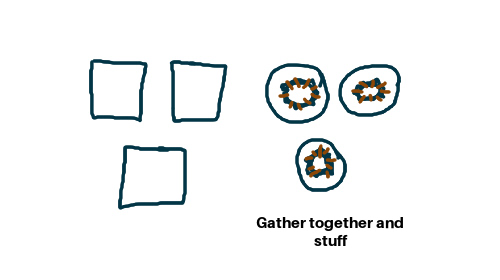
Step 6. Attach tail using a whip stitch until tail is secured to the bum. Repeat this step for both feet, securing the feet to the front of the torso under the bunny’s chin.

Step 7. Stitch head to back if needed and add a nose, eyes, and whiskers! We used an embroidery stitch for this last step, but you can glue on felt triangles/circles.
Now everything is done! Share with us what adorable bunnies you made! Or you can head to the Fabricana Coquitlam store to see our GIANT bunny in person. Happy Easter!