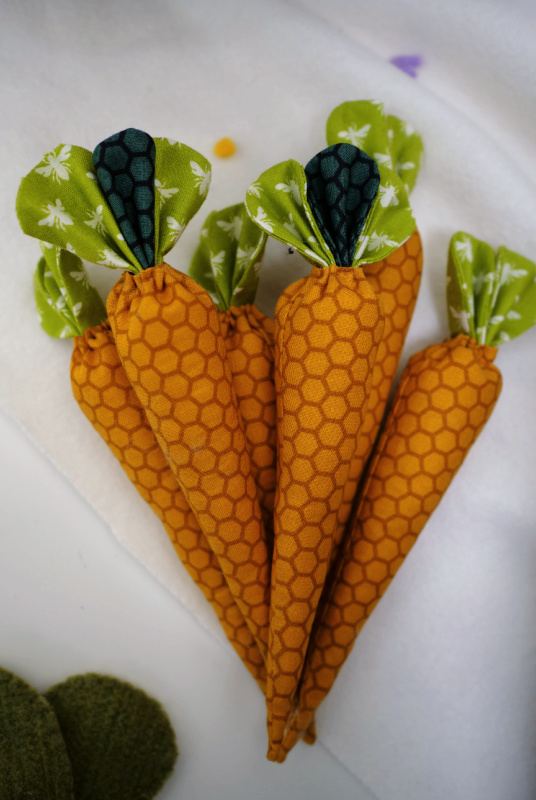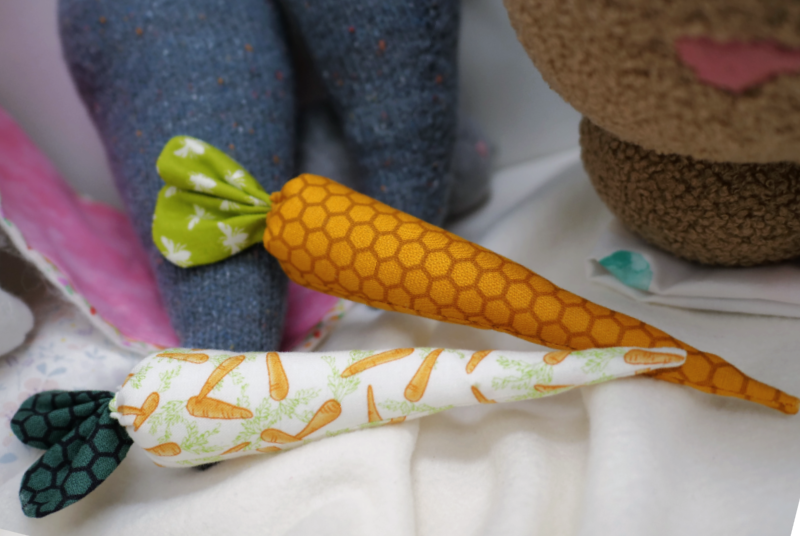
This easy Carrot Craft is perfect for creating seasonal decor for your home in preparation for Easter. It’s easy enough to do with your kids too, so start off Spring time right! Our wonderful staff at the Coquitlam store put together this tutorial and have even made sewing bundles for in-store shoppers to grab and go with this DIY. These instructions teach you how to make a 9″ carrot with 2 leaves, however you can take the basic measurements and create any sized carrot you would like!
Material Needed
Because the carrots and leaves take up such a small amount of fabric, this is a great project to help use up scraps. However, if you would like to buy new yardage you can get 6 carrots out of a Fat Eight or 13 carrots out of a Quarter Yard. The same amounts of contrasting fabric will provide you with enough leaves, if not a few extra.
- Medium weight Craft Cotton – 1/4 Yard (makes 13 carrots)
- Contrasting Medium weight Craft Cotton – 1/4 Yard
- Hand sewing needle
- Matching thread
- Fiber Fill or stuffing
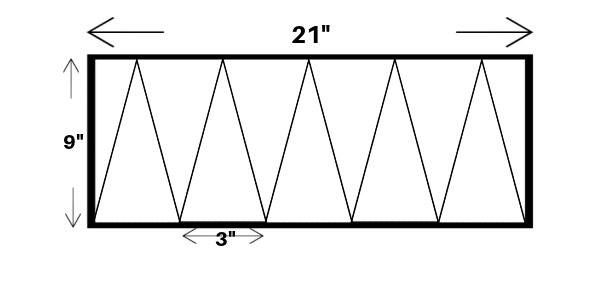
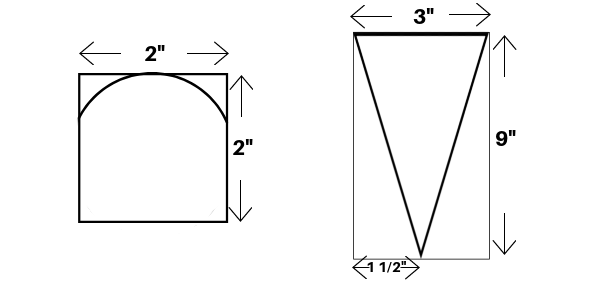
To draft your own pattern for this project is extremely easy! All you need to do is make a triangle using the following dimensions, as shown. Use the rectangle pattern illustration if you are making multiple carrots, and the single triangle if you are making one carrot.
Sewing Instructions
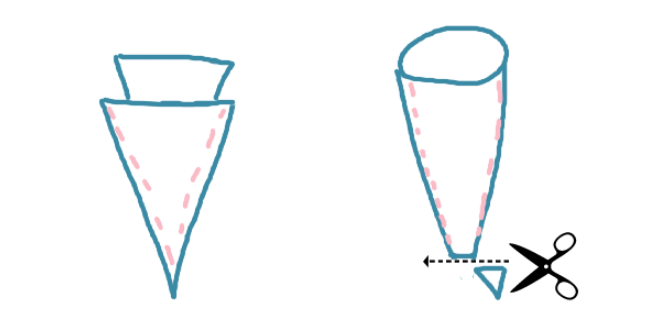
Step 1: You will need a back and front for your carrot, so make sure you cut your fabric double layered after you make your pattern. Cut your fabric and set aside.
Step 2: With right sides together, sew your carrot along the side seams with a 1/4″ seam allowance. Trim the point of your carrot and turn right-side out. Make sure there is no hole left at the point of the carrot.
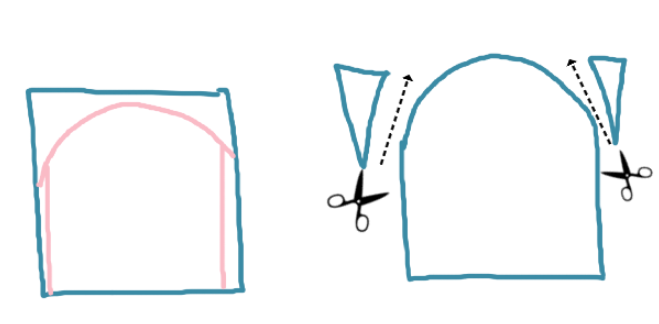
Step 3: For the leaves, cut four 2″ x 2″ squares. With right-sides together, sew the leaves along the sides and top (along the rounded corner as seen). Round the top two corners and leave the bottom edge open. Trim the excess fabric around the curves, turn right-side out, and press flat.
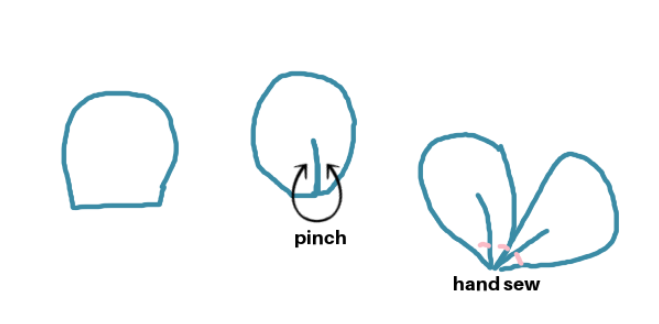
Step 4: Accordion fold the leaves and with a needle and thread, hand stitch a few stitches at the bottom edge to keep them in place. You can use 2 or 3 leaves to create this affect.
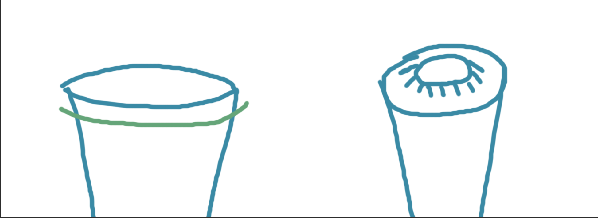
Step 5: Fill your carrot with fiber fill. Feel free to add as much or as little as you would like.
Step 6: Turn down the top edge of your carrot 1/4″ and using a needle and thread stitch a running stitch around the top. Pull the thread to close up the top, leaving a small hole for the leaves.
Step 7: Place the leaves inside the hole at the top and stitch secure.
Congratulations! Your perfectly adorable carrot is now finished! This tutorial was inspired by amerooniedesigns.com, with some alterations for ease of sewing!