Description for YouTube:
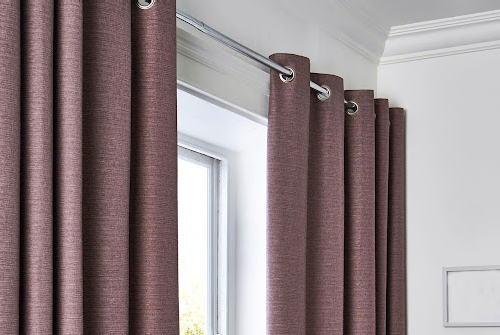
Follow along with Myles to see how easy it is to make a fully-lined grommet drapery panel. This is an older tutorial of ours from 2013 that people are interested in. Apologies for the poorer video quality if you’re following along. For the full video please visit our YouTube channel and watch here: www.youtube.com/Grommet-Panel
Cutting Instructions:
- Figure out your finished length for your panels.
- For the drapery fabric you will need to add 11” to your finished length (4” for the top and 7” for the hem). Cut off your selvages. Keep in mind you will lose 3” of your finished width once you sew on the lining.
- For the lining fabric you will add 8” to your finished length (3” for the top and 5” for the hem). You will also cut your lining fabric 4” narrower than your drapery fabric.
Preparing your finished panels:
- On your drapery panel stitch a 4” wide drapery header tape along the top edge of your fabric on the wrong-side of the fabric. Once the tape is sewn, fold along the edge of the drapery tape and press, creating a 4” hem at the top of your panel. Fold the bottom hem up 7” and then turn it back on itself 3 ½” and press. Stitch hem in place close to the fold.
- On your lining panel fold the top edge under 3” and press. At the bottom fold the hem up 5” and press and then turn it back on itself 2 ½” and press. Stitch the hem in place close to the fold.
- Now it’s time to apply the lining to the drapery piece. Line up the lining and drapery fabric right-sides together along one side of the panel making sure that the folded edge of your lining fabric sits where you header tape ends. (Note that once you have done this your lining will be about 1”-1 ½” shorter than your drape.)
- Next fold back the top of the drape and header tape over the lining and pin in place starting at the top and working your way to the bottom of the drape.
- Now we need to repeat the same process on the other side. Note from the cutting instructions that the lining will be narrower than your drapery fabric so just bring the cut edge of the lining fabric over until it meets the edge of your drape fabric.
- Once again match the folded edge of your lining fabric with the edge of your header tape. Fold the fabric back along that line and pin all the way down the side.
- Starting at the top of the drape, sew the lining and drape fabric along one side using a ½” seam allowance. End your stitching where the lining ends and make sure to backstitch at the top and bottom.
- Now sew the other side following the same procedure.
- Next clip your seam allowance just below your header tape. This will help you press your seam allowance flat.
- Press your seam allowance towards your lining fabric. Turn your panel inside out.
- At the top of the drape match up the centre point on your drape and lining fabric. Pin from this point outwards along the entire top edge. This helps to distribute the extra drapery fabric evenly on both sides of your lining. Now sew along the entire top of your drape with a ½” seam allowance. Now you will want to press your entire panel, making sure to iron along the edges of your panel as well.
Measuring for you grommet placement:
- The measurement between your first grommet and the edge of your panel should be the distance between your rod and the wall. Multiply this measurement by two for both end grommets.
- Measure the finished width of your panel. Now subtract the measurement you got in step 1. Next subtract the total grommet size (amount of grommets x outside grommet width).
- Take the remaining measurement and divide it by the amount of grommets you have minus one to figure out your grommet spacing measurement. Please note you should always use an even amount of grommets to make sure your drape hangs properly.
Grommet placement calculation example:
Distance from rod to wall: 3”
Finished panel width: 59”
Number of grommets: 8
Grommet size: 2.25”
- 3”x2=6”
- (59”-6”)=53”-(8 x2.25”)=35”
- 35”/(8-1)=5” between each grommet
- Once you have your grommet placement figured out you will want to measure for placement making sure to measure from both the sides and the top of your panel and mark the inside of your grommets. For this we suggest using a water soluble marking pencil. It is important to mark all your grommets along your panel before doing any cutting to check your placement is correct. You may have to adjust your placement slightly to make sure your grommets are evenly spaced.
- Once you are sure that all your grommet placements are correct you will want to cut out the circles you drew.
- Next push the ‘male’ side of the grommet (with the larger inner lip edge) from the front to the back of your panel. Add a small line of glue around your grommet and put the other side of your grommet on and push until you hear the pieces click together. Make sure to give the glue at least 24 hours to dry before hanging the panels.
- Repeat this process for all your grommets.
Congratulations on completing your grommet panel!


4 thoughts on “Full Lined Grommet Panel (accompanying video)”
The directions don’t say what to do with the unfinished edges of the drapery hem below the lining hem. Do you turn the raw edges under and hand tack?
Hello Marilyn. Since this faces the wall, I typically whipstitch the raw edge to the hem. Your suggestion of turning back the raw edge will definitely give a cleaner finish. Keep in mind that the seam allowances are pressed toward the lining, so if you want to turn the raw edge back, you may need to clip into the seam allowance (above the hem of the lining) in order to fold it back toward the side hem.
I made these drapes intending for the grommets. I can’t get them to snap together. It’s seems the header, lining and face fabric is too THICK. I have plastic grommets from Joann Fabrics. Do i need to get a more heavy duty grommet? Any suggestions on where to get them? Thanks
Hello Katie. There are heavy duty grommets but these generally require a grommet press (heavy duty tool) to apply them. You may want to reach out to a local drapery shop to see if they can apply the grommets for you.