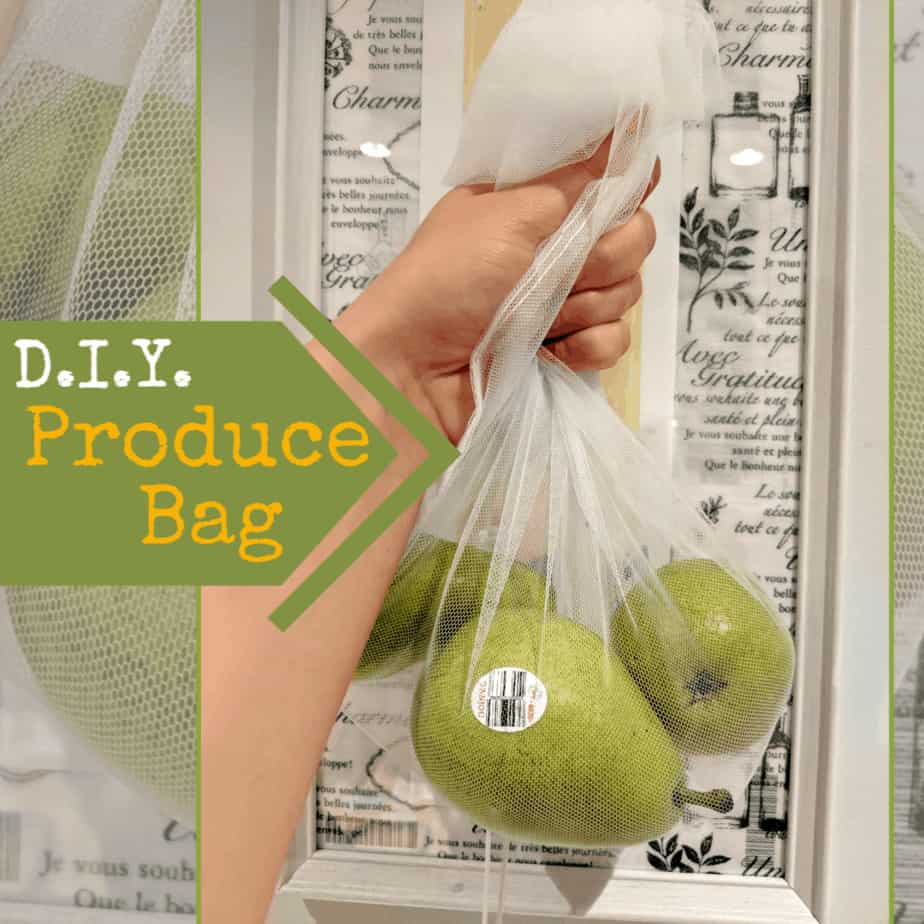
This super easy Produce Bag tutorial is great for beginner sewists and those eco-friendly folks looking to help reduce plastic waste. Produce Bags are great for carrying and washing your fruits and veggies. I know I hate to use a small, one-time plastic bag to just pick up some apples from the produce section, and this way I can gather everything I need, weigh it and not worry about hurting the environment.
Produce Bags need to be lightweight, but durable; that’s why we suggest using Euro-Tulle. Euro-Tulle is a fine mesh that allows for breathability, but won’t tear easily. And it’s lightweight, so it won’t add to the scale when paying for the goods.
This same tutorial can be used with different weighted fabrics in order to create items like: totes, laundry bags, delicate garment washing bags, and more!
Tools & Materials
**Note: the materials below are enough to make 4 produce bags.
1) 1 meter of Euro-Tulle
2) 3.5 meters of fine cord (we used drapery cording since it’s gentle on the fabric, but strong)
3) 4 cord locks
4) Scissors
5) Matching or contrasting thread
Instructions:
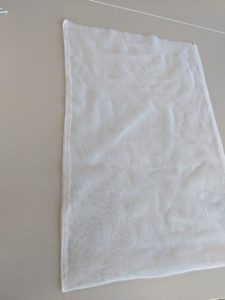
Step 1: Cut your prewashed fabric into 4 equal-sized strips across the length. Each strip should measure out to be 37cm by 1m.
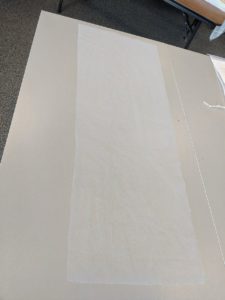
Step 2: Fold the fabric lengthwise so the fold creates a “bottom”, only leave three sides open.
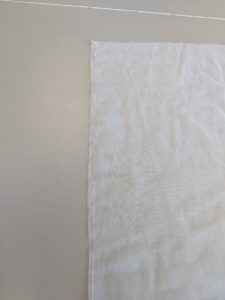
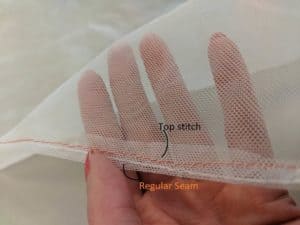
Step 3: On one of the long lengths of your fabric (side 1) sew, using a straight stitch, from top to bottom using a ⅜ or 1cm seam allowance. Go slow and don’t allow the fabric to pucker or snag. We suggest using a micro-needle.
Step 4: On the opposite side (side 2) of the bag along the length using a ⅜ inch or 1cm seam allowance sew a 1-inch stitch at the cut (top) edge. Making sure to secure each it with a backstitch.
Leave a ¾ inch gap and then continue to stitch (with a backstitch at the start and finish). Creating a similar look to the other side of the bag.
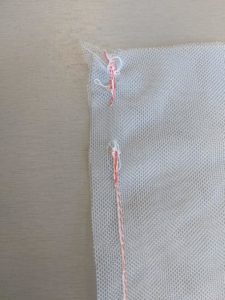
This gap is necessary for inserting your cord later.
Step 5: Turn the bag inside out so the seams are on the inside. Topstitch side 1 from top to bottom, sealing your seam inside. Then topstitch side 2 the same way you sewed it. Sewing the 1” line and then leaving a gap, and then continuing to sew down the length.
This will hide your seams and disallow them from fraying or catching on anything.
Step 6: Across the top of the bag, without sewing it shut, sew a casing for your cord. Using the gap created earlier as a guideline, sew across the entire top of the bag creating an open tube (approximately 2cm from fold). Stitch this seam twice, to add strength.
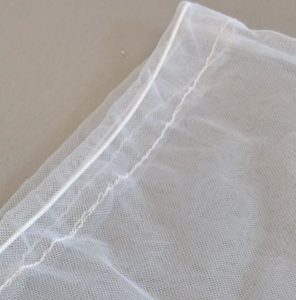
There should be two holes open for you to insert the cord still.
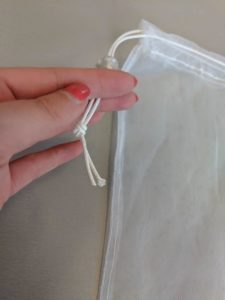
Step 7: Cut your cord into 48.5cm long cuts. Use a safety pin, or bodkin to thread the cord into the casing you just created at the top of your bag.
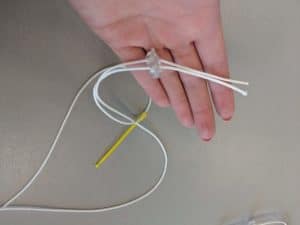
Step 8: Thread the cord through the lock and tie the cords together in a knot. Making sure to leave enough space for the cord lock to tighten and loosen.
That’s the simple step by step process to creating a produce bag! If you’re using this tutorial to create a laundry, or gentle wash garments bag we suggest using the same technique but sewing with a sports or cool-best-mesh fabric.
Share with us your wonderful eco-friendly bags!


