Having a hard time deciding what bag is the perfect fit for your beach activities? Why not try all three? We’ve got a great, simple tutorial for you that shows you three different ways to sew the classic tote. Try out the “Colleen” style tote for those full day trips to the lake or beach, the “Janice” style tote for your active trips that need a little more security, or the “Mini Colleen” style tote for those quick trips. You don’t need a pattern to make any of these bags either! Just follow the cutting instructions below to make the perfect tote every time.
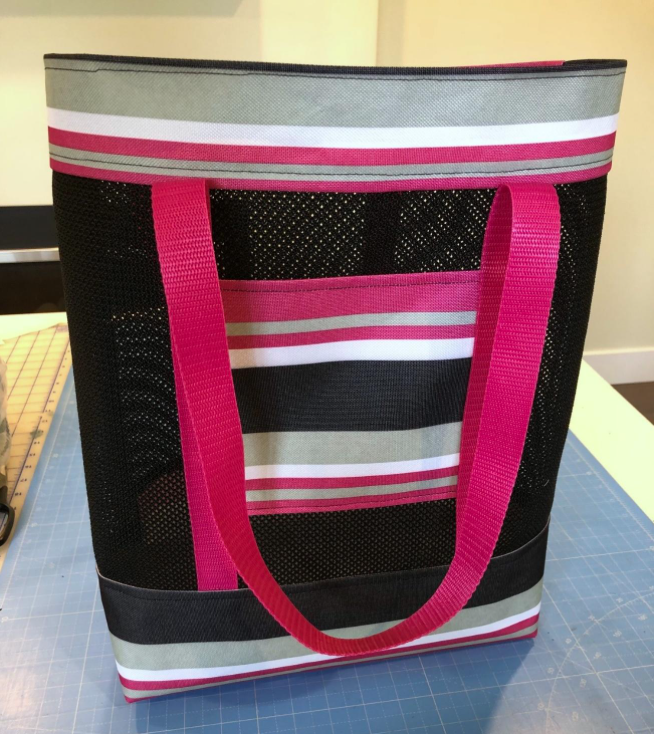
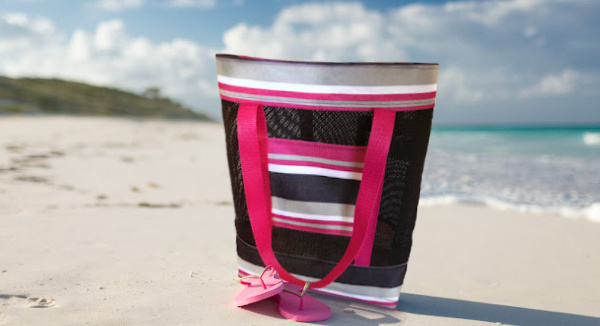
The Colleen: Large mesh window tote (read below!)
The Janice: Drawstring and self-lined tote
The Mini Colleen: Small mesh window tote
You can mix and match the techniques for any of these bags together too! Maybe you want to line your mesh tote, or maybe you want the extra pockets from the small mesh tote tutorial. Either way, each bag is slightly different and puts a unique spin on these basic sewing techniques from our “Colleen: Large mesh window tote” tutorial. Read on, and sew on!
Materials
(You will have enough materials to create 2 bags)
- 3/8 yard of heavy mesh
- ½ yard of canvas (many nylon fabrics are water repellent and don’t require lining)
- 2 ½ yards of nylon or cotton webbing (1” or 1 ½” wide) for straps
- Tailors chalk or fabric marking pen
- Sewing clips (instead of straight pins)
- Matching or contrasting thread
- Jeans machine needles (if you are sewing with canvas)
- Painter’s tape (optional)
Instructions
Step 1. Cut fabric as follows
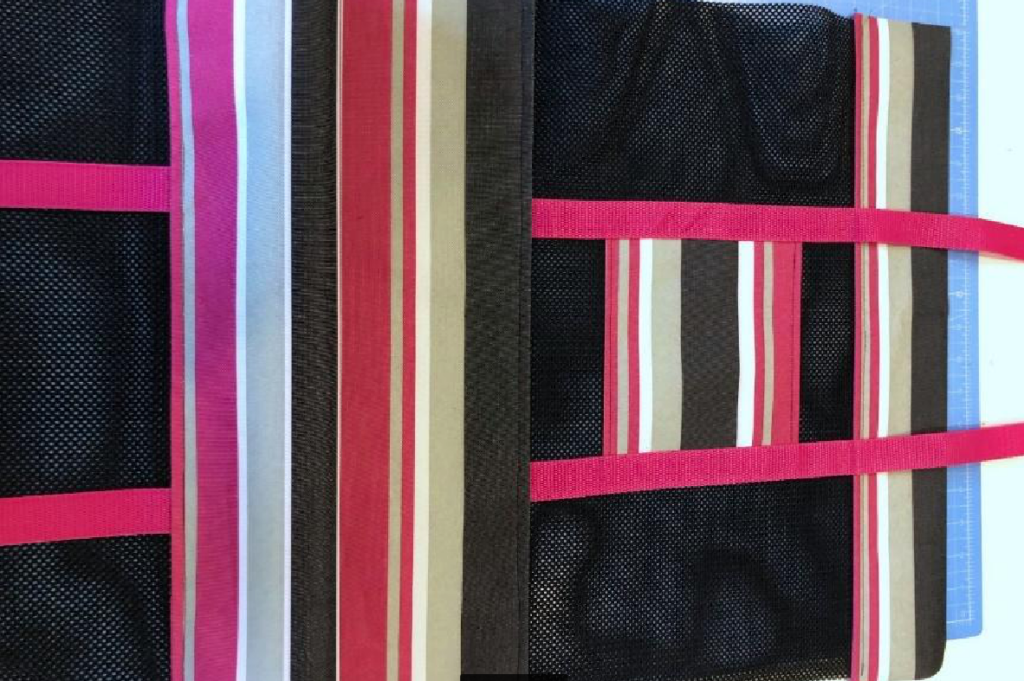
Mesh: 2 pieces 19” x 11” (Pattern piece “B1” and “B2”) this is the middle of your bag.
Canvas: 1 piece 19” x 15” (Pattern piece “C”) this is the bottom of your bag.
2 pieces 19” x 3 ½” (Pattern piece “A1” and “A2”) these are the top two strips of your bag.
1 piece 6 ½” x 7” (Pattern piece “D”) this is for the pocket.
Webbing straps: 2 pieces each 45” long
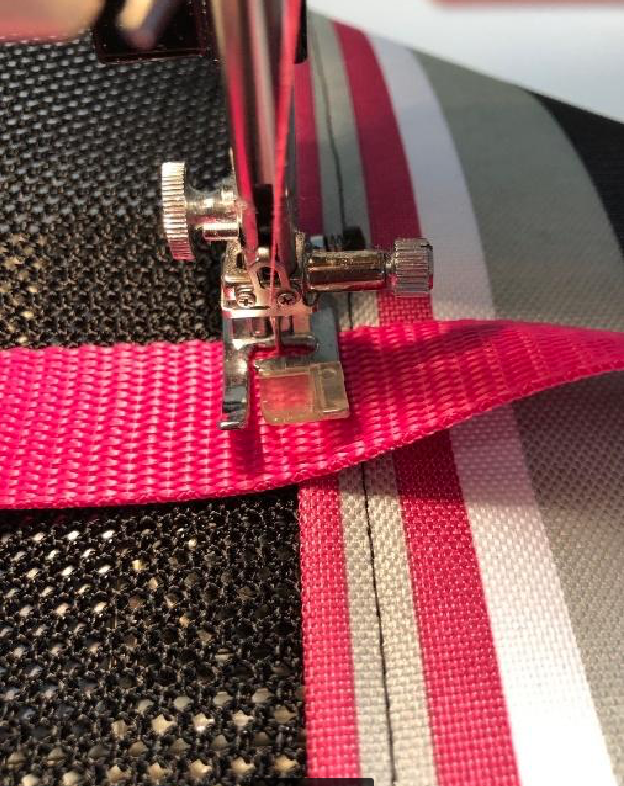
Step 2. Find the placement for your straps by marking the midpoint on both 19” sides of pattern piece C with tailors chalk. Measure 3” from your midpoint and mark for both sides. Place the inside edge of the webbing against these marks. Baste the webbing in place, creating a loop at the top of your bag for a handle. Your handles will be 6” apart and should be on either side at the top of your bag.

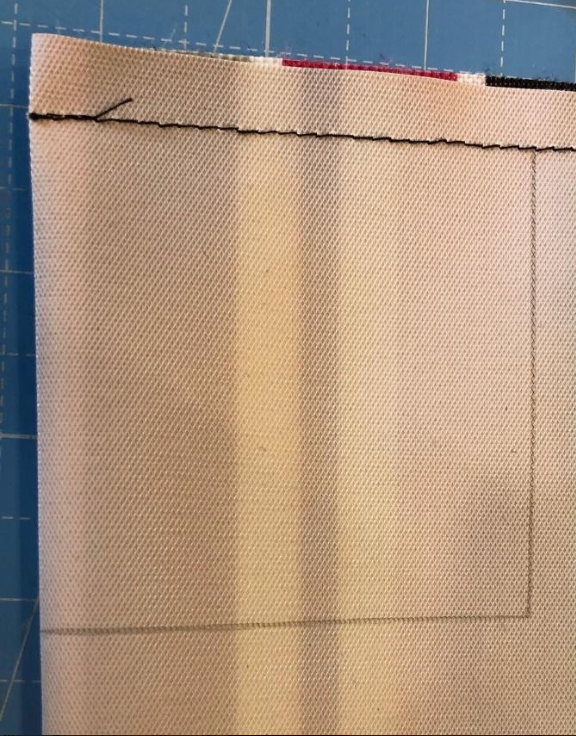
Step 3. Sew together the pieces of the main body of the tote with a straight stitch in the following order A1, B1, C, B2, A2, using a ½” seam allowances along the 19” side of the pattern pieces. Make sure to sew with right sides together. Note: your webbing should be caught in the seam allowance between both B and C pattern pieces. This seam will replace the need for your handles to be basted. The end result should create one large rectangle that alternates between canvas and mesh.
Step 4. Topstitch along all of the seams on the canvas side, catching the seam allowances.
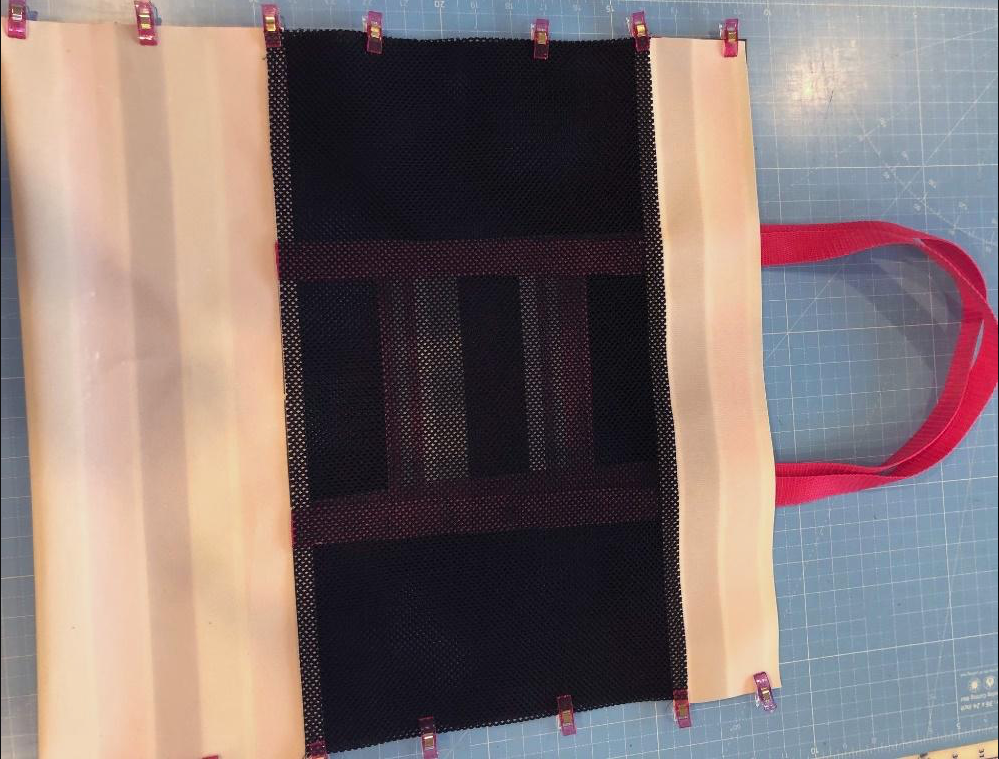
Step 5. Prepare the pocket, canvas piece D. Turn under both 6 ½” edges by ½” and top stitch in place.
Step 6. Place the pocket on the mesh, centred widthwise and 2” above the B / C seam. Top stitch the bottom of the pocket. The sides will be held in place by the webbing in the next step. You can use tape to hold the pocket in place for now.
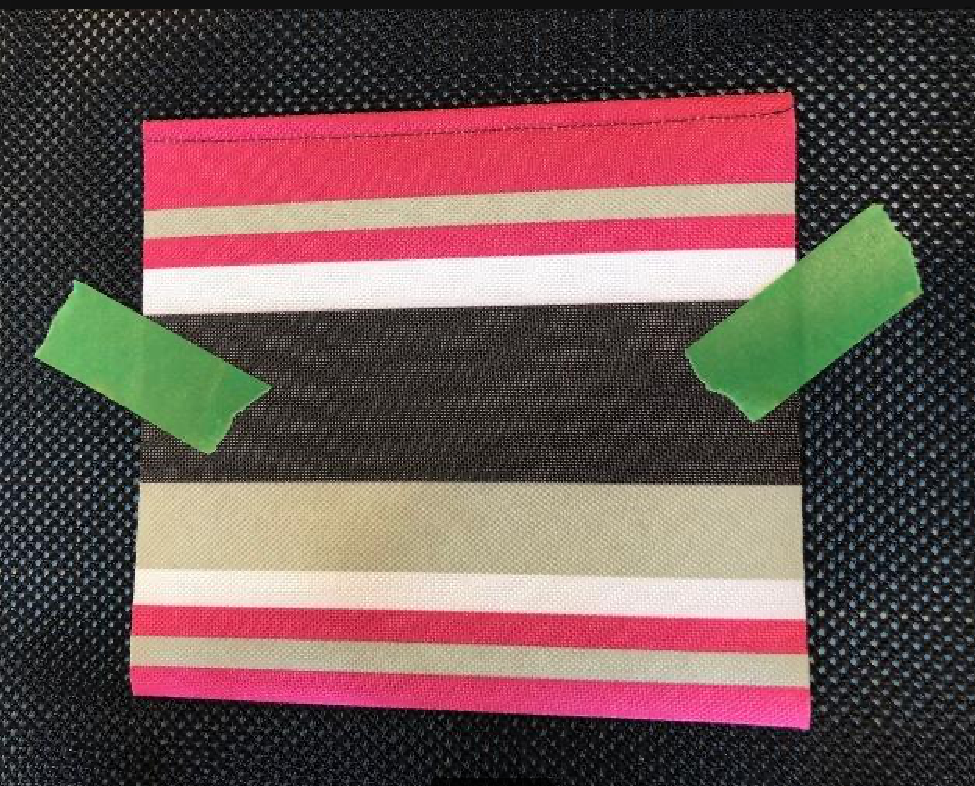
Step 7. Stitch down both sides of the webbing, pivoting at the A / B seam to stitch across the top. This way the straps will be secured on the mesh, but still loose at the top of the bag to create a handle. The inside edge of your webbing should catch the edge of your pocket to secure it in place.
Step 8. Now to secure the sides! Fold the bag in half with right sides together lining up both top edges. Use clips to hold the edges in place and sew down both sides.
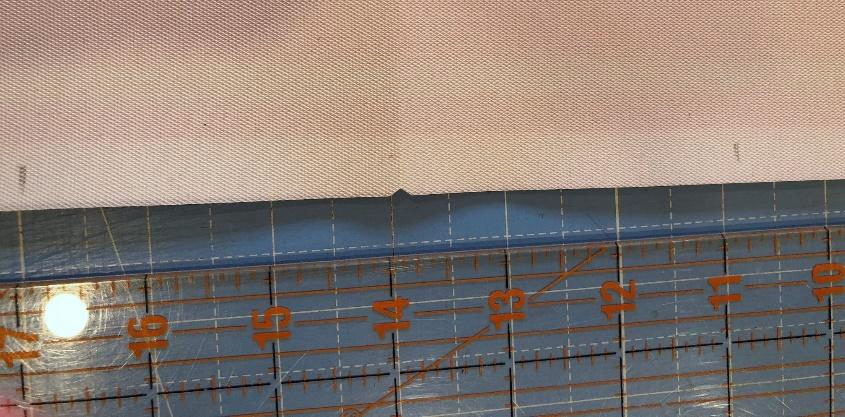
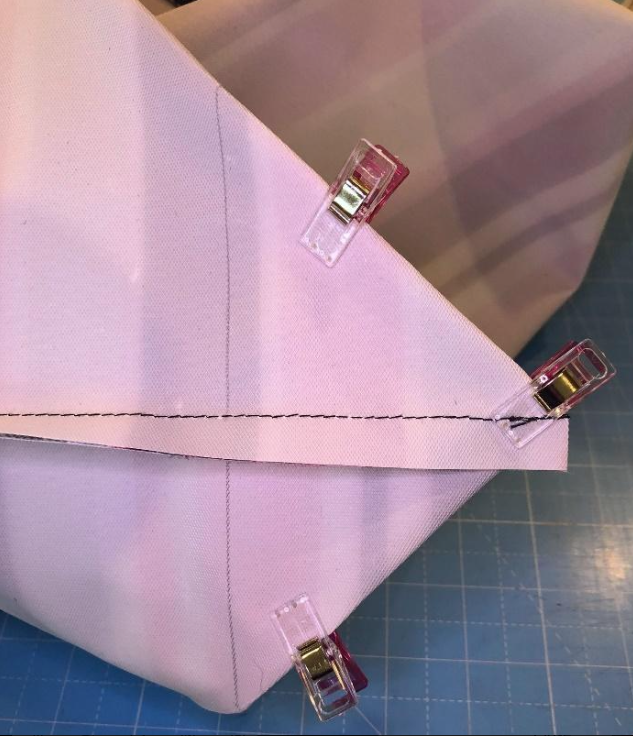
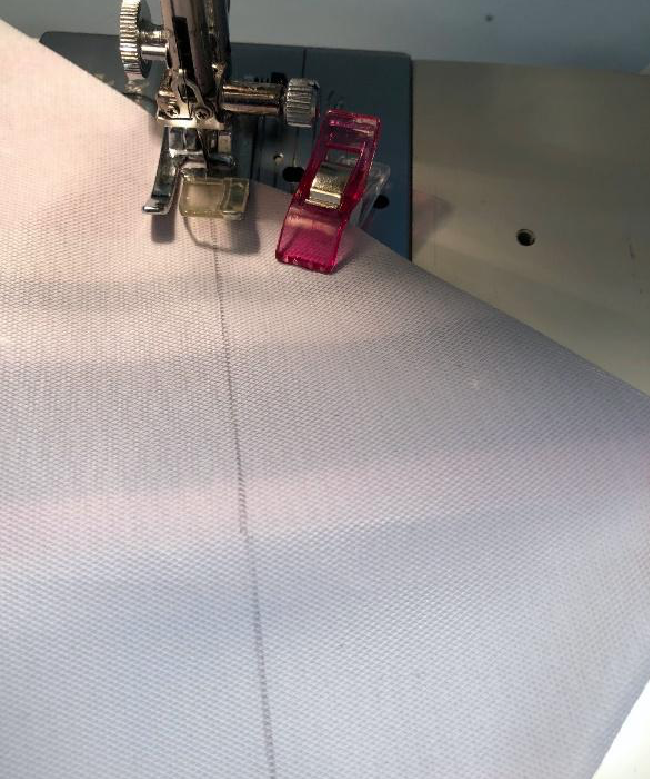
Step 9. Draw a 3” box at the bottom of the bag, measuring in from the seam allowance at the sides. This is the corner of your bag and how your bag will keep its shape. Marking the box on both sides of the bag will make it easier to stitch.
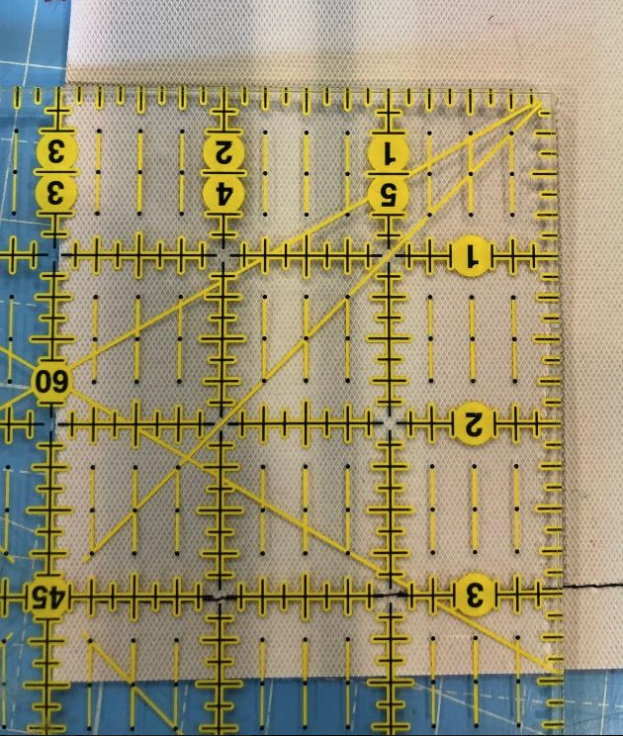
Step 10. Fold the side seam so that it lines up with the bottom of the bag, using the box you drew as reference. You will now have what looks like a triangle. Hold it in place with clips and sew along the marked line. You can choose to trim the triangles, or leave them in place.
Step 11. Turn the top edge of the bag down 1” and hem in place, keeping the webbing out of the way.
Step 12. Turn your bag right side out. Voila!
We hope you enjoyed this tutorial on making this awesome tote! It was put together by our staff member Colleen (assisted by Janice) and will be in-store on display in Coquitlam for a short time. These techniques are timeless though and perfect for any style tote you could make in the future. If you enjoyed this tutorial or want to see others like it, let us know in the comments!