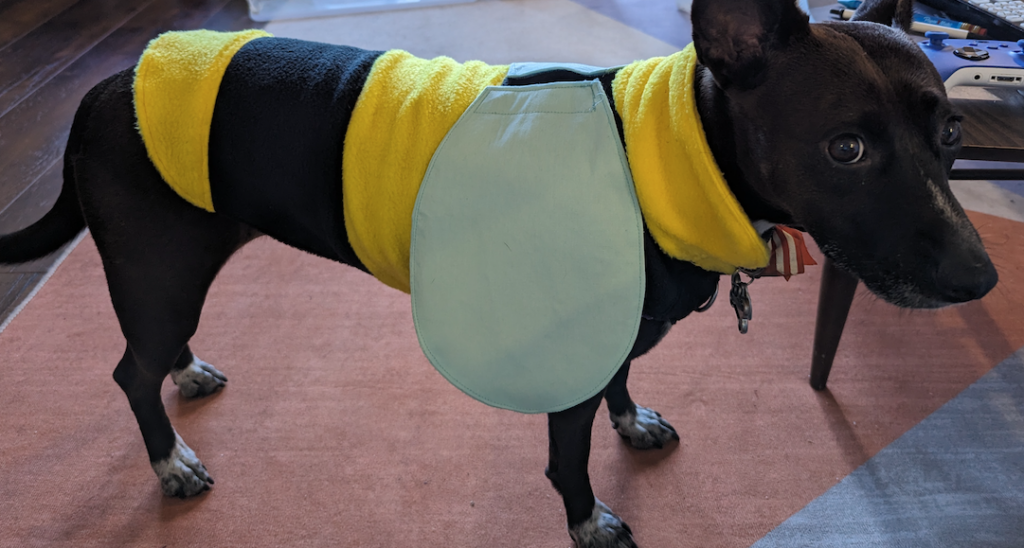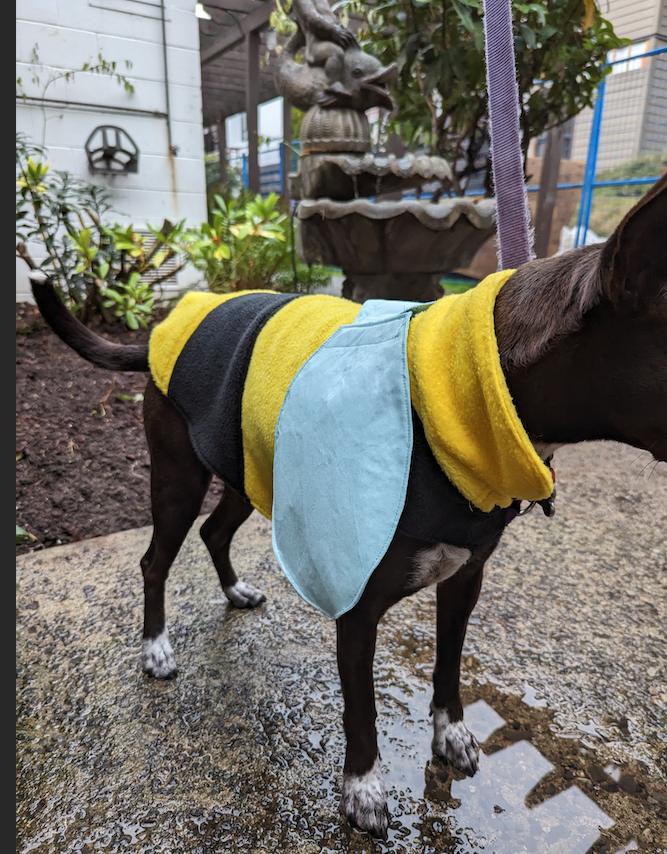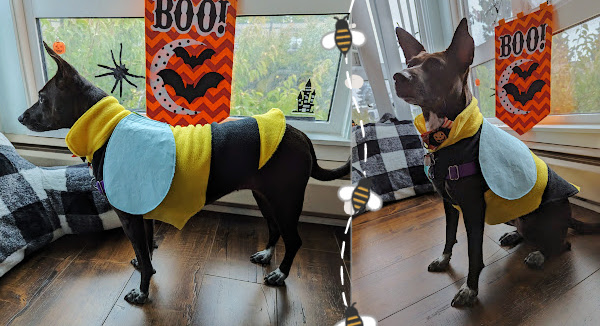
Happy (almost) Halloween! Do you have a pooch that you’ve love to dress up in a cozy, little costume? This easy to sew bumblebee costume is great for pups that don’t love to wear complex or constraining outfits. Plus, you can customise this sweater-costume-base to make a dozen different looks, not just a bumblebee! I’m going to be dressing up as a bee-keeper, so there isn’t a better costume than a bumblebee for my pooch! Follow along with this tutorial to make your own dog sweater in whatever style you want; whether you want your dog to be a bumblebee too, or you simply want a cozy coat for your pup this autumn.
Materials Needed
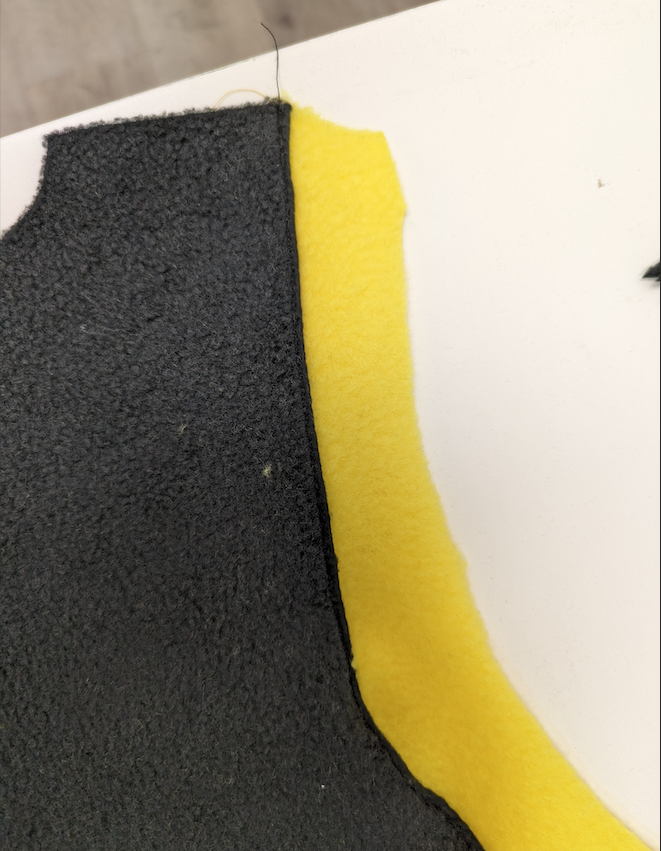
*Note: my dog is black so I used yellow as my “starting colour” (neck and collar), but if your dog is a lighter colour you may want black to be your “starting colour.” This may affect the amount of fabric you buy in a specific colour if you are adjusting the pattern or colour-scheme.
- If making sweater with 1 solid colour
- 0.75/y of fleece
- If making multi coloured sweater
- 0.5/y of yellow fleece
- 0.5/y of black fleece
- 12” of blue broadcloth or craft cotton (for wings)
- 12” of medium-heavy weight iron-on interfacing (for wings)
- Matching thread (yellow, black, and blue)
- Straight pins
- Tailor’s chalk
- 1 ½” Velcro approximately 1 foot required of both hook and eyes (rough and soft).

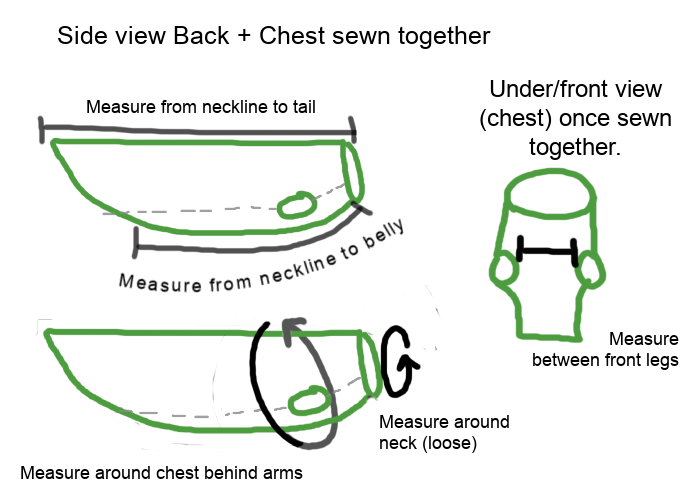
This pattern was designed for a barrel chested, 30lb dog. Changing the size of the sweater will affect the amount of fabric you require. The length of fabric you need should be equal to the back measurement along the “fold line.” If you want to adjust the size of the pattern to fit your dog you can follow these instructions, or get a visual estimate based off of our Dog Raincoat YouTube video that will show you the key spots to measure and adjust. Adjust the proportions of the sweater as follows:
- Measure from the neck line (where your dog’s collar sits) to just before your dog’s tail, add ½” seam allowance.
- Measure from neckline to their belly, stopping about midway down their body, add ½” seam allowance.
- Measure the chest between the two front legs, add ½” seam allowance at the neckline seams, not at the armholes.
- Measure loosely around the neck, add ½” seam allowance.
- Measure around the widest part of your dog’s chest (just behind their front legs), add ½” seam allowance.
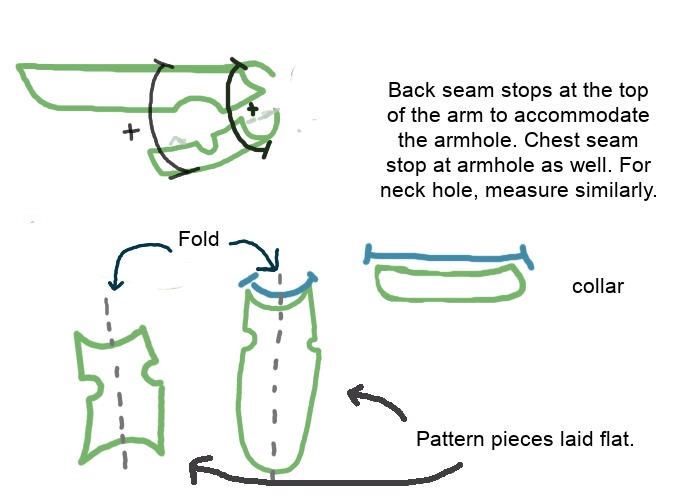
- Make sure when adjusting for chest radius that you split the measurements between both the Back pattern piece and Chest piece. Back seam stops at the middle-top of the arm to accommodate the armhole and the Chest seam stops at the middle-bottom of the armhole. For the neck hole, split the measurements similarly along the curve of the neck. Together, the two pattern pieces should equal the radius of your dog’s torso/neck and then divid that in half to accommodate cutting the pattern “on the fold.” (EX: If your dog’s chest is 20″ around, divid in half, there should be a measurement of approximately 8″ (7″+ 1/2″ + 1/2″) + 4″ (3″ + 1/2″ + 1/2″) [Widest width behind armholes of Back Pattern Piece + 1/2″ seam allowance at both seams + Widest width behind armholes of Chest Pattern Piece + 1/2″ seam allowance at both seams]).
- Measure the bottom length of the collar pattern piece, match to the length of the Back pattern piece at the neckline. Add ½” on each end for seam allowance.
Sewing Instructions
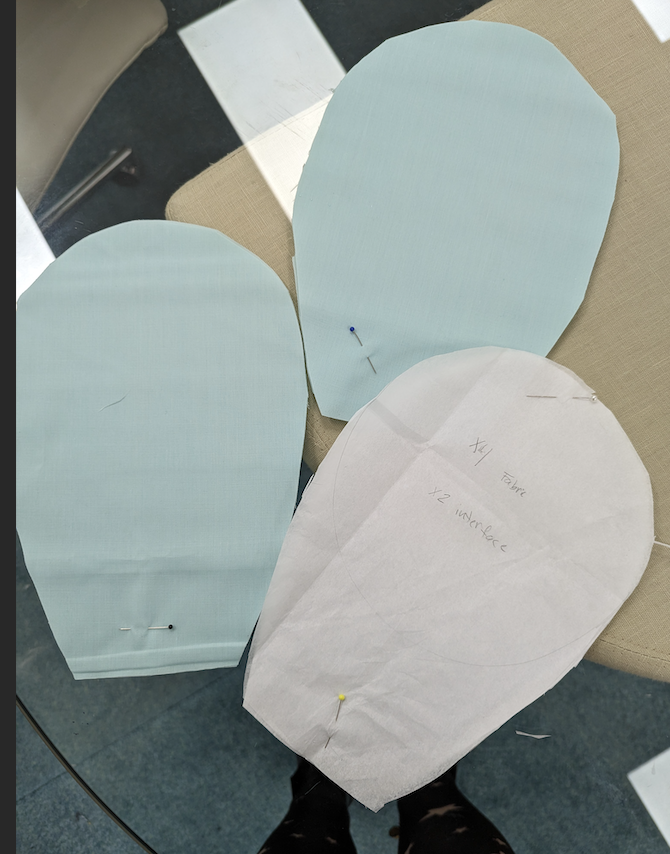
Step 1. Cut your pattern pieces out. If you are sewing a solid coloured sweater, skip to step 3.
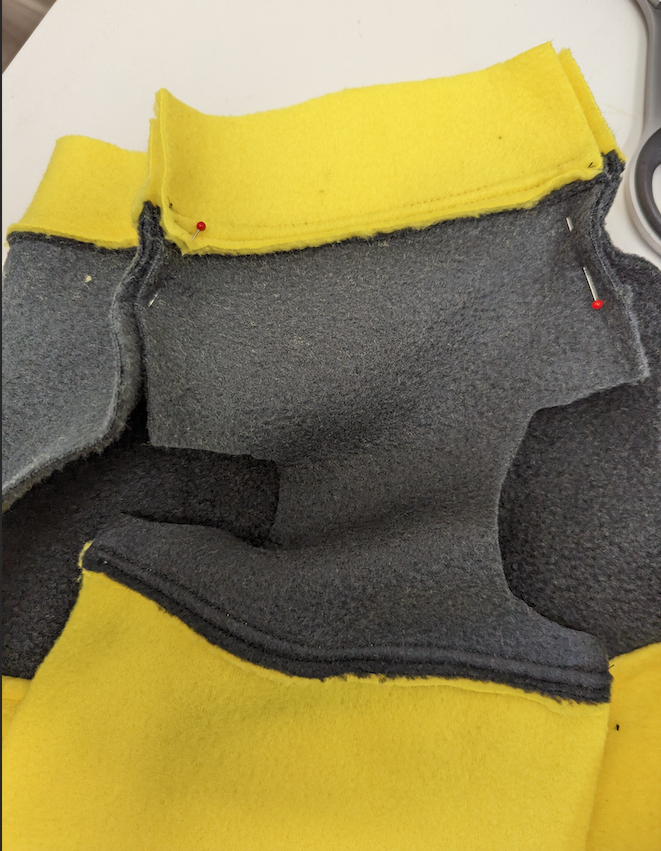
Fold your pattern pieces along the pink, dotted lines and cut them out in alternating colours. Make sure to add a ½” seam allowance at the pink lines (joins) so sewing it together won’t shorten your sweater. Mark each piece in accordance to the blue numbers on each pattern piece. All laid out, the Back and Chest should look like the photo below.
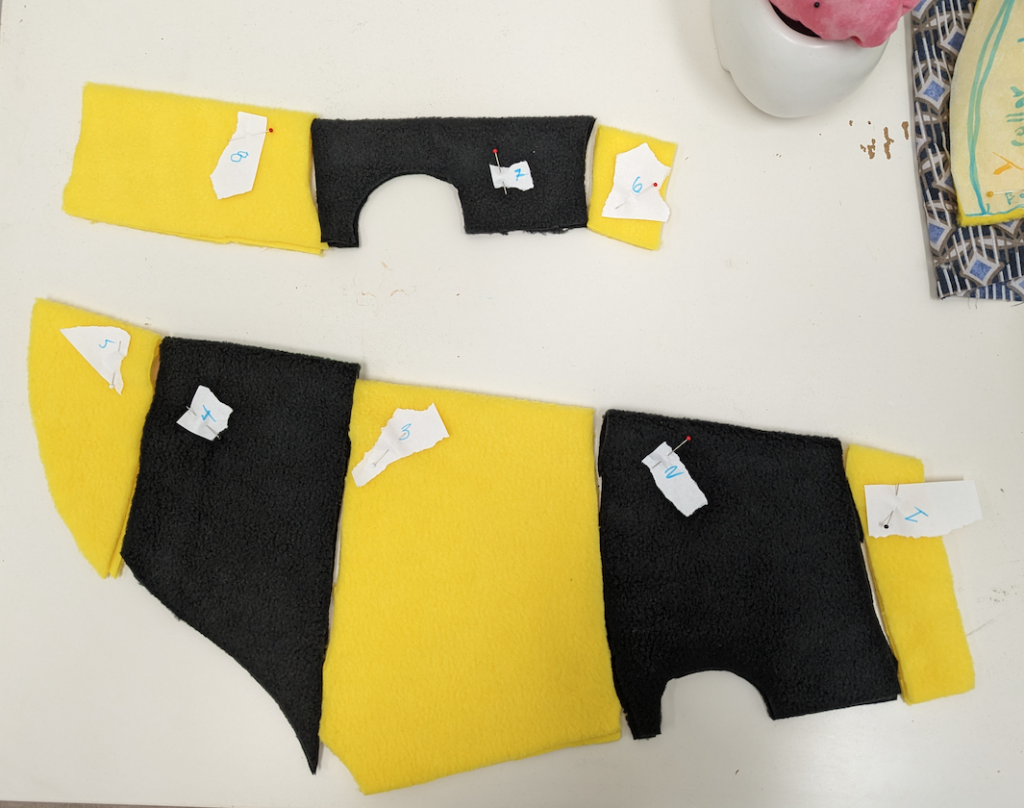
The Collar pattern piece should be cut out in the same colour as pattern #1 and/or the Back pattern piece.
Step 2. Optional: Thread your bobbin with yellow thread and thread your needle with black thread. If you do not care about your thread showing we suggest threading your bobbin and needle thread with black.
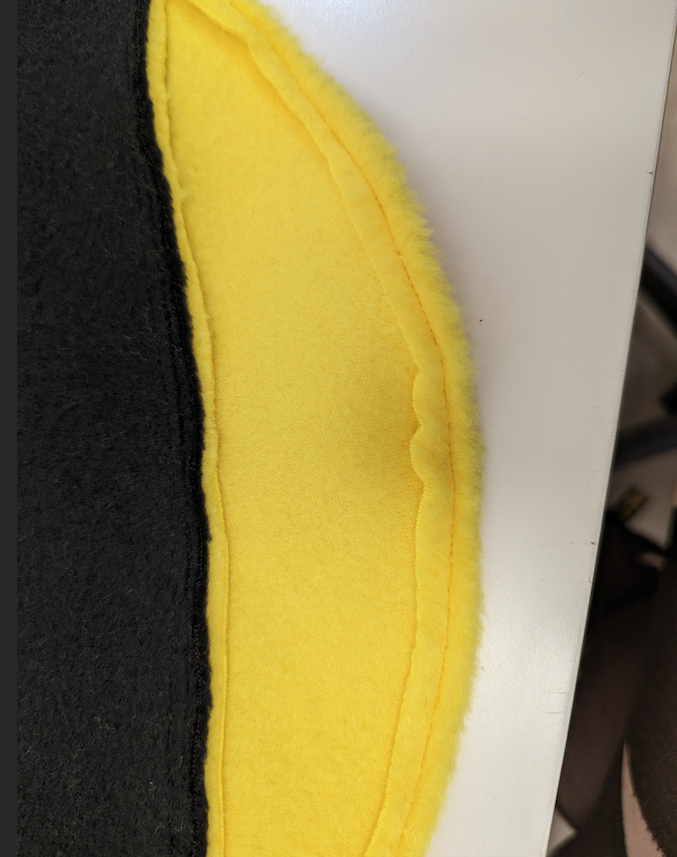
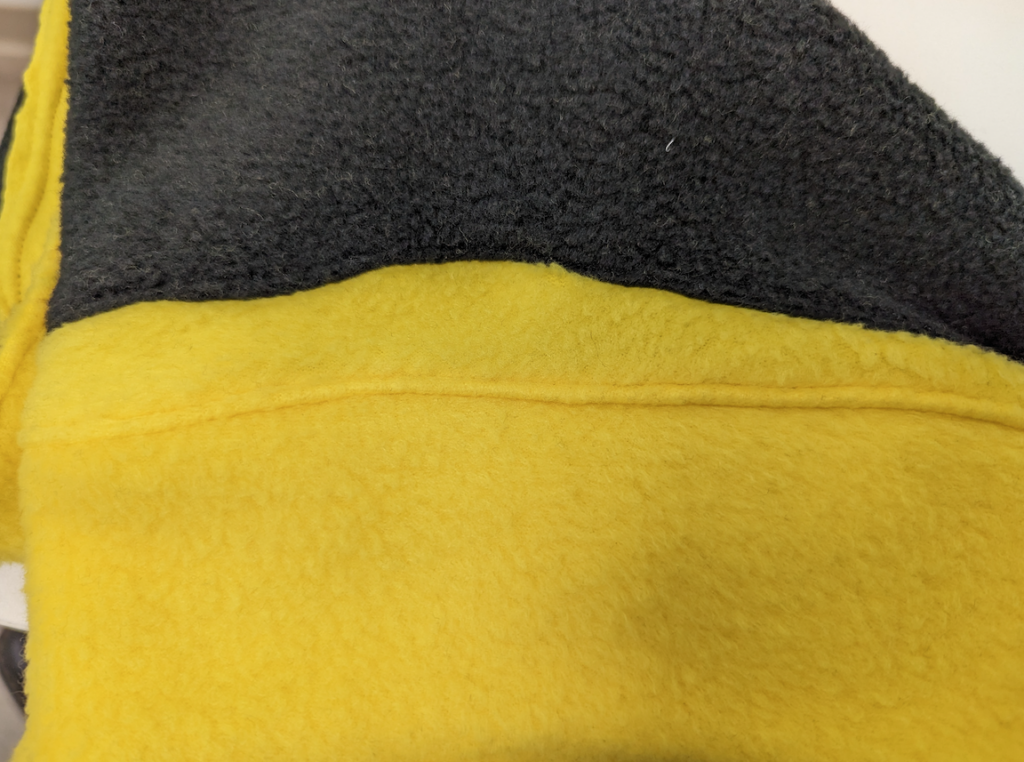
Join pattern piece #1 to pattern piece #2 with right sides together along the “pink line,” join them using a ½” seam allowance. Turn your fabric wrong side up and top stitch the seam allowance down with the seams facing the “tail” of the sweater. If your bobbin and thread colours are reversed, top stitch the seam allowance down from the right side of the fabric. Your top stitching thread (needle thread) should match the colour of fleece that is showing from the right side of the fabric.
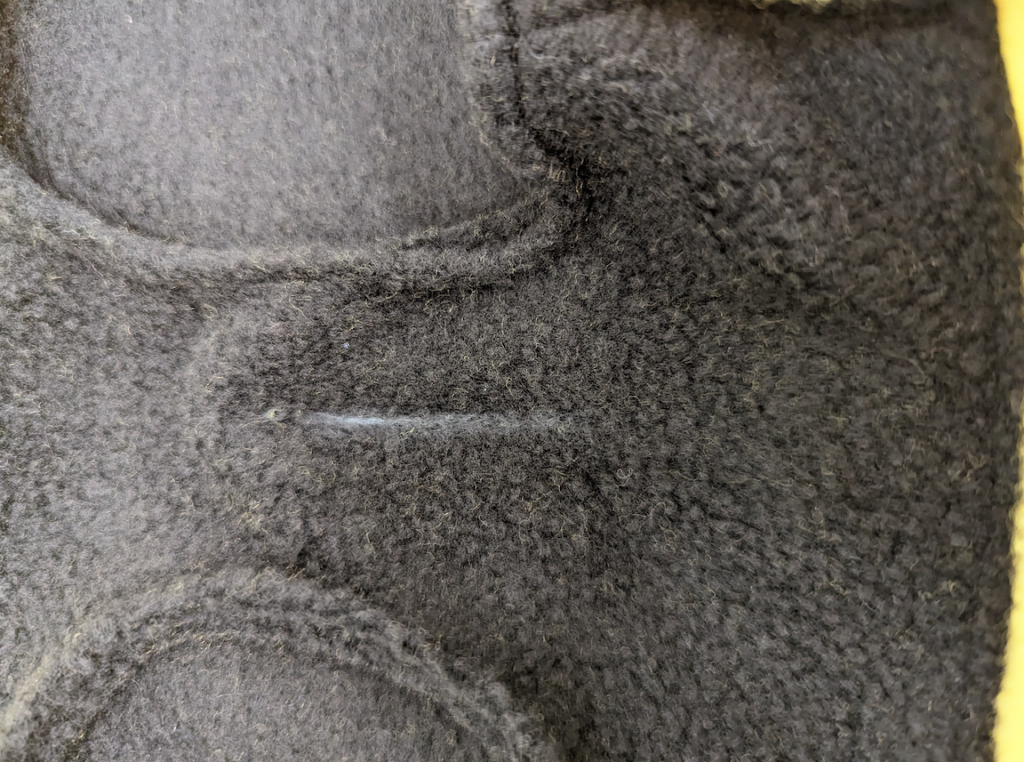
Be careful not to stretch the fabric while you sew since fleece has “give” to it and you will warp your sweater.
Repeat this step with pieces #1 through #5 (reversing top stitching from the wrong side and right side in accordance to what fabric/thread colour will appear on the outside of the sweater) and again for the Chest Pattern pieces #6 to #8.
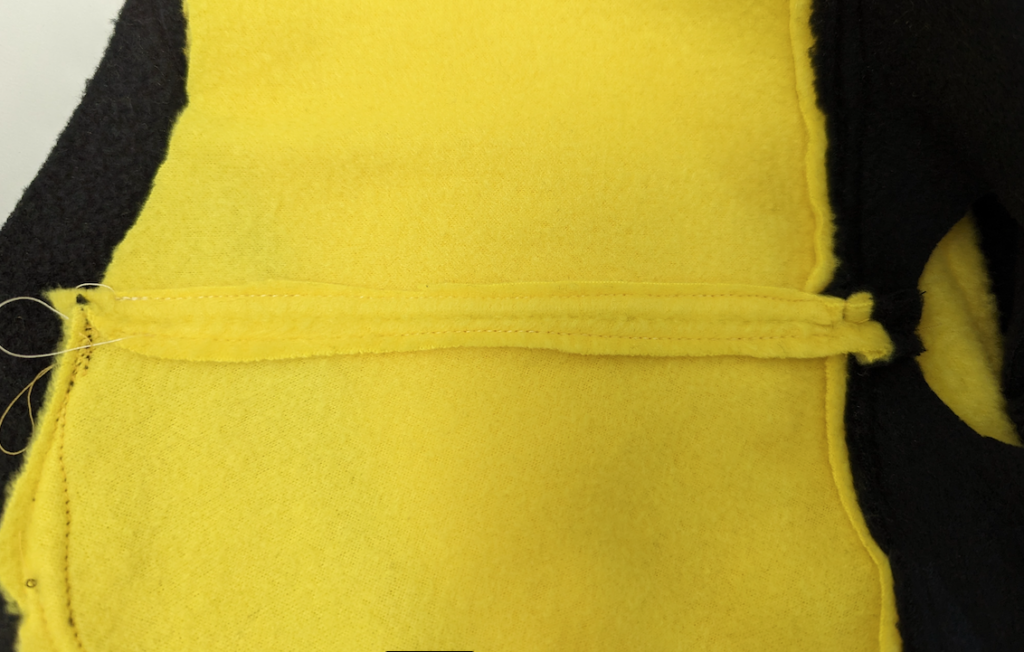
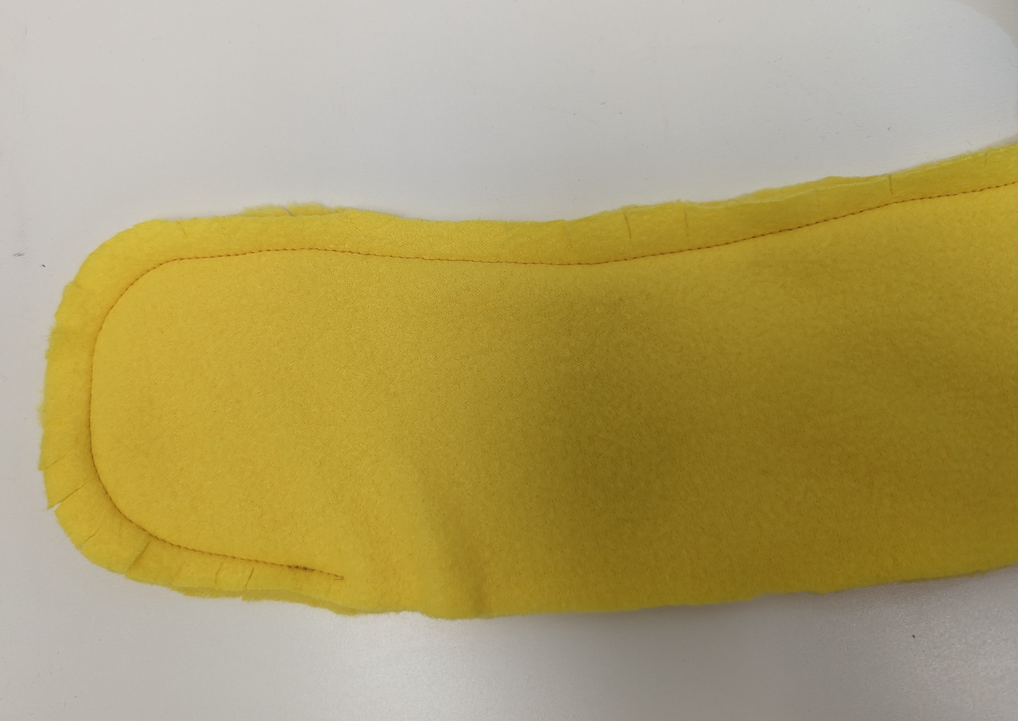
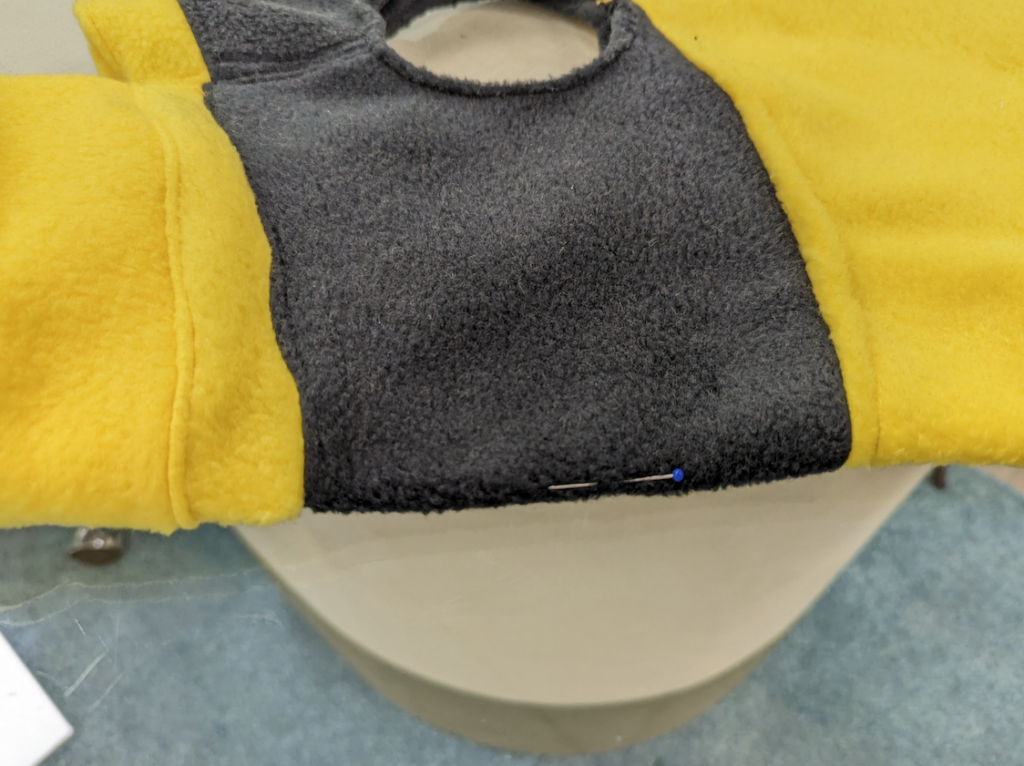
Step 3. Place right sides together and pin the Chest piece to the Back piece at the seams above the armholes and below the armholes, sew. Open the seams so they lay flat, top stitch along both sides to secure your seam allowances down.
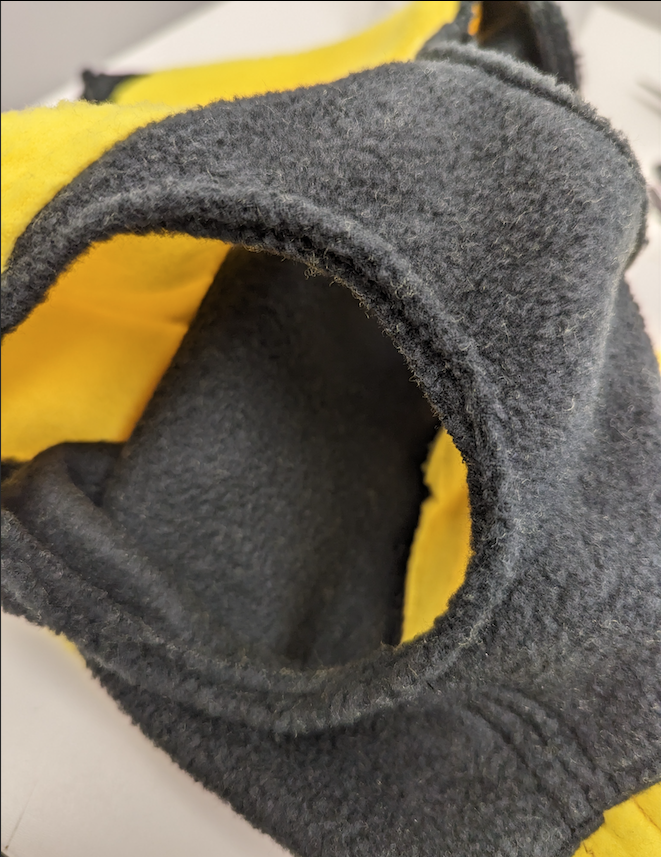
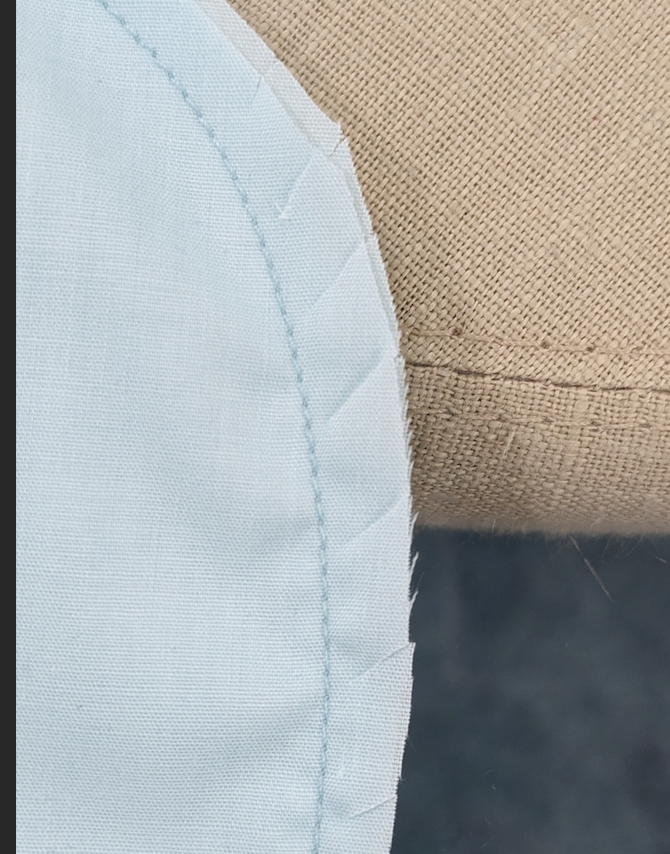
Step 4. Fold the raw edges of your armholes to the inside and hem with a ¼” to ½” seam allowance. Fold the raw edge of the “tail” and “under belly” of your sweater to the inside, Hem.
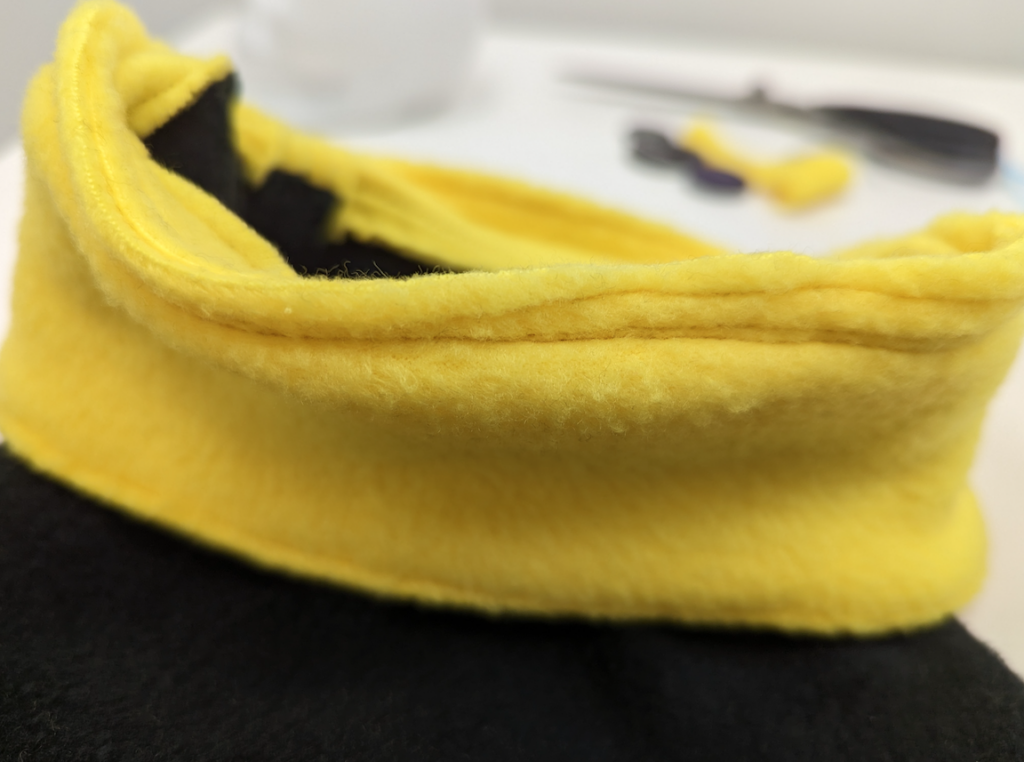
Step 5. Sew your 2 Collar pieces with right sides together, making sure to leave the flat, bottom edge open. Clip around the curves of your collar, and turn right side out. Top stitch the seam allowance down along the curves and top of your collar.
Step 6. Find the middle of the Back of your sweater by folding the sweater in half so the armholes are matched. Mark the middle point by the neckline with a pin, or tailor’s chalk. Fold your Collar in half lengthwise and mark the middle similarly at the raw edge.
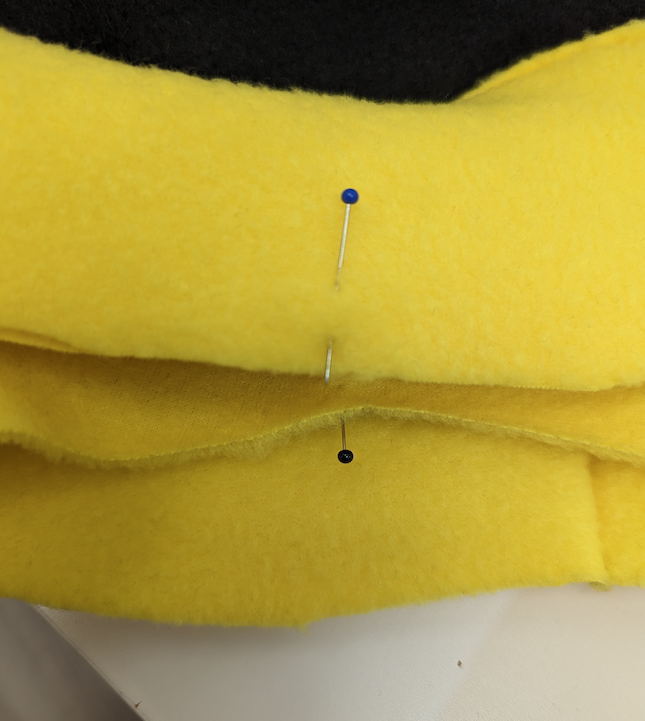
Match these two points together with the right sides of the fabric together and pin in place. Your collar should reach to both side seams. Sew and turn seam allowance to the inside.
The Chest piece of your sweater should naturally want to fold in as well. Sew this hem down with the raw edges facing inside.
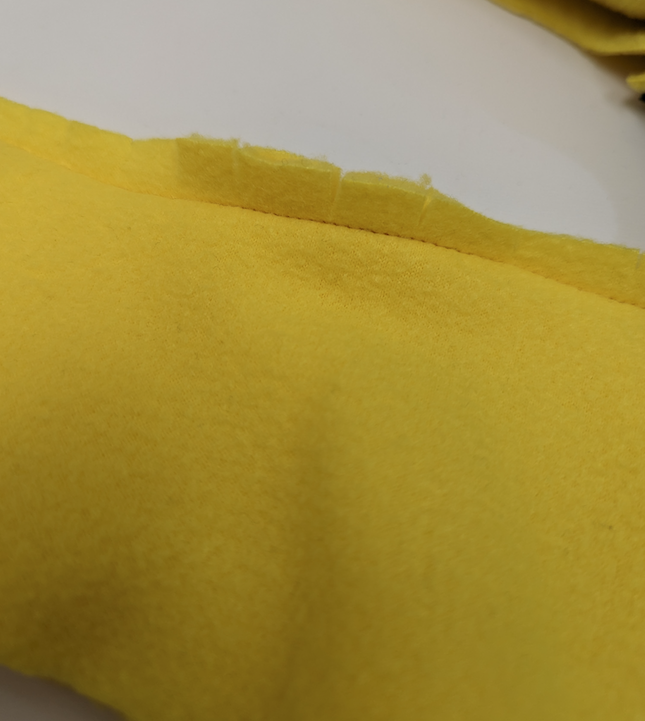
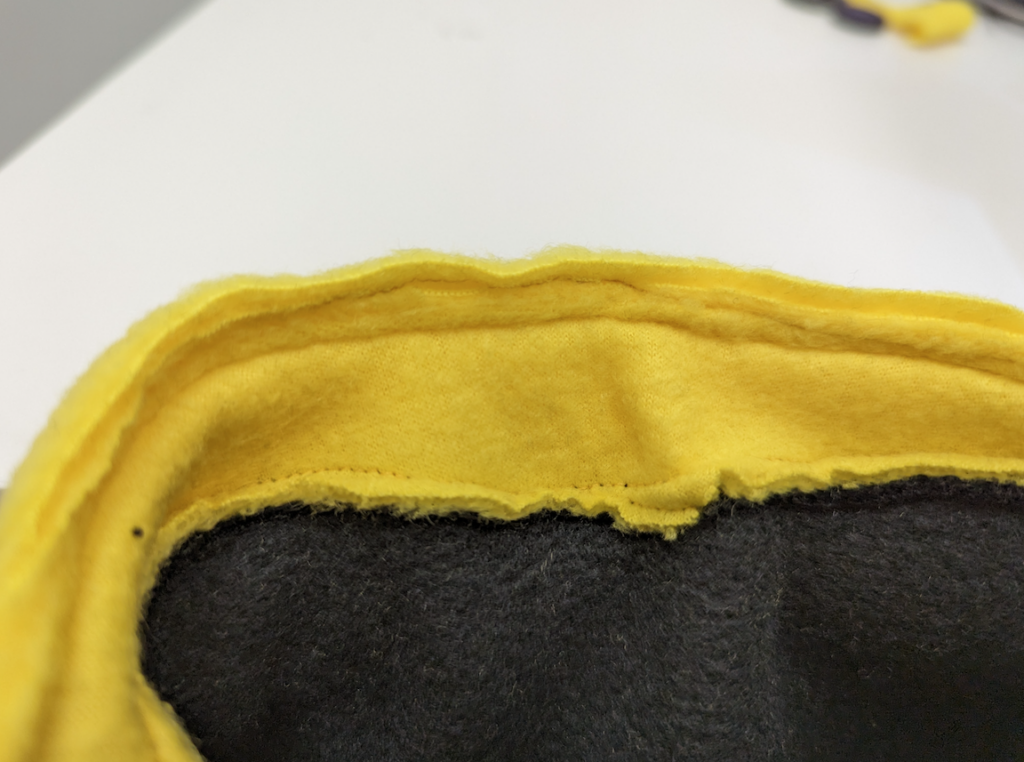
Step 7. Top stitch your seam allowance at the neck hole with the seam allowance facing down towards the “tail” of the sweater. Make sure to top stitch around the whole opening.
If your fleece is bulky at the collar edge, you can grade the seam. Do this by trimming one of the collar’s raw edges close to the stitch line before top stitching. This will help reduce the bulk.
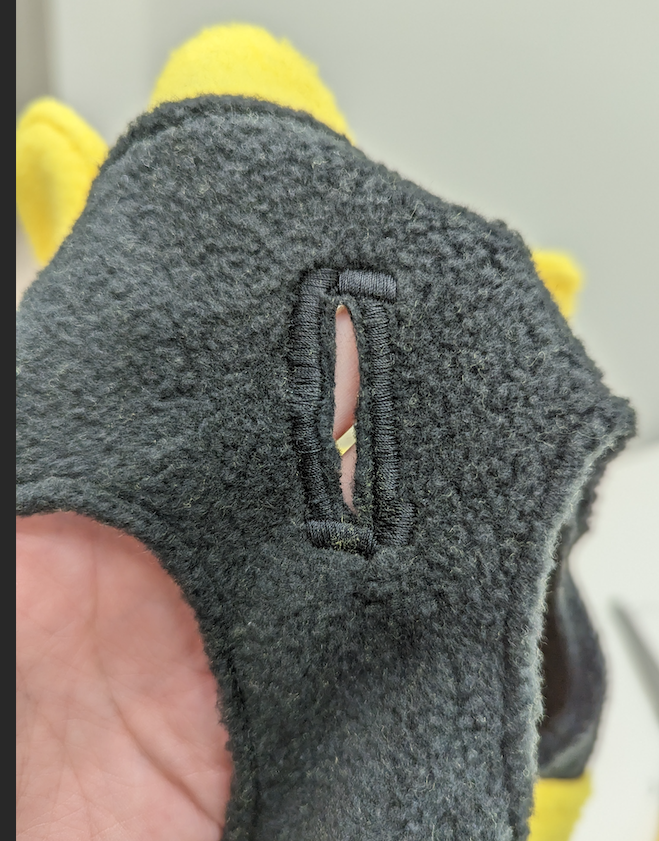
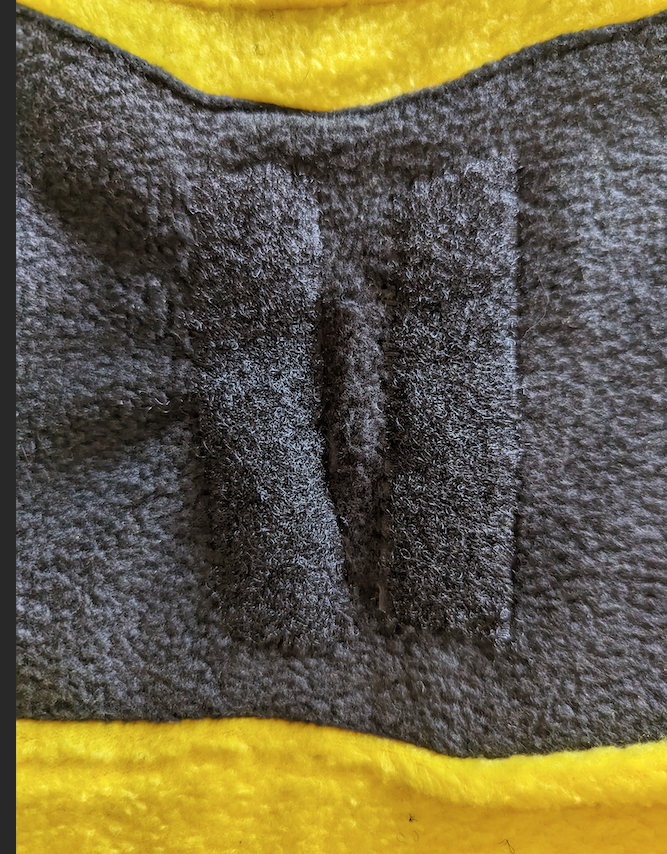
Step 8. Optional: This step is to accommodate a harness loop at the front of the sweater so the harness can be on the inside of the costume. If you want a harness loop at the top of your sweater, skip to step 9.
Similarly to before, fold your sweater in half and find the middle of the Chest on your sweater. Mark this space with tailor’s chalk starting just above the top of your armhole (this may be different for different harnesses and dogs, double check placement for your dog).
Using a buttonhole stitch, or a tight zig-zag stitch, sew a buttonhole long enough to accommodate the loop on your harness. For me this was a 1 ¾” buttonhole. Open the buttonhole carefully so you don’t cut any of the stitches.
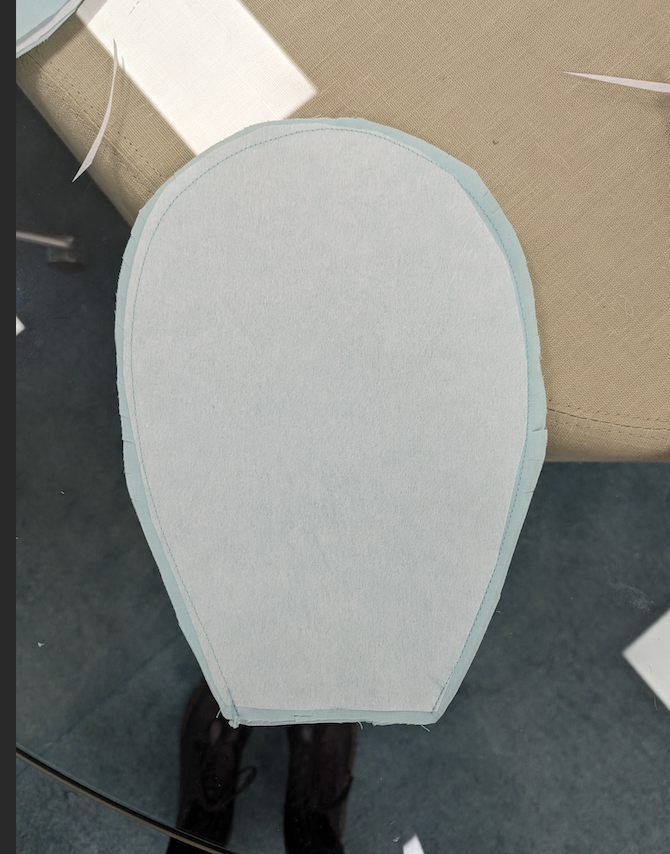
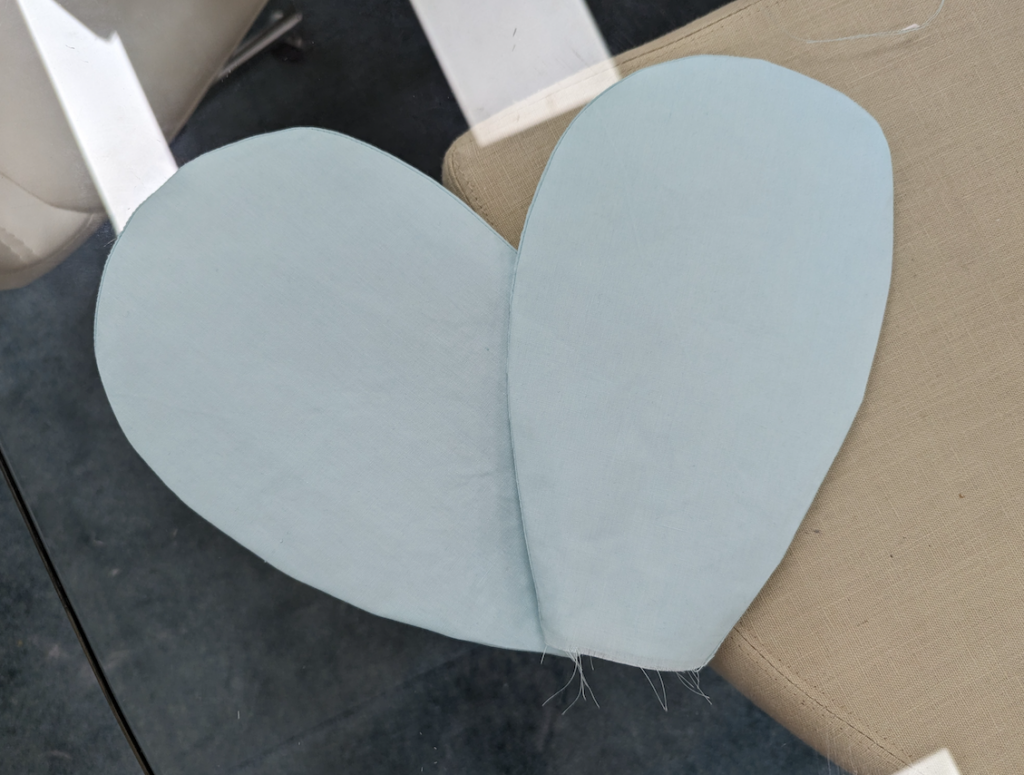
Step 9. Grab your Wing pattern pieces and iron on your interfacing to the wrong-side of the fabric. You should have 2 pieces of fabric that are interfaced, and 2 that are not.
Tip: cut your interfacing slightly smaller than your fabric so it doesn’t get caught in your seams.
Be careful when ironing on your interfacing; make sure to use a press cloth and to place the iron down without rubbing it in circles or lines. Always pick your iron up, place it, wait, and then pick it up again to place on a new spot. This stops the interfacing from shifting or wrinkling.

Step 10. Make sure to change your thread to blue before sewing. Sew your Wings together (one interfaced piece and one fabric) with right-sides together, making sure to leave the straight edge open. Then clip around the curves and turn right-side out. Top stitch the seams down.
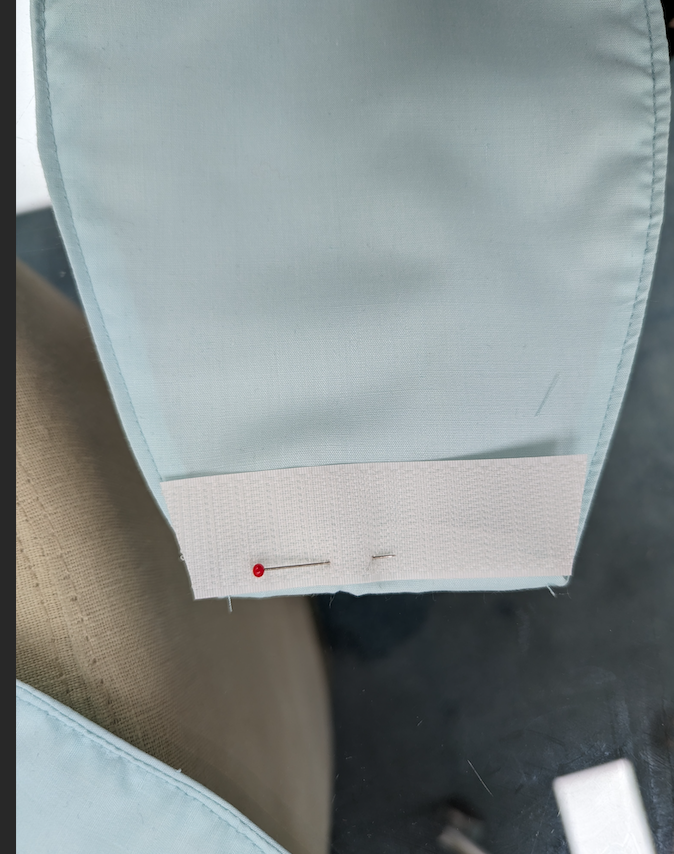
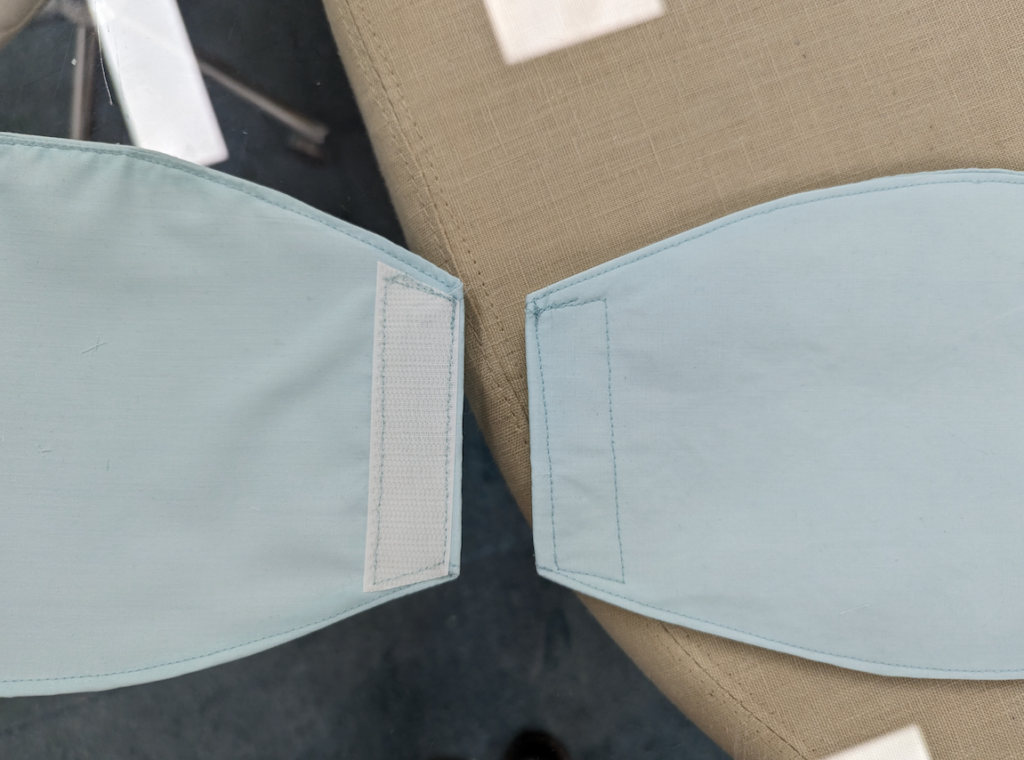
Step 11. Turn the raw edge of the Wing towards the underside of the fabric by a ½”. Measure and cut velcro (hook side/rough side) to fit along this hemline. Pin in place and sew so raw edges are hidden under the velcro. We suggest having the hook/rough velcro on the wings and eye/soft velcro on the sweater so when the sweater gets washed it will not snag the fabric.
Step 12. Mark the middle of the Back of the sweater centered between the two arm holes. This is where you will be attaching your eye/soft velcro AND where you will be placing your harness buttonhole if you are adding one here. Follow the same steps in step 8 for a buttonhole, but at this new location.
Measure to make sure your eye/soft velcro is the same length as the velcro on your Wings and cut. Change to black thread and sew velcro onto the Back of your sweater so there is a small gap between the two velcro strips large enough to accommodate a buttonhole.

Just like that, you’re all done! This incredibly simple dog sweater is perfect whether you’re looking to add fleece “spikes” on the back to make your dog a dinosaur, adding a bat wing detail for a spooky look or simply following along with our humble-bumblebee costume. If you used this tutorial make sure to tag us in your social media posts, we’d love to see your completed project! Let us know in the comments if there are some other dog ‘fits you’d like us to tackle.