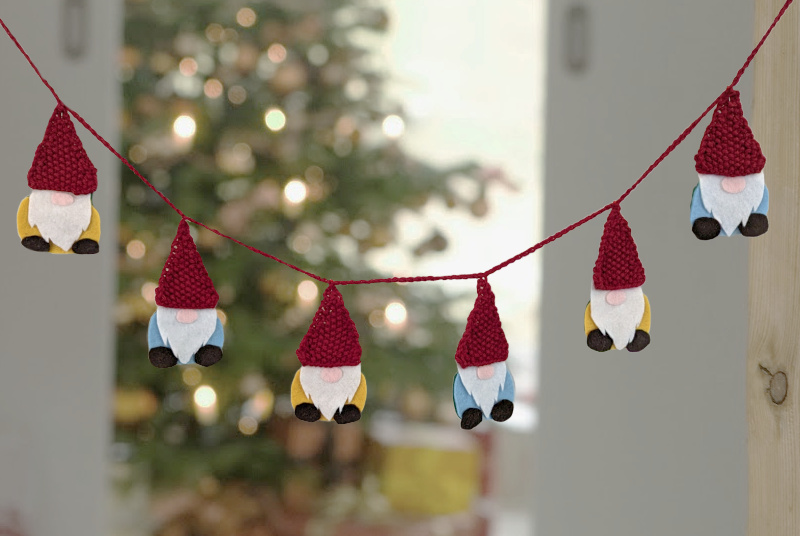
This is a quick and easy project using the traditional seed stitch. This stitch helps to keep your knitting nice and flat (no curling edges). These simple triangles can be used as gnome hats, trees, or other triangular objects. We’ve put together this fun and cozy winter tutorial on how to make a gnome garland! Follow along to learn how to knit the hats and grab the free pattern to cut out your gnome bodies!
We used a worsted weight yarn and 4.5mm needles to make the hats. For felt amounts and instructions on how to put the gnome bodies together, download the pattern above.
Instructions
Cast on 17 stitches.

Row 1 (right side): With yarn in front of the needle, slip the first stitch as if to purl. Bring yarn to the back of your work. Knit 1 and purl 1. Continue knit 1 and purl 1 pattern until you have one stitch remaining. Knit the last stitch.
Row 2 (wrong side): With yarn in front of the needle, slip the first stitch as if to purl. Bring yarn to the back of your work. Knit 1, purl 1. Continue knit 1 and purl 1 pattern until you have one stitch remaining. Knit the last stitch.
Row 3 (right side): With yarn in front of the needle, slip the first stitch as if to purl. Bring yarn to the back of your work. Slip the next two stitches as if to knit. Slide the left needle through both slipped stitches and knit them together. Purl the next stitch. Knit 1 and purl 1. Continue knit 1 and purl 1 pattern until 3 stitches remain. Knit 2 together. Knit the last stitch.
Row 4 (wrong side): With yarn in front of the needle, slip the first stitch as if to purl. Bring yarn to the back of your work. Knit 1 and purl 1. Continue the knit 1 and purl 1 pattern until one stitch remains. Knit the last stitch.
Rows 5, 7, 9, 11 (right side): same as row 3.
Rows 6, 8, 10, 12 (wrong side): same as row 4.
Row 13 (right side): With yarn in front of the needle, slip the first stitch as if to purl. Bring yarn to the back of your work. Slip the next two stitches as if to knit. Slide the left needle through both slipped stitches and knit them together. Purl the next stitch. Knit 2 together. Knit the last stitch.
Row 14 (wrong side): same as row 4.
Row 15 (right side): With yarn in front of the needle, slip the first stitch as if to purl. Bring yarn to the back of your work. Slip the next two stitches as if to knit. Slide the left needle through both slipped stitches and knit them together. Knit last stitch.
Row 16 (wrong side): With yarn in front of the needle, slip the first stitch as if to purl. Bring yarn to the back of your work. Knit 1. Knit last stitch.
Row 17 (right side): With yarn in front of the needle, slip the first stitch as if to purl. Bring yarn to the back of your work. Knit 2 together. Slip the first stitch over the ones you just knitted together.
Row 18 (wrong side): Knit 1.

Cut yarn and pull through the last stitch. Weave in ends and block.
Gnome hat done! We then did a simple knitted string to attach the hats to in order to weave them into 1 garland. Tell us what you’re going to make with your triangle crochet pattern, we love seeing all your work so if you use this pattern please tag us on Instagram or Facebook!


